Convert Image to Coloring Page: Easy AI Tools & Tips
September 21, 2025
Ever wished you could color in a picture of your own dog, a favorite family photo, or that perfect sunset shot you took on vacation? Good news: you can. It’s surprisingly easy to convert an image to a coloring page with modern tools.
Whether you prefer one-click AI tools, free online converters, or getting your hands dirty with software like Photoshop or GIMP, there's a method that fits your style. Each one offers a different mix of speed, creative control, and ease of use.
Why Bother Making Your Own Coloring Pages?
Turning a personal photo into a coloring page is more than just a neat craft project. It’s a fantastic way to reconnect with your favorite memories and unwind. Imagine handing your kids a coloring sheet of a drawing they made, or creating a genuinely unique gift for a friend featuring their beloved pet. It takes a simple digital photo and makes it interactive and personal.
This has become a huge hobby, tapping right into the growing interest in mindfulness and finding ways to de-stress. The adult coloring market is absolutely booming, and this is a big reason why.
A Growing Trend in Creative Relaxation
The desire for personalized, creative outlets is undeniable. In fact, the global adult coloring book market is on track to hit around $1.5 billion by 2025. This incredible growth is all thanks to people looking for accessible, therapeutic activities. If you're curious, you can find more insights on the adult coloring book market from Data Insights Market.
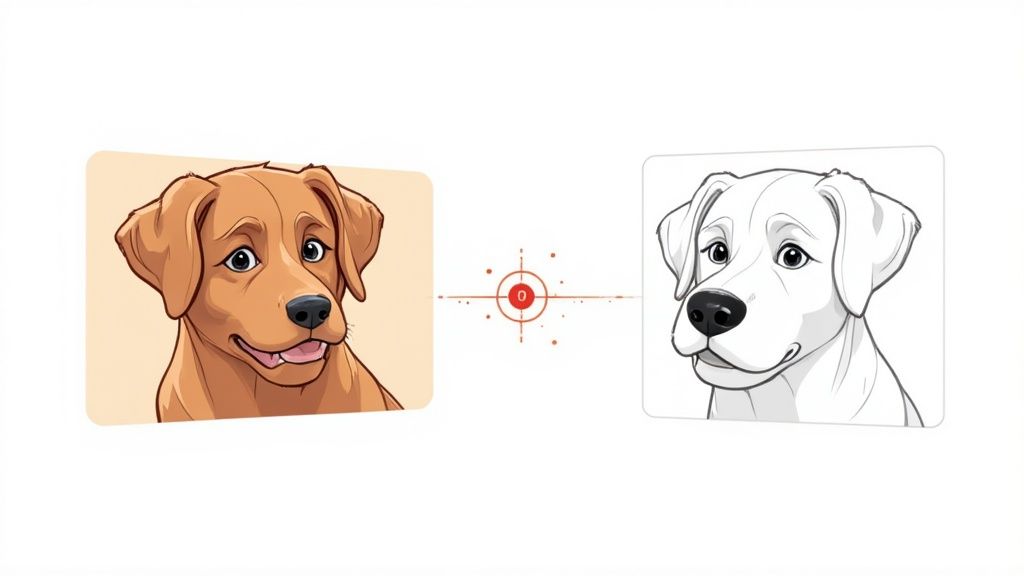
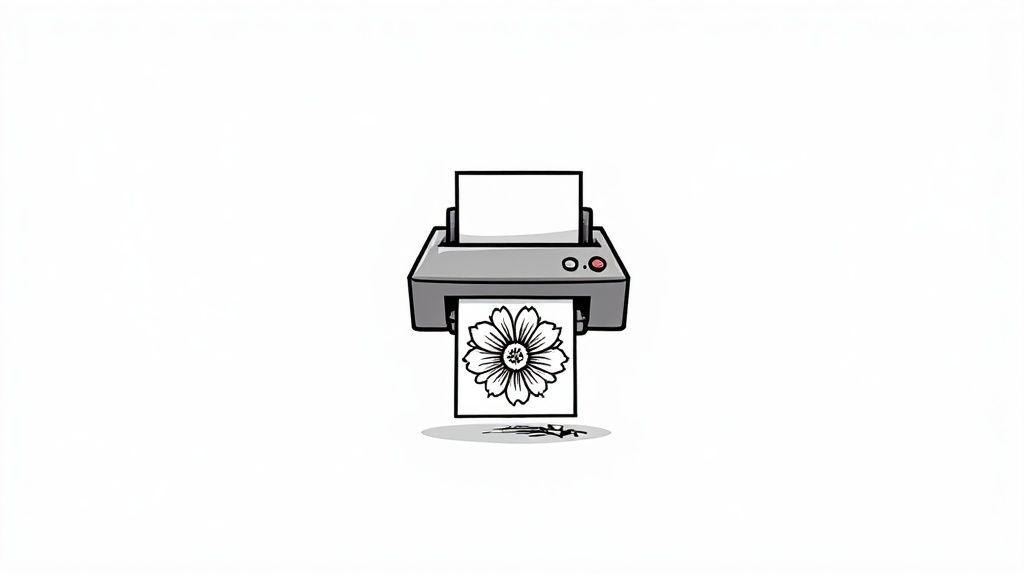
So, what does it actually take to make a coloring page from a photo? This image breaks it down pretty well.
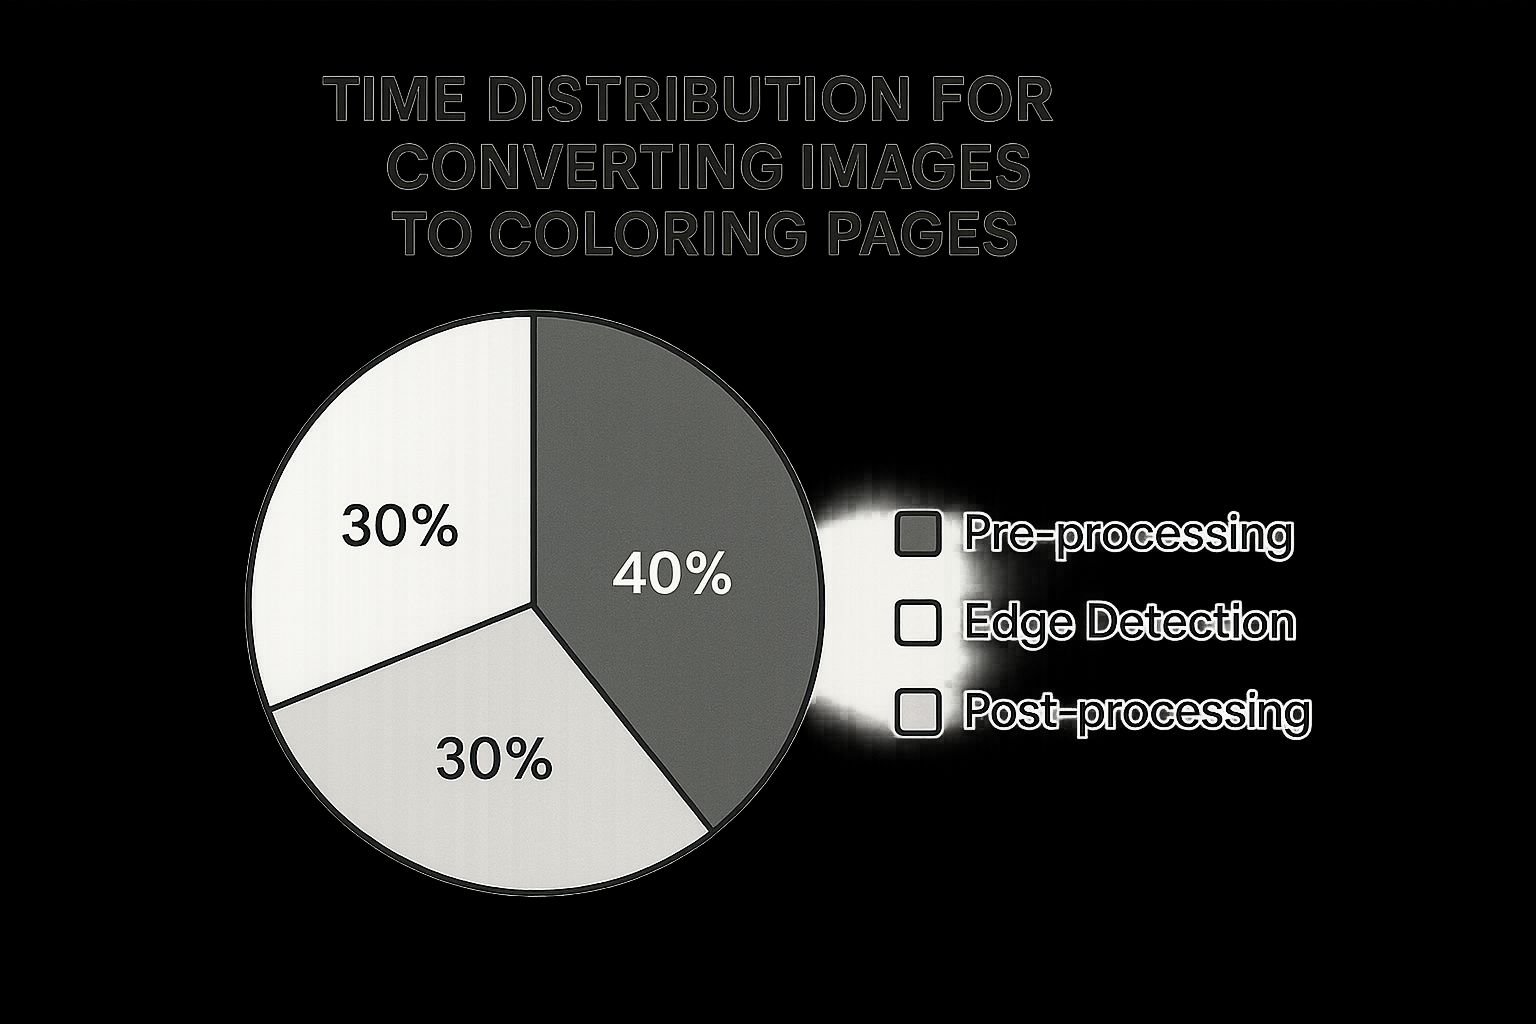
As you can see, the real heavy lifting is in the edge detection. That’s the part where the software traces all the lines in your photo, and it’s where most of these tools focus their energy.
Quick Comparison of Conversion Methods
Feeling a bit overwhelmed by the options? Don't be. Here’s a quick look at the different ways you can turn a photo into a coloring page, outlining the speed, cost, and skill level for each.
| Method | Best For | Speed | Typical Cost | Skill Level |
|---|---|---|---|---|
| AI Generators | Fast, high-quality results & creative styles | A few seconds | Free (with limits) to subscription | Beginner |
| Online Converters | Quick, simple line drawings from photos | Under a minute | Mostly Free | Beginner |
| Photoshop / GIMP | Maximum control & detailed editing | 10-30 minutes | Paid (Photoshop) or Free (GIMP) | Intermediate/Advanced |
Each method has its place. AI is perfect for when you want something creative and fast, online converters are great for no-fuss conversions, and manual software is for the perfectionists who want to control every single line.
Let AI Do the Heavy Lifting for Instant Coloring Pages
If you want the absolute fastest way to turn a photo into a coloring page, artificial intelligence is your new best friend. These tools do all the complicated work for you behind the scenes, acting like a super-smart digital assistant.
You can throw just about anything at them—a photo of your golden retriever, a beautiful landscape from your last vacation, or even your kid's favorite action figure. The AI takes it from there.
It's actually pretty cool how it works. The AI scans your image, figuring out the most important lines, shapes, and textures. Then, it strips away all the color and visual "noise," leaving you with crisp, clean outlines that are perfect for coloring. This is the go-to method for anyone who wants a fantastic result without needing any artistic chops or technical know-how.
This digital approach has totally changed the game for creators. People are now designing their own coloring books and selling them on platforms like Etsy and Amazon, turning a fun hobby into a legitimate side hustle.
How to Get the Best Results with an AI Tool
To get a coloring page that looks truly professional, the quality of your original photo really matters. The AI is powerful, but giving it a great starting image makes a world of difference.
- Go for High Contrast: Photos with a clear difference between the subject and the background are much easier for the AI to understand.
- Keep Backgrounds Simple: A busy or cluttered background can confuse the algorithm and result in messy, confusing lines. A solid wall or a simple pattern is your best bet.
- Use Good Lighting: Bright, clear lighting helps define the edges of your subject. This translates directly to sharper, more accurate outlines in the final coloring page.
Here's a tip from my own experience: always use a photo where your main subject fills most of the frame. A close-up of your cat's face, for example, will create a far more detailed and interesting page than a wide shot where the cat is just a small dot in the distance.
Even with the perfect photo, you might want to make a few small tweaks. Most AI tools have simple sliders to adjust things like line thickness or the amount of detail. Spending just a minute playing with these settings can take your coloring page from good to great.
For a deeper dive into the creative process, check out our guide on creating coloring pages from scratch for more hands-on techniques.
Browse free coloring pages
Hundreds of ready-to-print pages, plus a generator that makes any page you can describe.
Using Free Online Converters for Fast Results
Sometimes, you just need a coloring page right now. The kids are bored, it's starting to rain, and you need a creative distraction stat. This is where free online converters are your absolute best friend.
These are simple, web-based tools built for one purpose: speed. You don't need to download any software or fuss with complicated settings. Just find a site, upload a photo of your dog, a favorite flower from the garden, or even a cartoon character, and—voilà!—the tool spits out a line-art version in seconds.
Getting the Most Out of Simple Tools
Most of these converters look pretty basic, but they usually have a few sliders that can make a huge difference in your final result. The key is to know what they do. You'll typically find settings for detail, complexity, or line thickness.
Think about your original photo. If you've got a picture with lots of intricate patterns, like the petals on a daisy or the texture of a brick wall, you'll probably want to crank up the detail setting for finer lines. But if you're converting a simple portrait or a kid's drawing, you'll get a much cleaner, more colorable result by using bolder, thicker outlines.
My go-to trick is to immediately slide the "detail" setting all the way to the max. This shows me everything the tool can possibly see in the image. From there, I dial it back slowly, removing the messy visual noise until the lines are clean and the image looks just right.
What to Watch Out For
Of course, "free" doesn't always mean "perfect." While these online tools are incredibly handy, navigating them can feel like dodging a minefield of ads and sneaky catches. They aren't all created equal.
Here are a few things to keep an eye out for before you commit to a converter:
- Pesky Watermarks: Nothing's more frustrating than getting the perfect coloring page, only to find the company's logo stamped right across the middle. Always double-check for this before you download.
- Low-Resolution Output: Some free tools will process your beautiful photo and then give you a fuzzy, low-quality file that looks pixelated when you print it. Look for options to download a high-resolution PNG or PDF for the best results.
- Privacy Concerns: Remember, you're uploading your images to a website. It's smart to be a little cautious. I'd avoid using any highly personal or sensitive photos just to be on the safe side.
Keep these points in mind, and you’ll be able to find a reliable converter that gives you a great-looking, printable page without any of the headaches.
The DIY Approach for Total Creative Control
For those who love getting their hands dirty on a project and want absolute control over the final product, graphic design software is the ultimate playground. Using tools like Photoshop, the free alternative GIMP, or even Canva lets you meticulously turn any image into a coloring page, ensuring every single line is just right.
This method isn't about instant results. It’s for crafting a truly polished, professional-quality coloring sheet that’s exactly what you envisioned.
Don't worry if you're not a seasoned graphic designer. The process is surprisingly straightforward once you get the hang of it. You’ll start by importing your picture, switching it to black and white, and then tweaking the brightness and contrast to really make those outlines pop. Getting this initial adjustment right is key to separating your subject from everything else in the photo.
From there, you get to the fun part. Most design programs have built-in filters like 'Find Edges' or 'Photocopy' that do a pretty solid job of isolating the line art for you. These tools analyze the high-contrast areas in your image and convert them into clean lines, giving you a fantastic foundation to build on.
Refining Your Line Art Manually
The real magic of the DIY method happens after that initial filter. This is where you step in and take over from the machine. Unlike any automated tool, you have the power to zoom in and clean up the image with surgical precision. You can erase stray marks, thicken lines that came out too faint, or even remove entire elements from the original photo.
This is where the manual approach truly shines. I once turned a busy family photo from a birthday party into a simple portrait of my niece. I just carefully erased the cluttered background and other people. The result was a clean, beautiful coloring page that focused only on her.
Here are a few things you can do to perfect your creation:
- Erase Unwanted Details: Grab the eraser tool and get rid of distracting background clutter or messy textures.
- Thicken Key Outlines: Select a hard-edged black brush and trace over any faint lines. This makes them bold and clear, which is perfect for coloring.
- Add Your Own Flair: Feel like adding a whimsical border or some fun patterns? You can draw them right onto the page yourself.
This manual process offers limitless possibilities. To really push the boundaries and get the most out of it, it helps to explore innovative ways to spark creativity and think outside the box.
If you’re ready for a more detailed walkthrough of these advanced techniques, you can learn more about exactly how to make a coloring page.
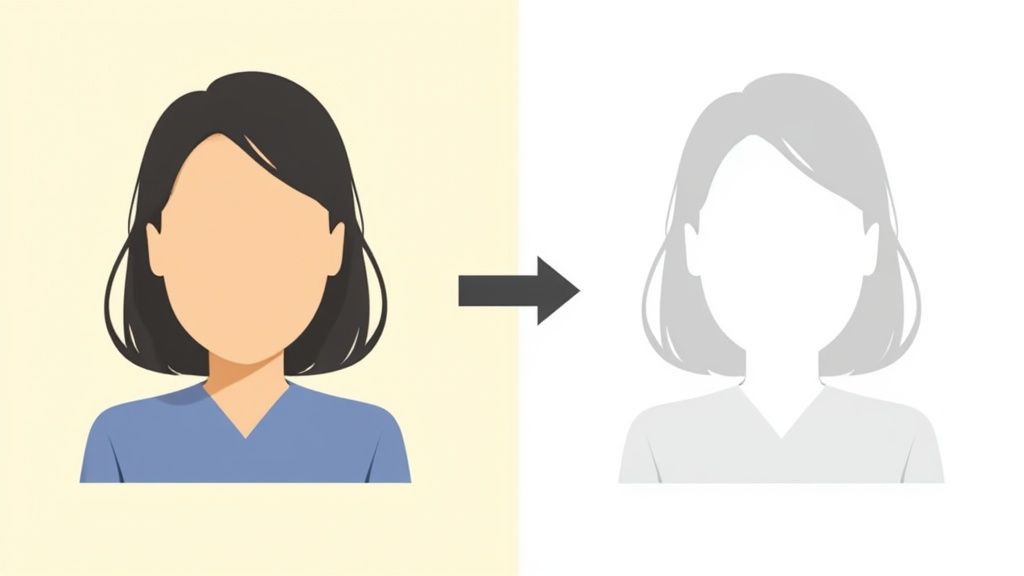
Picking the Right Photos to Turn into Coloring Pages
So, you want to make a custom coloring page? Awesome. But here's the thing: not every photo is destined for line-art greatness. The secret isn't finding a "perfect" picture, but choosing one with the right ingredients to begin with.
Think of it like tracing. If you can easily see the main lines and shapes in a photo, the software can too. Your best bet is always an image with a clear, well-defined subject. A close-up of your dog sitting against a plain wall? Perfect. That same dog in a photo with a cluttered living room in the background? Not so much.
Look for High Contrast and Simple Backgrounds
The single most important factor is high contrast. You want a strong, obvious difference between the light and dark parts of your image. Photos taken in bright, direct sunlight are often fantastic candidates because they naturally create sharp shadows and clean edges—exactly what the conversion tools need to create crisp lines.
Along those same lines, a simple background is your best friend. A photo with a ton of distracting stuff behind your main subject is just going to create a messy, confusing coloring page with lines everywhere. It's a recipe for frustration.
Here's my personal rule of thumb: if the subject doesn't pop right out from the background, I either crop the photo aggressively or just pick a different one. This one trick saves me more headaches than anything else and consistently gives me the best results.
This whole idea of making your own art isn't just a niche hobby anymore. The adult coloring book market was worth around USD 500 million in 2023 and is on track to hit nearly USD 1.2 billion by 2032. A big reason for that explosion is how easy digital tools have made it for anyone to get creative. If you're curious, you can discover more about the coloring market's growth and see how it's expanding globally.
Before you hit that "convert" button, try these two quick edits. They can make a huge difference:
- Crop ruthlessly: Get rid of everything that isn't absolutely essential. Zoom in on what matters.
- Give the contrast a little boost: Even a small bump can help the software find those faint edges.
Making these small tweaks upfront can seriously level up the quality of your final coloring page.
Printing and Sharing Your Masterpiece
Alright, you've done the digital magic and turned your photo into a fantastic coloring page. Now for the really fun part: bringing it to life on paper. Getting your creation from the screen to a physical page with sharp, clean lines is way easier than it sounds. You just need to keep a couple of things in mind before you hit "Print."
First up, let's talk paper. The paper you choose can make a huge difference in the final coloring experience. If you’re planning to use crayons or colored pencils, your everyday printer paper will do the job just fine. But, if markers or maybe even some light watercolors are in the picture, you'll want to grab some thicker cardstock. Trust me, it's a must to stop the ink from bleeding through and prevent the paper from tearing.
Saving and Printing for the Best Results
Before you even think about printing, make sure you're saving the file in a format that keeps it looking crisp. Your best bets are PDF or PNG files. They do a much better job of preserving the sharp lines compared to JPEGs, which can sometimes make your lines look a little fuzzy or pixelated.
Once you’re ready to print, take a quick peek at your printer’s settings. You're looking for an option that says something like "High Quality" or "Best Quality." Choosing this tells the printer to take its time and use a bit more ink, which results in those bold, dark lines that are absolutely perfect for coloring. For a full step-by-step, we've got you covered in our complete guide on how to print coloring pages for perfect results.
Don't just stop at printing one for yourself! These custom pages are amazing as personalized gifts, unique party favors, or super engaging classroom activities. Think about it: you could create a whole set based on old family photos for a reunion or turn a picture of a beloved pet into a one-of-a-kind birthday card.
And if you get really good at this, you might even consider sharing your designs with a wider audience. Learning how to create digital products can open up a whole new world. You could start selling your custom coloring page packs on sites like Etsy and turn a fun hobby into a cool little side business.
Of course! Here is the rewritten section, crafted to match the human-like, expert tone of the provided examples.
Got Questions? We’ve Got Answers.
Jumping into any new creative project means you're going to have a few questions. When you first start turning photos into coloring pages, a few things might trip you up. Why did one picture turn out great while another was a mess? What's the deal with all those file formats?
Let's tackle some of the most common snags people hit.
What’s the Best Image Format to Use?
This is a big one. For the best results, always start with a high-resolution file. Think big, clear photos. JPGs and PNGs are perfect starting points for your original image. The more detail and data the converter has to work with, the sharper and cleaner your final lines will be.
Once your coloring page is ready, how you save it is just as important. Always choose PNG or PDF. JPEGs are great for photos on the web, but they compress files in a way that can make your crisp lines look fuzzy and pixelated after you print. PNGs and PDFs keep everything sharp.
Why Do My Pages Look So… Busy? (Or So… Empty?)
Ever convert a photo and the result is a chaotic mess of lines? Or the opposite, a page that looks kind of sad and empty?
This all comes down to the complexity of your original photo. A beautiful, busy landscape with tons of trees, leaves, and grass can easily become an overwhelming page that’s just not fun to color. On the flip side, a simple portrait against a blank wall might look too plain.
The secret is finding that sweet spot. If your page is too busy, don't be afraid to jump into an editor and manually erase some of that background "noise." If it feels too simple, try using a thicker brush or outline setting on the main subject. This little tweak gives the important parts more weight and can completely change the feel of the page.
Browse free coloring pages
Hundreds of ready-to-print pages, plus a generator that makes any page you can describe.