Convert Image to Line Art Like a Pro
October 7, 2025

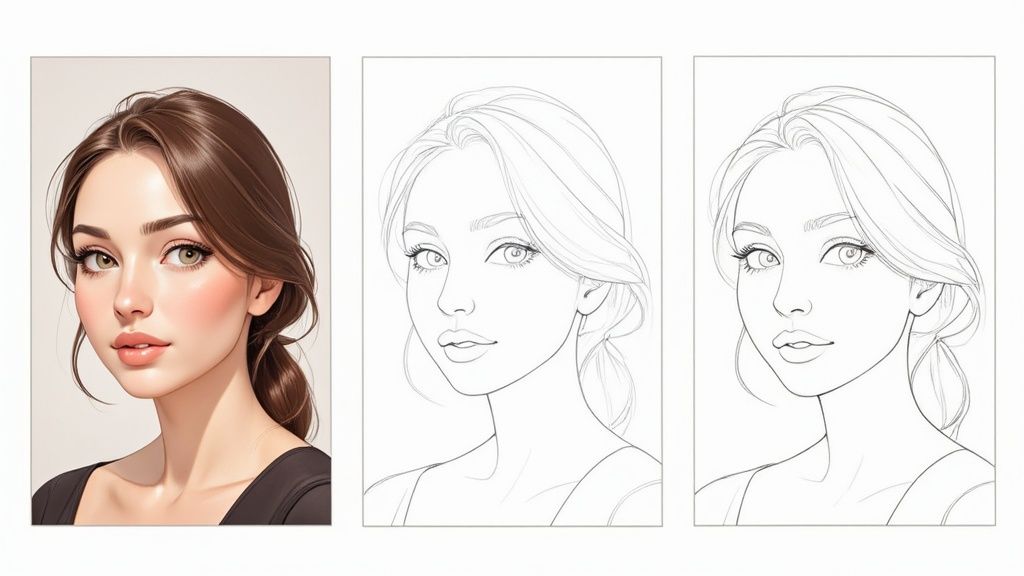
Turning a detailed photo into clean, simple line art is a fantastic way to breathe new life into your images for all sorts of creative projects. The idea is to strip away all the color and shading, leaving you with just the essential outlines of your subject. This can be as easy as a single click with an AI tool, or you can get your hands dirty with a more controlled, manual approach in design software.
Why Everyone Is Turning Photos Into Line Art
Ever see those cool, minimalist outlines people create from detailed photos and wonder how they do it? The trend to convert image to line art has absolutely exploded, and it’s easy to see why. It’s a creative bridge that lets anyone—no matter their artistic skill level—transform personal photos into unique, usable art.
And this is about more than just slapping on a neat filter. It's about unlocking a ton of practical and artistic potential you never knew your photos had.
New Creative Possibilities
People are converting photos into line art for a massive range of projects. Just imagine turning a favorite family vacation photo into a custom coloring page for your kids, or designing a simple, elegant logo from a much more complex illustration.
Artists and hobbyists use this trick all the time to plan out paintings or even design tattoos, letting them nail the perfect outline before committing to permanent ink. By stripping an image down to its core lines, you make it incredibly versatile.
The real magic here is how accessible this has become. Modern tools have totally democratized the process, letting people create professional-looking outlines without needing a graphic design degree. It’s all about creative freedom and turning old memories into something brand new.
The rise of instant, one-click line art conversion tools has completely changed the game. Content creators show that with free software or AI-based converters, over 80% of new users get impressive results on their very first try. This shift opens up creative avenues like stenciling and product design that were once much harder to break into. You can see some expert demonstrations on YouTube that show just how powerful these methods are.
Ultimately, simplifying an image into line art is a powerful form of visual communication, a concept we explore more deeply in our article on What is Visual Communication?. This technique boils down complex information, making it easier for anyone to understand and appreciate at a glance.
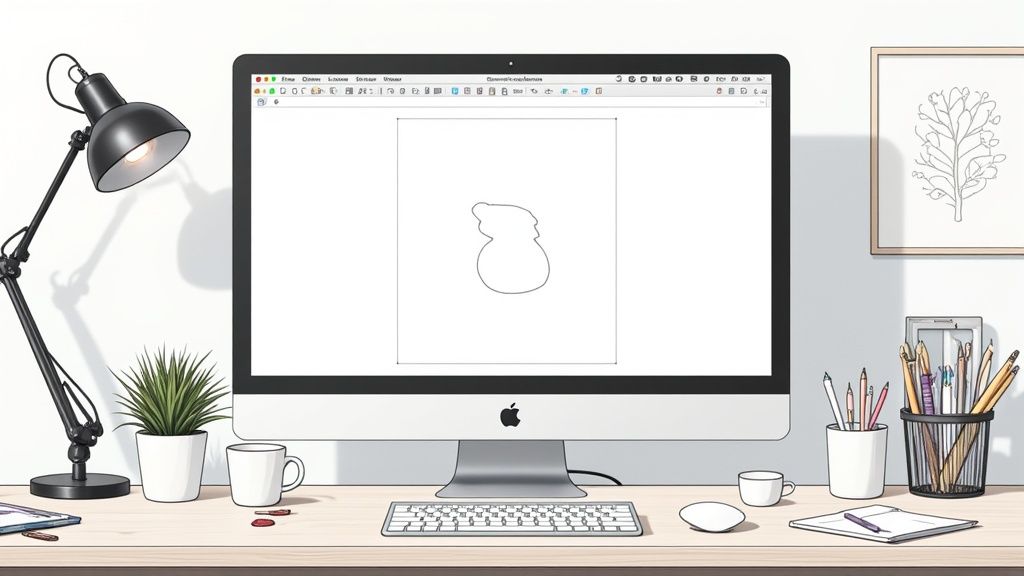
Ditch the Learning Curve: Let AI Handle the Conversion
Forget everything you know about spending hours in complex software, wrestling with layers and filters just to get a decent outline. The fastest, simplest way to convert an image to line art these days is with modern AI tools. They've completely changed the game, turning a fussy, technical process into something that takes literally seconds.
So, how does it work? When you upload a photo, the AI scans it and instantly identifies the most important edges, shapes, and contours. It's trained to "see" the subject the way an artist would, separating the main outlines from background clutter and subtle shading. The result is clean, crisp linework that pops right out.
Think about it: you could turn a favorite photo of your dog into a clean drawing for a custom mug, or a picture of your house into a sketch for a holiday card. That's how easy and practical this is. No more fiddling with sliders and adjustments.
The Magic of Speed and Simplicity
The biggest win here is sheer efficiency. A task that could easily eat up an hour of careful manual tracing in traditional software is now done in the time it takes to upload a file. This is an absolute game-changer for anyone who needs great results without the wait.
This kind of automation is causing a massive shift in how creatives work. In fact, the demand for AI-powered converters is skyrocketing, with platforms seeing huge interest in features like batch processing and automatic background removal. Slashing production time from hours to seconds is a pretty compelling reason for people to jump on board. For more on this, check out the trend analysis at coloringbook.ai.
From Photo to Artwork in One Click
Tools like ColorPageAI were built for exactly this. The whole process is incredibly straightforward.
- You start by grabbing any photo from your device and uploading it.
- The AI gets to work, processing the image and identifying all the key lines.
- In moments, your new line drawing is ready to download and use.
This no-fuss approach is perfect for projects like creating your own custom coloring books. If that sounds like fun, you can find more tips in our guide on creating coloring pages. And for those who want to dive deeper into how artificial intelligence is shaping visual arts, this article on AI image generation techniques is a great place to start.
Browse free coloring pages
Hundreds of ready-to-print pages, plus a generator that makes any page you can describe.
Want Full Control? Go Manual.
AI tools are fantastic for speed, but sometimes you just need to get your hands dirty. For those projects that demand a personal touch and absolute precision, diving into software like Photoshop or the free alternative GIMP is the only way to go. This is your chance to convert an image to line art with complete control over every single pixel, making sure the final result is exactly what you envisioned.
This hands-on approach is less about one-click magic and more about a thoughtful, creative workflow. You’re not just tracing; you’re making deliberate artistic choices.
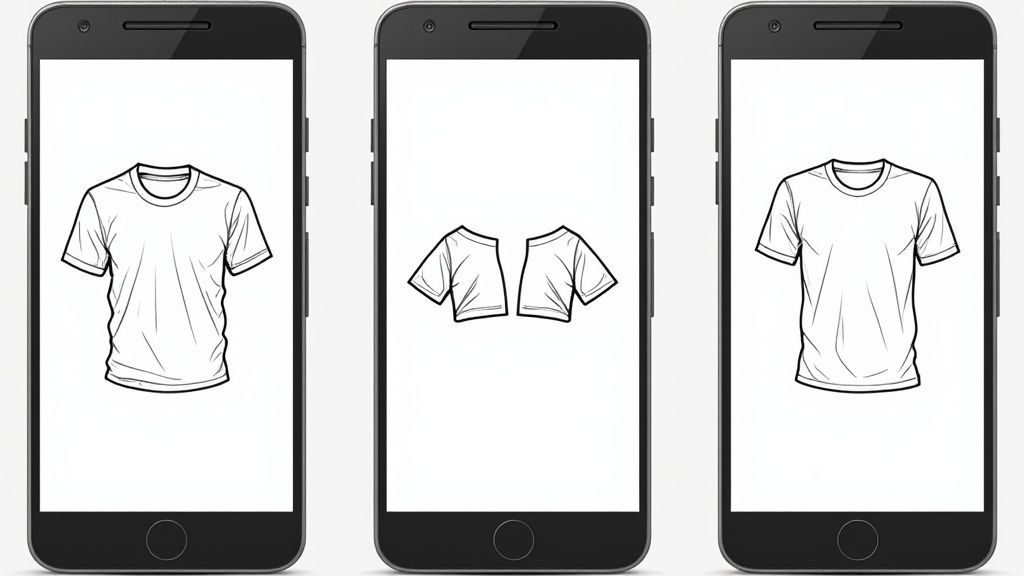
Imagine turning a photo of a dramatic landscape into a killer t-shirt design. When you do it manually, you can choose to really lean into the bold lines of the clouds while intentionally simplifying the busy details in the trees. It’s that level of artistic nuance where the manual method truly outshines any automated tool.
The real goal here is to isolate the most important lines of your subject. This usually means playing with a combination of desaturating the image, duplicating layers, and using specific filters and blend modes to make the edges you want to keep pop.
The Manual Workflow in Action
So, how does it actually work? The process usually kicks off with some basic image prep. First, you'll want to strip out the color by converting it to grayscale and then crank up the contrast to really define those edges.
A common technique I’ve used for years involves a few key moves:
- Duplicate Your Layer: First rule of Photoshop club: always work on a copy. It preserves your original image and gives you a safety net.
- Desaturate and Invert: Strip out all the color, then flip the tones (blacks become white, whites become black).
- Apply Filters & Blend Modes: This is where the magic happens. Use a blend mode like "Color Dodge" on your inverted layer to isolate the edges, making them appear as clean lines.
- Refine with Levels: Finally, use the Levels or Curves adjustment tools to crush the darks and blow out the lights, leaving you with nothing but crisp, clean linework.
This workflow has been around forever, just with different tools. I remember early Photoshop tutorials that used a funky three-step filter method involving Oil Paint and Poster Edges filters to get a similar effect. You can still find videos that showcase these classic techniques and see how artists have been tackling this for years.
Ultimately, getting good at this skill opens up a ton of creative possibilities. You can create incredibly detailed outlines that are perfect for complex projects. And if you're looking to apply these skills to something specific, check out our detailed guide on how to make coloring pages.
Choosing the Right Image for Perfect Line Art
Not all photos are created equal, especially when your goal is to convert an image to line art. The success of your final piece hangs heavily on the quality and type of picture you start with. Think of it as a pre-flight checklist to avoid muddy, frustrating results and get crisp lines every single time.
The single biggest factor? Contrast.
You’re looking for an image where the main subject pops right out from the background. A portrait against a plain, light-colored wall is a fantastic candidate. On the flip side, a photo of someone standing in a dense, shadowy forest is just asking for trouble. The software will have a tough time telling where your subject ends and the trees begin.
Key Ingredients for a Great Source Photo
Beyond just contrast, a few other elements make a world of difference in the final quality of your linework. Before you upload your next picture, give it a quick once-over for these features.
- Sharp Focus: Your subject needs to be crystal clear. Blurry or out-of-focus images will only give you soft, undefined lines that look more like smudges than art.
- Good Lighting: Strong, direct lighting is your best friend here. It creates the defined shadows and highlights that software needs to trace. Flat, overcast lighting? It tends to make everything blend together.
- Uncluttered Backgrounds: Simpler is always better. A busy background full of patterns or other objects just creates visual noise that confuses the conversion process.
Picking the right photo is half the battle. A clean, high-contrast image gives any tool, whether it’s an AI like ColorPageAI or manual software, the best possible chance to produce a stunning result.
This is especially true if you’re hoping to create some custom artwork for coloring. If that's your goal, our guide on how to turn photos into coloring pages has more specific tips for getting printable, high-quality outlines that are actually fun to color. By starting smart, you make sure the whole creative process is enjoyable from beginning to end.
AI Tools vs. Manual Software: Which is Right for You?
So, you want to convert an image to line art. Should you go with the instant results of an AI tool or roll up your sleeves with manual software like Photoshop? There's no single "best" answer—it all boils down to your project, your timeline, and how much control you really want.
This isn't about which method is better in a vacuum, but which one fits your specific need right now. A busy parent trying to whip up a coloring page from a family photo before the kids get restless will find an AI tool like ColorPageAI to be a lifesaver. On the other hand, a professional designer crafting a precise logo for a client needs the unmatched precision that only manual software can offer.
The Big Trade-Off: Speed vs. Customization
At its core, the choice is between time and control. AI tools are built for one thing: speed. They can give you a solid result in seconds. Manual software is a different beast entirely. It’s a deep dive where you meticulously control every line’s thickness, smoothness, and placement, but that level of detail demands patience and a bit of a learning curve.
This chart really puts the time investment into perspective.
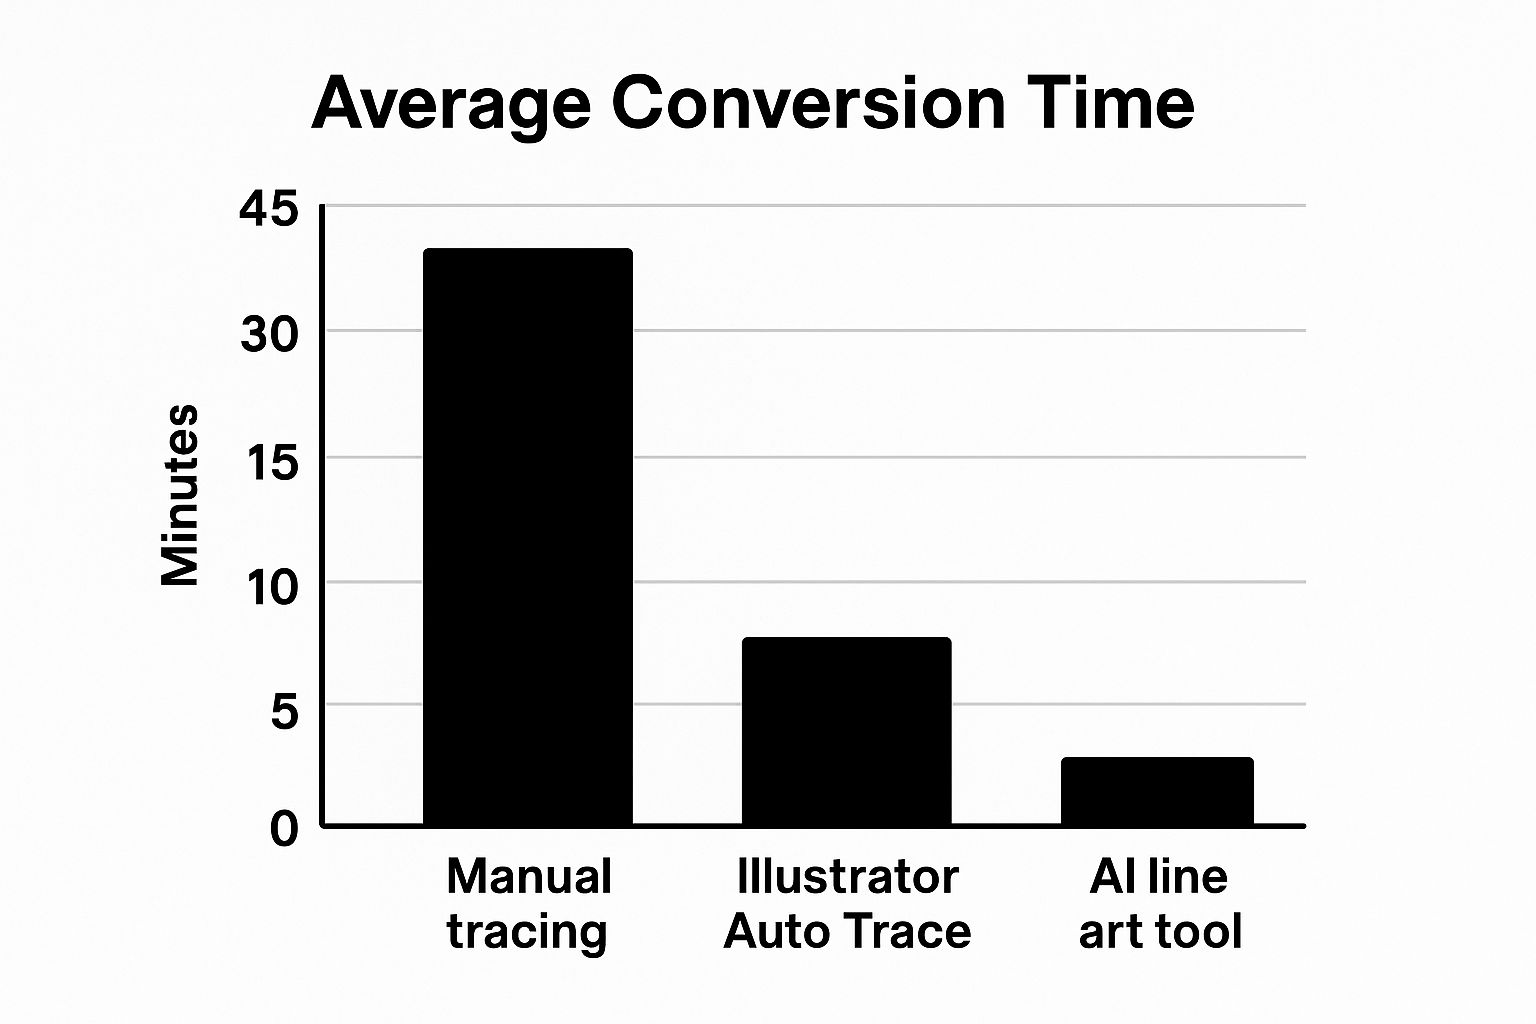
What could easily be a 45-minute task in Photoshop becomes just a couple of minutes with an AI converter. That’s a huge win for efficiency when you need it.
Your choice really comes down to the end goal. Do you need a quick, fun result for a personal project, or are you creating a piece of art where every single line is a deliberate, calculated choice?
To help you decide, let's break it down with a side-by-side comparison.
AI Converters vs Manual Software At a Glance
Sometimes, seeing the pros and cons laid out clearly is the best way to make a call. This table cuts right to the chase, comparing the key differences between a one-click AI solution and a traditional, hands-on software approach.
| Feature | AI Tools (e.g., ColorPageAI) | Manual Software (e.g., Photoshop) |
|---|---|---|
| Speed | Blazing fast, results in seconds or minutes. | Slow and methodical; can take hours for complex images. |
| Ease of Use | Incredibly simple. If you can click a button, you're set. | Steep learning curve. Requires technical skills and practice. |
| Control | You get what the AI gives you, with limited tweaks. | Total creative freedom over every single pixel and line. |
| Cost | Often free, freemium, or a low-cost subscription. | Can be a significant investment (e.g., Adobe's monthly fee). |
| Best For | Coloring pages, quick drafts, personal projects, fun. | Professional design work, detailed illustrations, logos. |
Ultimately, neither option makes the other obsolete. They're just different tools for different jobs.
In fact, one of the smartest workflows is to blend the two. You can use an AI tool to generate a fantastic starting point in seconds, then pull that image into your favorite software to add those final, perfect touches. It's the best of both worlds: the speed of automation paired with the nuance of human creativity.
Still Have Questions About Turning Images into Line Art?
You’re not alone. It’s one thing to hear about the process, but it’s another to get your hands dirty and start converting your own photos. If you’ve run into a few snags or are just curious about the nitty-gritty details, I’ve got you covered.
Let's walk through some of the most common questions that pop up when people start their journey to convert images to line art.
Thinking about the right file formats or wondering why your first attempt looks a little messy are totally normal parts of the learning curve. Getting these details right can make all the difference.
What’s the Best File Format for Line Art?
This one's a classic, and the answer really boils down to how you plan to use your finished piece. There's no single "best" format, but there are definitely right and wrong choices for specific jobs.
- PNG is your go-to for web and print. Its superpower is transparency. This means you can slap your line art onto any background without that ugly white box tagging along. It's perfect for things like logos, printable coloring pages, and website graphics.
- SVG is the professional's choice for editing. As a vector format (Scalable Vector Graphic), an SVG can be stretched to the size of a billboard without losing an ounce of quality. If you need to resize your art for different projects, this is the one you want.
A quick word of warning: stay away from JPEGs for line art. They're great for photos, but their compression method creates fuzzy, pixelated artifacts around crisp lines, completely undermining all your hard work.
How Can I Get Better Results?
So, you ran your photo through a converter and the result was... less than stellar. It happens, especially with busy or low-contrast images. Don't throw in the towel just yet; a few simple tweaks can dramatically improve your outcome.
The most critical step happens before you even click "convert." Pop your photo into a simple editor and bump up the contrast and brightness. This little bit of prep work helps the software see a clear difference between your subject and the background, leading to much cleaner lines.
And don't forget the power of a little post-conversion cleanup. Once you have your line art, open it in any image editor and use the eraser tool to zap any stray pixels or messy bits. This final touch is often what separates a decent result from a truly professional one.
Tired of all the manual tweaking? ColorPageAI leverages some seriously smart AI to turn your photos into pristine, ready-to-use outlines in just a few seconds. Give it a shot and create your first five coloring pages completely free at https://colorpage.ai.
Browse free coloring pages
Hundreds of ready-to-print pages, plus a generator that makes any page you can describe.