How to Remove Crayon From Clothes A Real-Life Guide
August 31, 2025
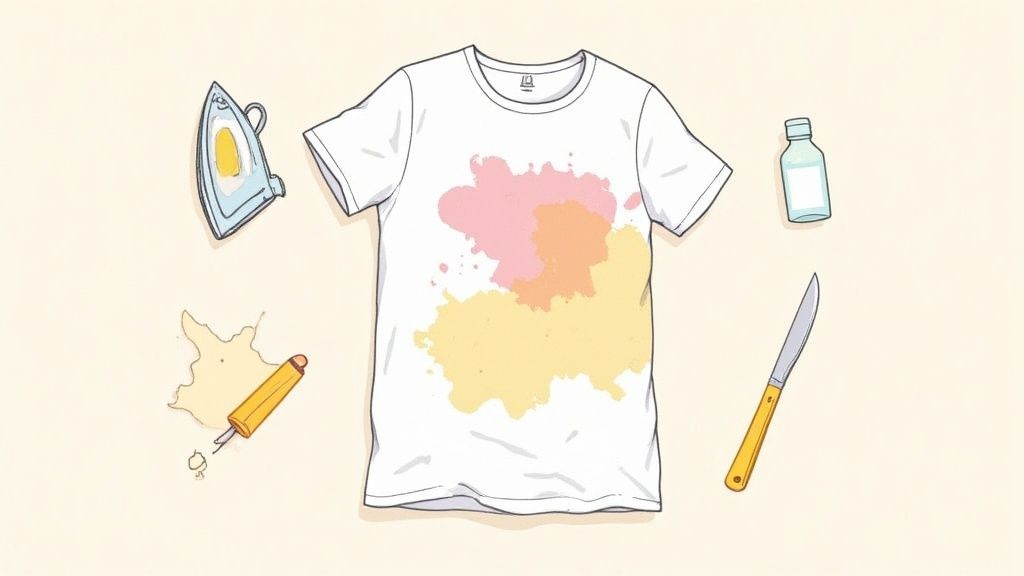
That gut-wrenching moment when you open the dryer and see a rainbow of melted crayon splattered across a fresh load of laundry? It’s practically a parenting rite of passage. But don't panic—it's completely fixable.
The secret to removing crayon from clothes isn’t some magical chemical. It's a simple strategy: scrape off the excess wax, use a bit of gentle heat to melt the rest into something absorbent, and then go after any color that’s left behind. Once you nail this process, you’ll know exactly how to save your laundry from even the most colorful disaster.
Why Crayon Stains Happen and How to Fix Them
Finding a rogue crayon in the laundry is an almost universal experience, and it’s no wonder. Crayons are everywhere. The global market for wax crayons was valued at a whopping $3.35 billion in 2023 and is still growing, which just goes to show how many of these little wax sticks are in homes and schools. Sooner or later, one is bound to end up in a pocket.
At its core, a crayon is just a stick of colored wax. When it tumbles through a hot wash cycle or, even worse, the dryer, that wax melts and seeps deep into the clothing fibers, locking the pigment in place. This is exactly why tossing it back in the wash won't work and usually just makes the smeary, waxy mess even bigger.
Understanding the Core Strategy
The key isn’t to scrub harder but to work smarter by reversing the process that created the stain in the first place. Your game plan will always come down to three fundamental steps.
Before we dive into the specific methods, it's helpful to understand the basic principles behind them. No matter which technique you use, you'll be following this general workflow.
Quick Guide to Crayon Stain Removal Principles
| Principle | Action | Why It Works |
|---|---|---|
| Mechanical Removal | Scrape off as much solid crayon as you can with a dull knife or spoon. | This is your first line of defense. It minimizes the amount of wax you have to melt and treat later, preventing the stain from spreading. |
| Heat Transfer | Use controlled heat (like an iron) to melt the wax into an absorbent material like paper towels. | This crucial step draws the melted wax and some of the pigment out of the fabric fibers instead of pushing it deeper. |
| Final Stain Treatment | Apply a stain remover or pre-treater to tackle any leftover color residue. | With the wax gone, all that’s left is a simple pigment stain, which standard laundry products can easily handle. |
This systematic approach is what makes the process so effective. You're isolating each component of the stain—the wax and the color—and dealing with them one at a time.
By tackling the wax first and the color second, you break the problem into two manageable parts. Trying to do both at once is what often leads to frustration and a permanently stained garment.
Of course, crayons aren't the only laundry headache. If you're pulling clothes out of the dryer only to have them stick together, learning how to remove static from clothes instantly can be a real game-changer. With the right know-how, nearly any laundry mishap has a simple solution.
Getting Your Crayon Removal Kit Together
Before you even think about tackling that bright, waxy masterpiece on your kid's favorite t-shirt, take a minute. The key to success is having your crayon-fighting tools ready and waiting.
Think of it like being a stain surgeon—you wouldn’t start an operation without your instruments laid out. Rushing in can turn a small spot into a giant, smeared mess. Trust me, gathering everything now saves you from a frantic mid-clean scramble later. You likely have all this stuff hiding in your kitchen and laundry room already.
The First-Response Tools
This first set of items does the heavy lifting, using a classic heat-transfer trick to pull the crayon out of the fabric.
- Something to Scrape With: A butter knife is my go-to, but the edge of an old credit card or even a plastic spoon works just as well. You need something dull to gently flick off the solid, raised bits of crayon. This step is huge—it gets rid of the bulk of the wax before you even bring heat into the equation.
- Something to Absorb the Wax: Grab some plain white paper towels or a brown paper bag. These are your magic sponges. When you apply heat, they’ll soak up the melted, colored wax. Just make sure they’re completely plain—no prints or logos! The iron's heat could transfer any ink right onto the clothing, and nobody wants to trade a crayon stain for a grocery store logo.
- An Iron: Your standard household iron is the perfect tool for the job. You’ll want it on a low, no-steam setting. Steam adds moisture, which can mess with how the paper absorbs the wax.
This trio—scraper, paper, and iron—is your secret weapon. The technique is surprisingly similar to how artists create batik fabric, where wax is melted away to reveal a design. We're just doing it in reverse to save a shirt!
The Final Clean-Up Crew
After you’ve lifted the wax, you'll probably see a faint, greasy color stain left behind. Don't panic. That's what this next round of supplies is for.
- Liquid Dish Soap or Stain Remover: A good grease-cutting dish soap is a powerhouse against the oily residue crayon leaves behind. Of course, your favorite laundry pre-treatment spray will also do the trick. This step is all about targeting the pigment that the wax carried into the fabric fibers.
- An Old Toothbrush (Optional but Recommended): For tougher fabrics like denim or canvas, a soft-bristled toothbrush is great for gently working the soap or stain remover deep into the material.
And hey, while we’re on the subject of crayons, let's remember they’re usually a source of joy, not laundry disasters. If you're looking for ways to keep that creative energy aimed at paper, checking out some fun fine motor skills activities can be a great way to channel their inner artist.
Now that your toolkit is assembled, you’re ready to get that crayon out for good.
Browse free coloring pages
Hundreds of ready-to-print pages, plus a generator that makes any page you can describe.
Using Heat to Lift Out Fresh Crayon Stains
So you’ve found a fresh crayon masterpiece on a shirt—the kind that hasn't been through a hot dryer cycle yet. Good news! The iron method is about to become your best friend.
This trick is surprisingly simple. It works by melting the wax that’s holding all that colorful pigment onto the fabric fibers, then pulling it right out. Think of it like reverse tie-dye, where instead of adding wax to create a design, we’re melting it away to save a favorite t-shirt.
First thing's first: you need to gently scrape off any solid, chunky bits of crayon. A dull butter knife or the edge of an old credit card is perfect for this. Don't skip this part—it gets rid of the bulk of the wax and stops the stain from spreading into an even bigger mess when you apply heat.
Creating the Stain Sandwich
Once you've scraped off the excess, it's time to make a "stain sandwich."
Lay the stained part of the garment flat on your ironing board. Slip a clean paper towel or a piece of a brown paper bag underneath the stain, then place another one on top. This little setup gives the melted wax a place to go on both sides of the fabric.
Next, set your iron to a low, no-steam setting. This is critical. High heat can permanently set the color, and steam adds moisture that gets in the way of the paper absorbing the wax.
Now, gently press the warm iron onto the top paper towel right over the stain. Don't rub or slide it around. Just apply light, steady pressure for a few seconds. You'll actually see the colored wax lift from the clothing and soak into the paper. Honestly, it's pretty satisfying to watch.
The key here is patience. Lift the iron and check the paper towel. You should see a waxy, colored spot. That’s a great sign—it means the process is working exactly like it should.
Repeat Until the Wax Is Gone
Time for a fresh start. Move the paper towels to a clean section or just grab new ones. You definitely don’t want to press the wax you just removed right back onto the fabric.
Keep repeating the process: gently press with the iron, lift, check the paper, and replace it.
You’ll do this little cycle until no more color or wax transfers onto a fresh paper towel. This whole step is just about getting the wax out. Once that’s gone, dealing with any faint color left behind is so much easier.
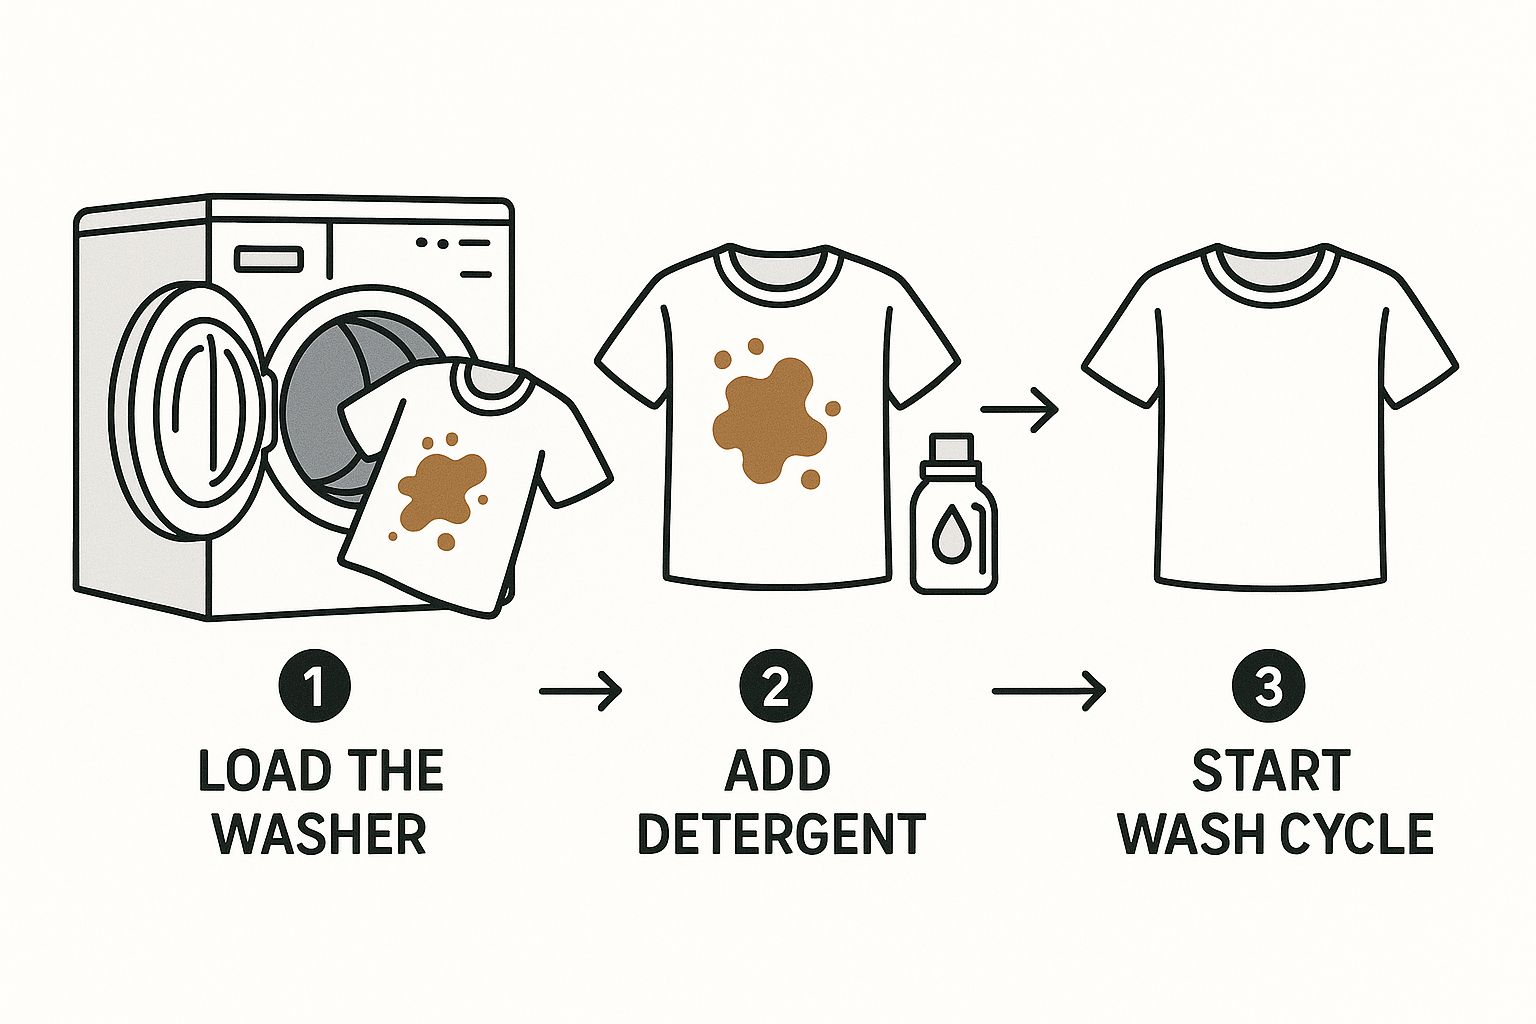
After you've lifted all the wax, just pre-treat any lingering color with your favorite stain remover and toss the garment in the wash. A good detergent in a regular cycle usually takes care of the rest.
Of course, crayons are supposed to be for fun, not for creating laundry emergencies. To keep that creative energy flowing in the right direction, check out these awesome creative activities for kids at home that are perfect for your little artists.
Rescuing Clothes from a Dryer Crayon Disaster
Finding a rogue crayon mark on a shirt is one thing. It’s a minor inconvenience. But opening the dryer to find an entire load of clothes has been tie-dyed with melted wax? That’s a whole new level of laundry nightmare.
Don't throw in the towel just yet. This colorful catastrophe is absolutely salvageable, but it requires a different game plan than a simple, fresh stain. When a crayon melts in the blistering heat of a dryer, the wax and pigment basically bake themselves into the fabric fibers, creating a stubborn, hardened mess.
Your mission, should you choose to accept it, is a two-part assault. First, you've got to deal with the greasy wax coating your clothes. Then, you need to decontaminate the inside of your dryer drum itself.
First, Decontaminate Your Dryer
Before you even think about the clothes, you have to clean your dryer. Seriously, don't skip this. If you do, any leftover wax residue will gleefully transfer onto the next load of laundry, and you’ll be stuck in a frustrating, waxy loop.
- Get Scrappy: Once the dryer drum is completely cool, use a plastic scraper or an old credit card to gently flake off any large, solid bits of crayon.
- Wipe It Down: Grab some old rags you don't care about. Spray one with a penetrating lubricant like WD-40 and wipe down the entire inside of the drum. The solvent is fantastic at breaking down that waxy, greasy film.
- Soap and Water Follow-Up: Use a different clean rag dampened with warm, soapy water to cut through the oily residue left behind. A good grease-fighting dish soap works wonders here.
- The Sacrificial Load: Finally, toss in a load of old towels or rags and run a full dry cycle on high heat. This clever trick will catch any last, sneaky traces of wax you might have missed.
With your dryer clean and no longer a threat to future laundry, it's time to turn your attention to the main event: the crayon-covered clothes.
Tackle the Heat-Set Crayon Stains
For these baked-in stains, the gentle iron-and-paper-towel method just isn't going to cut it. You need to bring out the big guns—something with more power to penetrate and dissolve that hardened wax.
Start by laying an affected garment flat. Apply a penetrating spray like WD-40 directly onto each and every crayon stain, making sure to saturate it completely. Let it sit for about 15-20 minutes. This gives the solvent time to really work its magic and break down the wax's bond with the fabric.
Pro Tip: If you're a little hesitant to use a lubricant spray on your clothes, a high-quality, grease-cutting dish soap is an excellent alternative. Squeeze it directly onto the stains and use an old toothbrush to gently scrub the soap into the fabric until it lathers up.
After the treatment has had time to sit, it’s time for a good wash. Place the treated clothes in the washing machine and run them on the hottest water setting the fabric can safely handle, along with your usual detergent. The hot water is absolutely crucial for melting and washing away the dissolved wax and pigment.
The global stain remover market, valued at around $24.98 billion in 2024, just goes to show how common these tough laundry battles are for households everywhere. This huge demand is what pushes companies to create powerful solutions for messes exactly like this one. You can dig into more insights about this growing market over on straitsresearch.com.
Once the wash cycle is complete, here comes the most important step of all: do not put the clothes back in the dryer. I repeat, do not put them in the dryer!
Air-dry them completely first. This allows you to inspect each item in bright light to make sure every last trace of the crayon stain is truly gone. If any color remains, just repeat the treatment process. Whatever you do, don't let that garment see any heat again until the stain is 100% gone.
Getting Creative With Natural Solutions
Found a crayon masterpiece on a brand-new shirt but don't have a specialized stain remover? Don't sweat it. Chances are, your kitchen pantry is already armed with some surprisingly effective weapons for this exact kind of laundry battle. These everyday items can be real lifesavers when you're in a pinch or just prefer a gentler approach.
Many parents are (rightfully) cautious about the chemicals they use on their kids' clothes. Exploring natural and eco-friendly cleaning solutions is a great move for a healthier home in general, but for crayon stains, you have some fantastic options right at your fingertips.
The Power of Distilled White Vinegar
Think of distilled white vinegar as your go-to for dissolving the waxy, greasy part of a crayon stain. Its mild acidity is perfect for breaking down that stubborn residue that lingers after you've scraped off the big chunks.
It couldn't be simpler to use. Just soak a clean cloth or a few cotton balls in the vinegar and dab it generously all over the stain. Let it sit and work its magic for about 15 minutes. Then, come back with a fresh cloth and blot the area to lift the loosened stain away. It's a perfect first move before you toss the item in the wash.
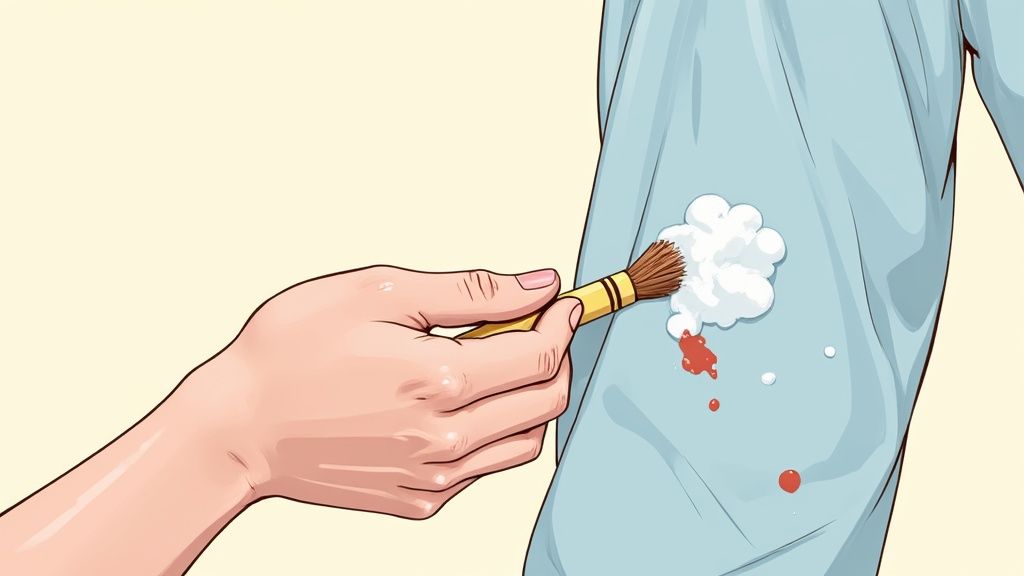
Whip Up a Baking Soda Paste
Need a little more scrubbing action without resorting to harsh abrasives? A simple paste of baking soda and water is a game-changer. This duo works wonders on those really ground-in crayon marks, especially on tougher fabrics like cotton or denim.
- Make the paste: Just mix about two parts baking soda with one part water until you get a thick, spreadable paste.
- Apply and scrub: Gently work the paste into the stain with your fingers or an old, soft toothbrush.
- Let it dry: Give the paste about 10-15 minutes to dry completely on the fabric.
- Brush and wash: Once it's dry and crusty, brush off all the excess paste and launder the garment like you normally would.
This method uses gentle friction to physically lift the crayon pigment out of the fabric's fibers.
As maddening as crayon stains are, they're often just a sign that your child is busy developing their creativity and motor skills. It’s a messy byproduct of important, hands-on learning. Understanding what are fine motor skills can sometimes help you find a little patience when you’re staring down a rainbow-streaked t-shirt.
An Unlikely Hero: The Ice Cube
Here’s a trick that flips the script entirely. Instead of melting the wax, you freeze it solid. This is an amazing technique for those thick, gloopy crayon smears or for delicate fabrics that you wouldn't dare take a hot iron to.
Just grab an ice cube and hold it directly on the crayon stain until the wax becomes hard and brittle. Once it's totally frozen, you can easily flake off the majority of the wax with a dull butter knife or the edge of a credit card. This gets the bulk of the problem out of the way, making any leftover color much easier to tackle with a standard pre-treater before washing.
Your Crayon Stain Removal Questions Answered
Even with the best game plan, things can get a little weird when you're trying to get crayon out of clothes. It’s totally normal to hit a snag when that waxy, colorful smudge doesn’t behave exactly as expected.
This is where we tackle those curveballs. Think of this as your rapid-response guide for tricky stain scenarios, making sure your laundry rescue mission ends in a win.
Can I Use a Hairdryer Instead of an Iron?
Yes, you absolutely can! A hairdryer on a warm setting is a fantastic backup, especially if you're dealing with delicate fabrics that just can't take the direct, high heat of an iron.
Just hold it a few inches away from the paper towel you've placed over the stain. The warm air will gently melt the wax, letting the paper soak it right up. It might take a little more patience than the iron method, but it gives you way more control over the heat—a much safer bet for those heat-sensitive materials.
What If a Faint Color Stain Remains?
It’s super common to see a faint, colorful ghost of the stain left behind even after you've lifted all the wax. Don't panic! This just means you're on the home stretch.
Now, you just treat that little shadow like any other dye stain.
- Grab your favorite laundry stain remover and apply it directly to the spot.
- For whites or anything you know is color-safe, a small amount of oxygen bleach can work miracles.
- Let the treatment sit for about 15-30 minutes before you toss the garment back in the wash for a normal cycle.
And remember the golden rule: always, always check that the stain is completely gone before putting the item in the dryer. If that crayon smudge happened on a white shirt, you might find some extra helpful tips on how to wash white clothes to get it back to its bright, crisp best.
The biggest mistake you can make is re-applying heat before the stain is 100% gone. Air drying first is your insurance policy—it prevents you from permanently setting a faint color stain that could have been easily washed out.
How Do I Handle Delicate Fabrics Like Wool or Silk?
When you're working with delicates, high heat is your enemy. The whole strategy here is to avoid it at all costs.
Start by popping the garment in the freezer for about an hour. This hardens the crayon wax, making it brittle. You can then gently scrape most of it off without yanking or damaging those delicate fibers.
If there's still a bit of wax left, use the hairdryer-and-paper-towel trick, but stick to a low, cool setting. For any leftover color, spot-treat with a cleaner made specifically for silk or wool. Just be sure to test it on a hidden spot first, like an inside seam, to make sure it won’t mess with the fabric's color or texture.
At ColorPageAI, we believe creativity should be fun, not a laundry day disaster. When your little artist is ready for their next masterpiece, let us generate a unique, personalized coloring page in seconds—from a breakdancing penguin to a unicorn teaching math. Spark their imagination without the waxy mess. Generate up to five free pages today at https://colorpage.ai.
Browse free coloring pages
Hundreds of ready-to-print pages, plus a generator that makes any page you can describe.