Make a Picture into a Coloring Page Your Easy Guide
September 25, 2025
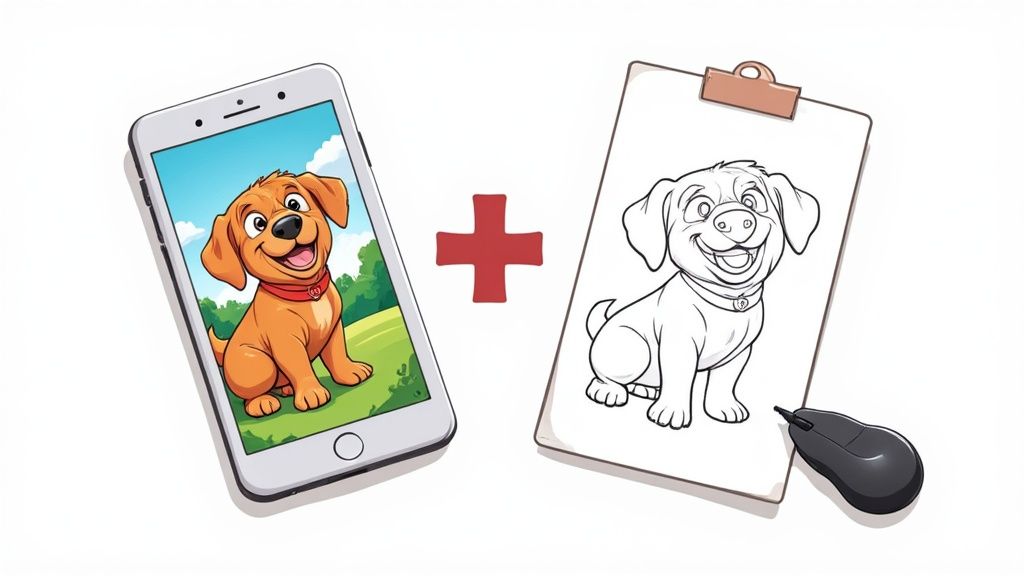
So, you want to turn a picture into a coloring page? It’s a lot easier than you might think. You basically have two choices: go the fast route with an automated AI tool that whips up an outline in seconds, or get your hands dirty with some basic editing software for total creative freedom.
Your Fast Track to Custom Coloring Pages
Turning a favorite photo into a coloring page is such a great way to make personalized gifts, fun stuff for the classroom, or just a chill project for an afternoon. It’s the perfect bridge between your digital memories and something real and creative you can hold in your hands.
And no, you don't need to be a graphic designer. The two main paths cater to whatever you're looking for—speed or control.
This guide will walk you through both. Whether you're a parent in a hurry looking for a quick activity or someone who loves to tinker with the details, you'll find a method that works for you. This whole idea is part of a bigger trend toward personalized creative projects. In fact, the adult coloring book industry is absolutely booming and is expected to hit a market value of around $1.5 billion in 2025. It just goes to show how much people are looking for mindful, stress-busting things to do.
The Core Idea: From Photo to Outline
At its heart, converting a picture is all about stripping away the color and boiling down all the complex details into clean, simple lines. You're essentially translating a rich visual story into a black-and-white framework, just waiting for someone to bring it back to life with their own colors.
This image really captures that fundamental shift from a full-color photo to an inviting, ready-to-color page.
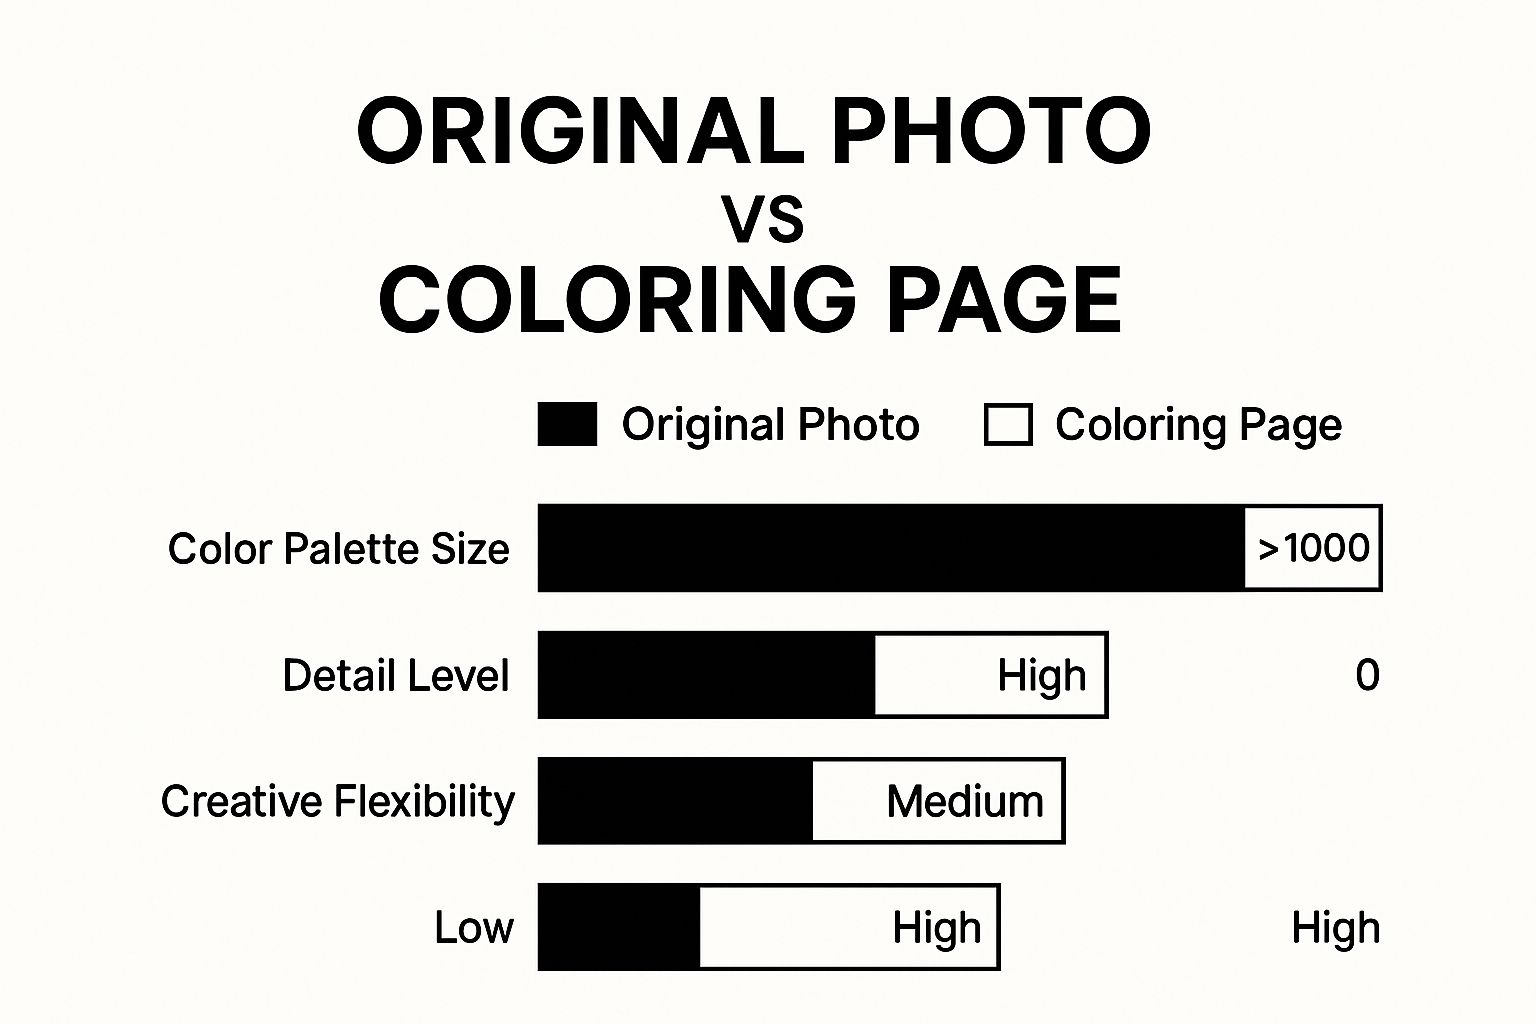
As you can see, the process gets rid of the color palette completely but cranks up the creative flexibility, letting you put your own spin on the image.
The real magic happens when you realize any photo can be a starting point. A snapshot of your pet, a favorite vacation spot, or even a silly selfie can become a one-of-a-kind piece of art. The key is choosing an image with clear subjects and good contrast.
If you're excited to dive deeper and learn how to make truly unique designs, our guide on custom coloring pages has even more tips and inspiration. Now that you've got the basics down, you're ready to pick a path and start creating.
Picking the Perfect Photo for Your Project
The secret to a fantastic coloring page? It all starts before you even touch any software or AI tools. It begins with the photo you choose.
Think of it this way: a blurry, low-contrast snapshot is almost guaranteed to give you a muddy, frustrating outline. But a great photo? That makes the whole process a breeze and the final result something you'll actually want to color.
What to Look For in a Source Photo
The best images for this kind of project usually have a few things in common. First off, you need a clear, defined subject. A sharp portrait of your dog sitting in the grass is going to work a million times better than a wide shot of a crowded park where your dog is just a tiny detail. Let the main subject be the star of the show.
Next, hunt for photos with good, even lighting. Deep, dark shadows and super bright, blown-out highlights will just confuse the conversion tools. You'll end up with big black splotches where there should be detail, or you'll lose important lines altogether. Even lighting gives the software clean information to work with.
When you're turning a picture into a coloring page, simplicity is your best friend. Photos with one main subject and a simple, clean background almost always produce the most satisfying and fun-to-color results.
Common Photo Pitfalls to Avoid
Try to steer clear of images that are just too "busy." A background packed with trees, complex patterns, or a ton of different textures can totally overwhelm the main subject. The result is often a chaotic page that’s more of a headache than a relaxing activity.
Also, be on high alert for low-resolution photos. If the image looks pixelated or fuzzy when you zoom in, the lines of your coloring page will end up looking soft and undefined. It's a simple rule: always start with the highest quality version of the photo you can get your hands on.
For a deeper dive, our guide on creating custom art from photos has some great extra tips. It gets more into the weeds on things like composition and lighting, which are crucial for any project that starts with a photograph.
Want to Create a Coloring Page in Seconds? Try AI.
If you’re ready for what feels like a magic trick, the AI method is your express lane to a finished coloring page. This approach is perfect for anyone who wants fantastic results in just a few minutes, making it a go-to for busy parents, teachers, or anyone needing a quick creative win without a steep learning curve.
The process is incredibly straightforward. Most online AI tools operate on a simple principle: you upload your photo, and the algorithm does the heavy lifting of tracing the key lines and stripping away the color. Seriously, it's designed to be so user-friendly you don't need any technical skills at all to get started.
Your First AI-Generated Coloring Page
Let's walk through a typical workflow. Most platforms will greet you with a big, obvious "Upload Image" button. Once your photo is loaded, you'll usually see just a few simple settings to play with.
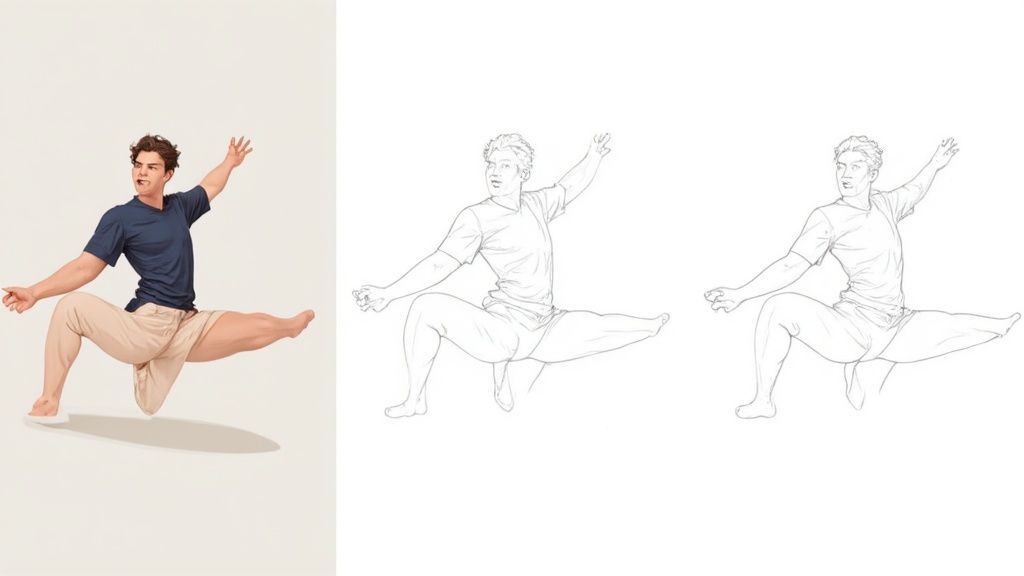
Here’s an example of what you might see. Notice the slider control? That’s for adjusting how complex you want the final outline to be.
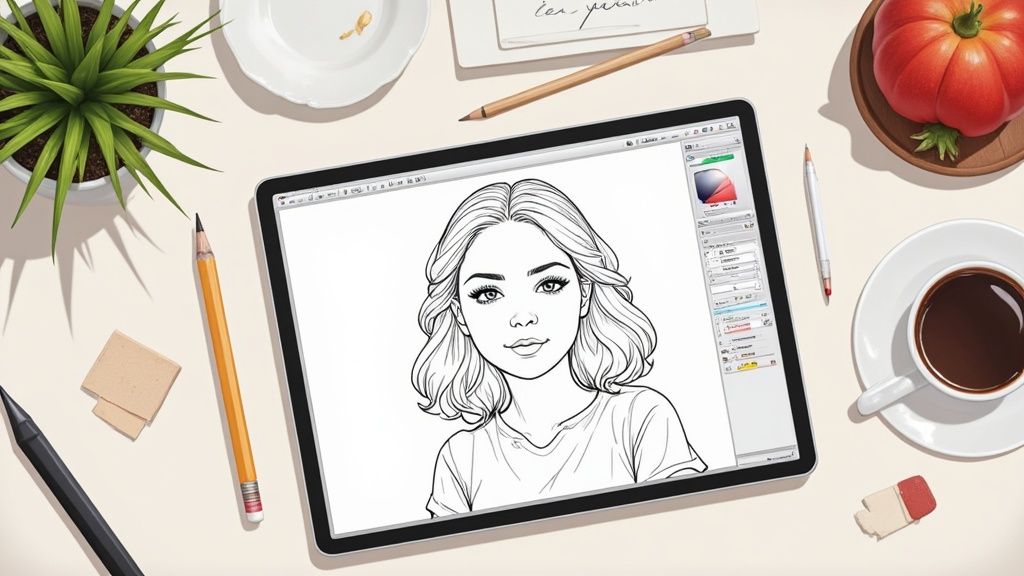
This kind of control lets you decide just how detailed you want the final page. You can go for a simple, chunky sketch or a much more intricate design. After you generate the image, it’s just a matter of downloading and printing. Easy as that.
Pro Tips for Getting Great Results
While the process is mostly automated, a little bit of prep work on your end goes a long way. I’ve found that cropping the image to focus tightly on the main subject before uploading can dramatically improve the final outline. This gets rid of distracting background junk that might confuse the AI.
Also, don't be afraid to experiment with different "styles" or "detail levels" if the tool offers them. Some AI generators let you choose between modes like "cartoon," "sketch," or "detailed," and each one produces a unique vibe. Playing around with these options is the real key to finding the perfect look for your project.
If you want to get really nerdy about guiding AI, learning about the top use cases of prompt engineering can give you some cool ideas for more advanced tools where you type in descriptions.
My biggest tip: The best results almost always come from photos with a single, clear subject and good lighting. Simple inputs lead to clean, easy-to-color outputs.
For those who want to dive deeper into this method, check out our detailed guide on how to turn photos into coloring pages for free. It covers even more tips and tool recommendations and is hands-down the easiest way to get started.
Browse free coloring pages
Hundreds of ready-to-print pages, plus a generator that makes any page you can describe.
Getting Hands-On with Editing Software
If you're the kind of person who enjoys the creative process and wants total control over the final product, then doing it by hand is incredibly satisfying. This approach lets you make a picture into a coloring page that’s truly your own. We’ll be using common photo editing software like GIMP, Photopea, or Photoshop without getting lost in a bunch of technical jargon.
Let’s turn what seems like a complicated task into a few simple, straightforward steps. The idea isn't just to follow a recipe, but to understand why each step is important. That way, you can fine-tune your creation until it's just right.
The Foundation: Grayscale and Contrast
First things first: get rid of the color. When you convert your image to grayscale, it instantly forces you to see the picture differently. Instead of being distracted by hues, you can focus on the underlying structure—the lines, shapes, and shadows that will become your coloring page. Think of it as preparing your canvas.
Once your image is in black and white, the next job is to make those edges really pop. This is where you’ll start playing with the brightness and contrast sliders. Gently bumping up the contrast helps to separate the dark lines from the lighter parts of the image, which makes them way easier for the software to detect later on.
The key is to be subtle. If you push the contrast too high, you’ll blow out all the delicate details. Just nudge it enough so the important lines stand out clearly from everything else.
This screenshot from GIMP shows a pretty typical workspace where you’d find all the tools you need for this.
As you can see, everything is right there—layers, tools, and color adjustments. Those are the core components you'll be using for this whole process.
Pulling Out the Perfect Lines
Now for the fun part: isolating the outlines. Every program has slightly different tools for this, but the end goal is always the same. You're looking for a filter or an adjustment that can turn your grayscale image into a crisp, two-tone masterpiece of black lines on a white background.
Here are a few of the most common tools that get the job done:
- Threshold Adjustment: This is usually the most direct route. It basically forces every single pixel in your image to become either pure black or pure white, getting rid of any murky gray areas. A simple slider lets you control how much detail makes the cut.
- Find Edges Filter: Some programs have a filter designed specifically for this. After you run it, you'll probably need to invert the colors to get those classic black lines on a white background.
- Photocopy Filter: You can often find this in a "Filter Gallery." It does exactly what it sounds like—mimics the look of a photocopy, simplifying the image down to just dark and light areas.
This manual method gives you the ultimate power to tweak and perfect your page. You can grab an eraser tool to clean up any random specks or use a brush to beef up faint lines that didn't quite come through. It’s this hands-on tinkering that lets you create a polished, professional-looking coloring page that’s exactly what you had in mind.
From Digital File to Finished Page
Alright, you've done the hard part. You wrestled your photo into a beautiful, ready-to-color digital file. Now for the final, satisfying step: bringing that creation to life on paper. Don't rush this part—a good print is what makes your custom page feel special.

The paper you pick really matters. Standard printer paper works in a pinch, of course, but if you want to elevate the experience, grab something a bit heavier. A simple cardstock prevents markers from bleeding through and can even handle a light touch with watercolors.
Getting the Print Settings Just Right
Before you hit that print button, pause and dive into your printer settings for a second. You'll want to crank up the quality to the highest setting available. This ensures your lines are as sharp as possible.
Also, look for the option to print in pure black and white. This is different from grayscale and will give you those bold, crisp outlines that are perfect for coloring.
Here's a pro tip I've learned from printing hundreds of these: save your final file as a PDF. JPEGs can sometimes get a little fuzzy or pixelated, but PDFs are brilliant at keeping those clean lines perfectly sharp from screen to paper.
If you want to go even deeper, our complete guide to printing coloring pages is packed with more tips for getting flawless results.
And remember, don't just think of it as a single sheet of paper. Your custom page can be so much more! Turn it into a one-of-a-kind birthday card, a unique party favor, or a thoughtful, handmade gift that someone will treasure.
A Few Common Questions When Making Coloring Pages
It's totally normal to hit a few snags when you first start turning pictures into coloring pages. Let's walk through some of the most common questions so you can sidestep those little frustrations and get right to the fun part.
A big one I see all the time is blurry or soft lines on the final print. This almost always comes down to one thing: the resolution of your original photo. If your source image is small or low-quality, the lines are never going to be sharp. Always, always start with the highest-resolution version of the picture you can find.
What Kinds of Photos Work Best (and What About Copyright)?
It’s tempting to just grab a cool picture from the internet, but you have to be careful about copyright. Snagging a random photo from a web search is a no-go if you plan to share or sell your coloring pages. Stick to your own personal photos or use images from sites that give you explicit permission, like stock photo websites with clear licensing.
So, what photos make the best coloring pages? From my experience, these are gold:
- Pet Portraits: Animals are just fantastic subjects. All that fur, those whiskers, and expressive eyes translate beautifully into interesting lines.
- Simple Landscapes: Think a lone tree on a hill or a single charming house. These work much better than a visually chaotic, dense forest scene.
- Clear Portraits: Photos of people can be a bit of a gamble, as some tools can distort faces. But a simple, well-lit portrait has a much better shot at turning out great.
The most important thing to remember is that simplicity is your best friend. A single, clear subject against a clean background will almost always give you a better coloring page than a busy, cluttered photo.
And if your lines are coming out way too thick or disappearing entirely? Go back and check the tool's settings. Whether you're using an AI generator with a "detail" slider or a manual program with a "threshold" adjustment, a tiny tweak there can completely transform your final outline.
Ready to skip the trial and error and just start creating? ColorPageAI uses smart tech to turn your ideas into beautiful, print-ready coloring sheets in seconds. You can create up to five for free today and see for yourself.
Browse free coloring pages
Hundreds of ready-to-print pages, plus a generator that makes any page you can describe.