Turn Picture into Coloring Page Fast & Free | Easy AI Tools
August 2, 2025
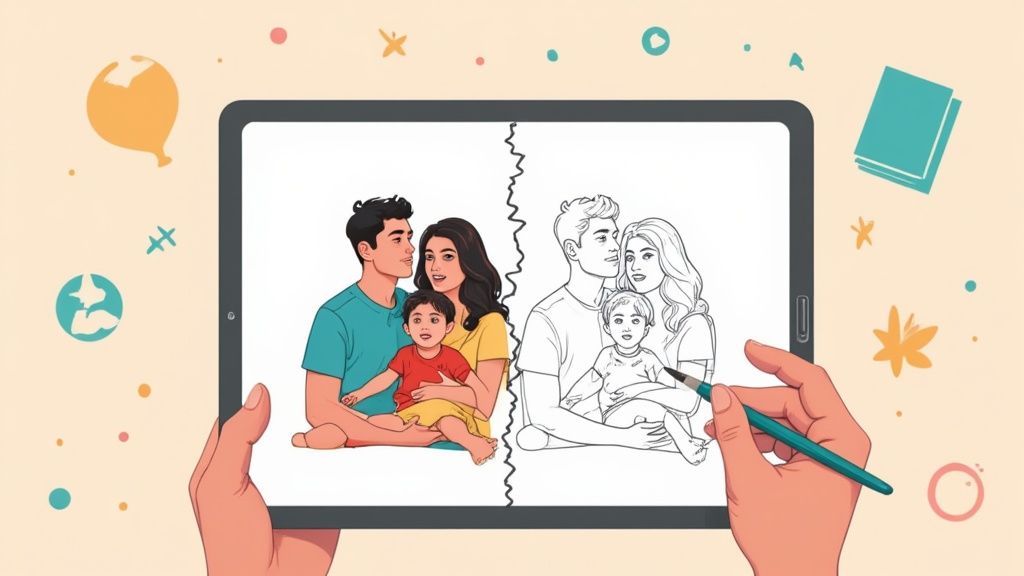
So, you want to turn a picture into a coloring page? The easiest and fastest way is with a free AI tool like ColorPageAI. It can take any photo you have and instantly whip up a printable piece of line art. The whole thing takes just a few seconds, and you don't need any artistic skills or fancy, complicated software.
Your Instant Guide to Custom Coloring Pages
It’s pretty amazing to think you can take a favorite memory—that candid family photo from the park or a gorgeous vacation sunset—and transform it into a one-of-a-kind coloring activity. Forget about the old days of spending hours tracing lines in frustrating programs. Modern AI generators have made this a simple, click-and-create project that anyone can do.
The real beauty here is how accessible it all is. You can create something fun and personal for your kids, a relaxing mindfulness activity for yourself, or even a thoughtful, custom gift for a friend. This guide will walk you through everything, but let's start with a quick comparison to help you find the right tool for the job.
Comparing Top AI Coloring Page Generators
When you decide to turn a picture into a coloring page, you'll quickly find a few different options out there. While most of them work in a similar way, a few key differences can really impact your final result.
Here’s a quick look at the features that matter and how ColorPageAI stacks up against other popular tools. This should give you a good idea of what to look for.
| Feature | ColorPageAI | Other Popular Tools |
|---|---|---|
| Customization Level | High (Adjust line thickness, detail) | Basic to Moderate (Often one-size-fits-all) |
| Processing Speed | Near-instant results in seconds | Can vary; some take longer to process |
| Ease of Use | Extremely simple, one-click process | May require multiple steps or adjustments |
| Cost | Free to start with generous credits | Often free with ads or limited features |
As you can see, the ability to fine-tune the output without a complex interface is a huge plus, and that's an area where many tools fall short.
Why AI Is the Best Method
Not too long ago, making a coloring page from a photo meant you needed some serious graphic design skills and a subscription to software like Photoshop. The process involved painstakingly tracing outlines by hand, tweaking contrast levels, and cleaning up the image. It was a chore, to say the least.
Now, AI does all the heavy lifting. It intelligently analyzes your photo, identifies the key subjects and their outlines, and spits out clean, colorable lines automatically. This shift has blown the doors wide open for creative projects, making them possible for everyone, regardless of technical background. As noted in Richly AI's generative AI revolution for unlocking creativity, these tools are paving new ways for personal expression.
The real magic is the speed and simplicity. A task that once took hours of skilled work can now be done in the time it takes to upload a photo. It’s a perfect example of how AI can make creative fun accessible to all of us.
This guide focuses on ColorPageAI because it hits that sweet spot between being incredibly easy to use and having powerful features, which means you get a great-looking coloring page every single time.
Choosing the Right Photo for Best Results
The secret to a fantastic coloring page isn't just about the AI—it’s about the photo you start with. Let's be honest, not every picture is destined to become clean, satisfying line art. The quality of what you put in directly dictates the quality of what you get out.
Think of our AI like an artist looking for clear instructions. A photo with strong, defined edges and great lighting gives it a perfect roadmap to follow. On the other hand, feeding it a blurry or cluttered image is like handing over a smudged map and just hoping for the best.
Focus on Contrast and Clarity
I've found that the best images always have a clear subject that practically jumps off the background. High contrast is your absolute best friend here. It helps the AI easily figure out what's the main event and what's just noise, which is everything when you want to turn a picture into a coloring page.
For instance, a close-up shot of your golden retriever against a plain, light-colored wall will almost always give you a better result than a photo of that same dog romping through a field of tall, busy grass. In the first scenario, the AI can easily trace the dog's form. In the second, it might get confused by all the overlapping lines and similar colors.
To get the best results, keep an eye out for these elements:
- Good Lighting: Try to avoid photos with harsh shadows or washed-out, blown-out highlights. Even, natural light is perfect because it helps define shapes without creating confusing dark patches.
- Simple Backgrounds: An uncluttered background is a game-changer. It ensures the focus stays squarely on your subject, preventing the AI from creating a bunch of unwanted lines from background clutter.
- A Clear Subject: Your subject should be well-defined and take up a good chunk of the frame. Photos snapped from too far away often lose the very details you want to color in.
Here's a little rule of thumb I always use: pick photos you'd describe as "clean" and "bold." If you can easily trace the main subject with your eyes, there's a great chance our AI can, too. This simple test saves a ton of time and frustration.
Pre-Editing for a Perfect Conversion
You don't need fancy, expensive software to prep your photo. A few quick tweaks can make a world of difference, and the photo editor already on your phone is usually more than enough for the job.
A little bit of prep work goes a very long way. I've seen how spending just 30 seconds on a quick edit can drastically improve the final line art, saving you the headache of cleaning up a messy page later.
Here’s a quick checklist of simple edits that really pay off:
- Crop Tightly: Be ruthless! Cut out any distracting background stuff and put the focus squarely on your subject. This immediately simplifies the image for the AI.
- Increase Contrast: Bumping up the contrast makes the light areas lighter and the dark areas darker. This is key for defining those edges and making them pop.
- Boost Sharpness (Slightly): A small touch of sharpness can help clarify any fuzzy edges, giving the AI much cleaner lines to follow. Just be careful not to overdo it, or you'll get a noisy, pixelated look.
By picking the right photo and making these quick adjustments, you're setting the stage for a perfect conversion. You're not just crossing your fingers for a good result; you're actively guiding the AI to create the exact coloring page you have in mind. That proactive approach is the real key to getting amazing results every single time.
Browse free coloring pages
Hundreds of ready-to-print pages, plus a generator that makes any page you can describe.
How to Convert Your Photo Into a Coloring Page
Alright, ready to see the magic happen? Let's walk through the entire process of turning one of your own photos into a custom coloring page. I'll be using ColorPageAI to show you how it’s done.
Honestly, it’s incredibly simple. The whole point is to take a complicated task and boil it down to just a few clicks. You can seriously go from a favorite photo to a printable piece of art in less than a minute.
The Conversion Journey Step-By-Step
First things first, head over to the ColorPageAI website. The upload area is right there on the homepage, front and center. I love that there’s no need to sign up or pull out a credit card just to give it a spin.
Just find the "Upload Image" button and give it a click. This will pop open a window letting you grab a photo from your computer or phone. Keep those tips from the last section in mind—a clear, high-contrast picture will always give you the cleanest lines.
Once your image is uploaded, the AI takes over. You don't have to do a thing. It gets to work analyzing the photo, figuring out the most important outlines, and stripping away all the color and noise to leave you with pure line art. The underlying process is a fascinating cousin to AI image style transfer, where an AI learns to apply the "style" of one image (in this case, a line drawing) to the content of another.
The basic flow is a breeze: upload, let the AI work its magic, and download. That's it.
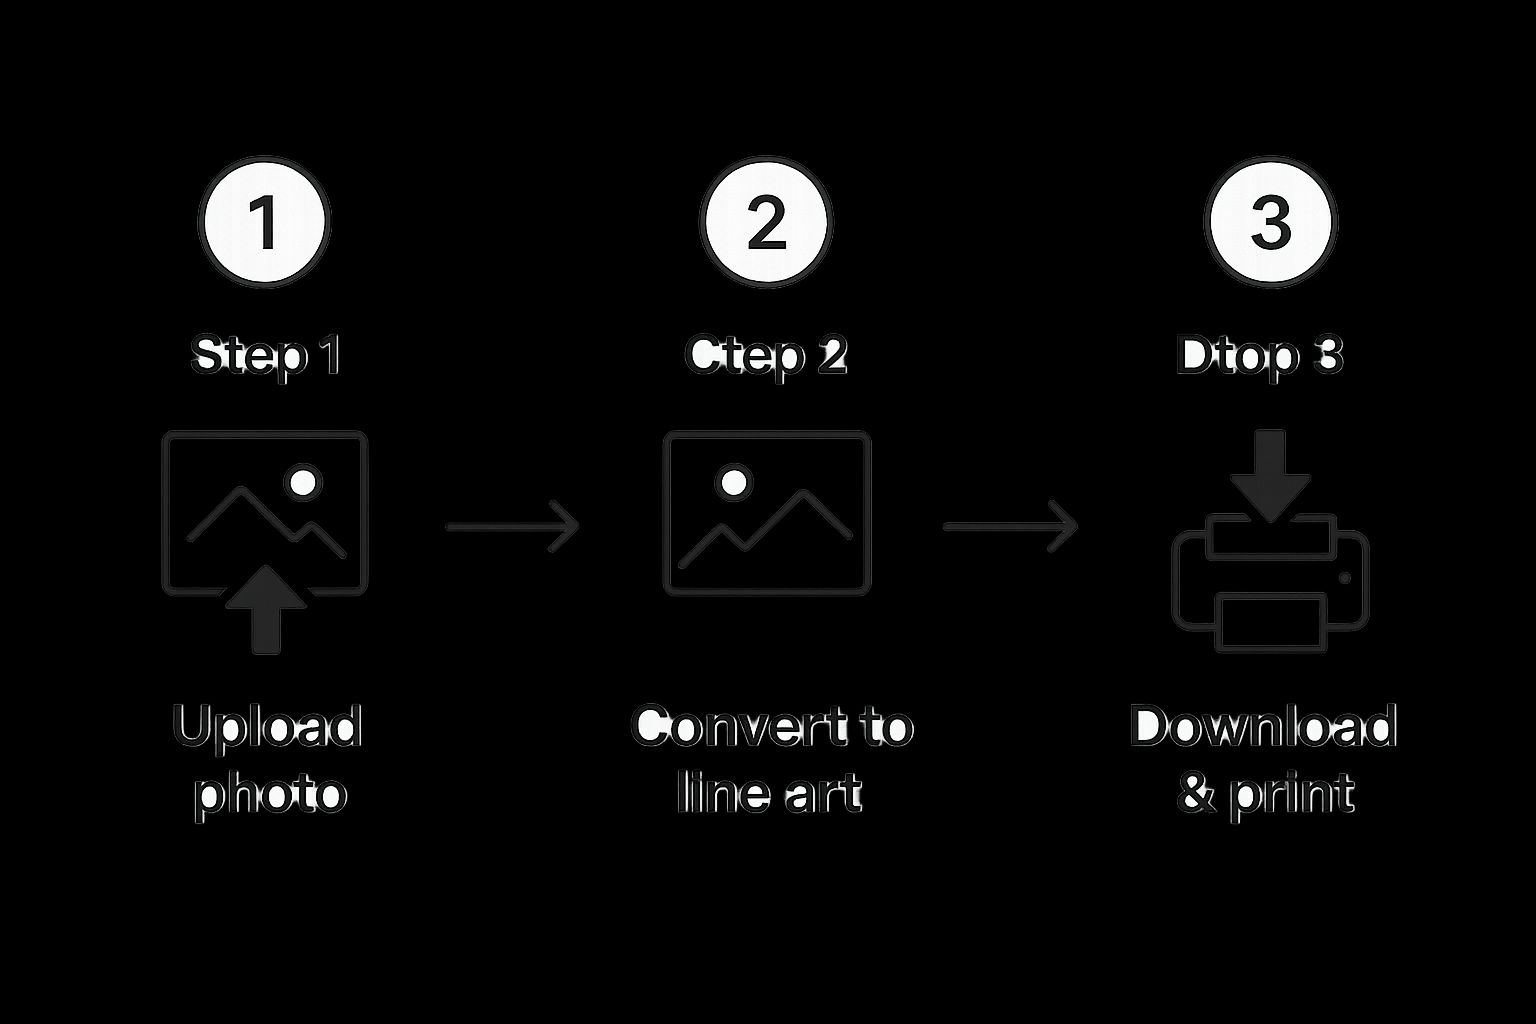
This graphic really captures how streamlined the whole thing is. No complex menus or confusing settings, just a direct path to your finished page.
From Upload to Download
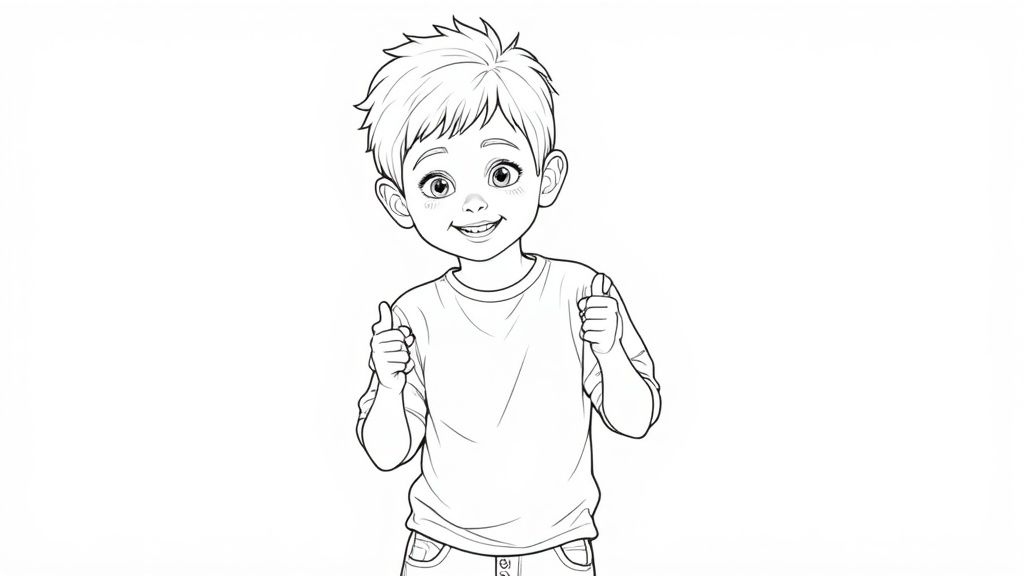
After just a few seconds, your brand-new coloring page will pop up on the screen. It’s always fun to see how the AI interprets a photo, turning familiar colors and shadows into crisp, clean lines that are just begging for some color.
This kind of technology is making creative projects so much more accessible. Think about it—what used to take expensive software and a lot of painstaking manual work in a program like Photoshop is now an instant, one-click process. This is the real power of modern AI. It puts creativity back in the hands of everyone, no artistic skill required.
Once you’re happy with the preview, you'll see a big "Download" button. Clicking this saves the file right to your device, usually as a high-quality PNG or PDF that’s perfect for printing.
If you really want to get into the weeds and explore more advanced techniques, our guide on how to create coloring pages is a great next step.
Putting Your Personal Stamp on Your New Coloring Page
Alright, the AI has done the heavy lifting and given you a fantastic starting point. But this is where the real fun begins. A raw conversion from a photo is cool, but a little customization is how you add your personal touch and truly make the page your own. It's all about fine-tuning your new creation.
Most good AI tools, including ColorPageAI, have built-in features that give you creative control after that first conversion. This is your chance to step in as the art director, perfecting the little details to make sure the final product is exactly what you had in mind when you first decided to turn a picture into a coloring page.
Adjusting Lines and Details
One of the first things you might notice is that the AI, in its eagerness to capture everything, may have thrown in a few stray or unnecessary lines. This happens a lot with photos that have complex textures or busy backgrounds. Don't worry—most editing tools have a simple eraser you can use to clean these up with just a few clicks.
Beyond just cleaning things up, you can usually adjust the look and feel of the outlines themselves. This is a huge step in setting the mood for your coloring page.
- Outline Thickness: Are you going for bold, chunky lines that are perfect for kids with crayons? Or do you want delicate, thin lines for a detailed adult coloring project with fine-tipped markers? Playing with this setting can completely change the vibe.
- Adding Your Own Flair: Some platforms even let you draw right on the page. You could add a whimsical border, write a name or a fun message, or even sketch in extra details that the AI might have missed.
As you refine your page, thinking about the principles of personalization can be really helpful. This isn't just about fixing a machine's output; it's about turning a simple conversion into a personal work of art.
The goal isn’t just to remove errors, but to add intention. Adjusting the line weight or adding a small, hand-drawn star can elevate your page from a simple activity to a thoughtful, personalized creation.
The Magic of Contour Detection
The tech that makes this kind of intuitive editing possible is pretty slick. The AI models behind these tools specialize in something called contour detection—basically, the science of identifying and pulling out the most important outlines from a picture. This is how the AI can look at a photo of a cat and perfectly trace the lines of its fur, whiskers, and eyes, leaving the rest behind.
AI-powered coloring page generators are now used all over the world, with some platforms boasting user bases of over one million creators. For instance, some free online tools can crank out a high-quality page from a photo in less than a second. Their AI is just that good at contour detection, efficiently extracting clean lines for a perfect printable.
This rapid generation is a huge part of why they're so popular with parents and teachers. If you want to dive deeper into this, check out our detailed guide on creating custom coloring pages.
At the end of the day, these refinement tools put you back in the artist's seat. They make sure your coloring page isn't just an AI-generated image, but a true reflection of your own creativity.
Bringing Your Creation to Life: Printing and Sharing
You’ve done the hard part—tweaking the lines, adjusting the details, and turning a photo into a perfect piece of line art. Now comes the real fun: bringing that digital file into the physical world. This is where your creation transforms from pixels on a screen into something you can hold, color, and share.
The final step is just as crucial as the first. A great print can elevate your work, giving the lines a crisp, professional look that’s just begging for crayons, markers, or colored pencils. Let's walk through how to get that perfect print and explore some fun ways to share your unique masterpiece.
Getting That Perfect Print
The magic of a great coloring page really comes down to two things: the paper you choose and your printer settings. Sure, you can grab a standard piece of office paper, but with a couple of minor tweaks, you can make your page feel like it came straight out of a premium coloring book.
For a more durable, high-quality feel, the right paper is a must.
- Cardstock: This is my personal go-to. It’s sturdy, so markers won't bleed through to the other side. Plus, it has a satisfying weight that just feels more special and "official."
- Matte Photo Paper: If you want incredibly sharp, dark lines, this is a fantastic choice. The smooth surface lets the ink sit perfectly without spreading, creating a super clean outline.
Once you have your paper, a quick trip to your printer settings will make all the difference. Before you hit "Print," look for an option like "High Quality" or "Best" in the print dialog box. This tells your printer to use a little more ink and slow down, which results in much cleaner, bolder lines that are a joy to color.
For a deeper dive, check out our complete guide on how to print coloring pages for flawless results every time.
A simple switch from standard paper to cardstock and using the "High Quality" print setting is a game-changer. It’s the difference between a flimsy, forgettable sheet and a durable piece of art someone will actually want to keep. It's a tiny effort for a massive upgrade.
Sharing Your Unique Creations
So, you've got a stack of incredible, custom-made pages. Now what? This is where your creativity can really shine because these aren't just generic designs—they’re personal.
Think about the possibilities. You could create a custom coloring book for a friend's birthday, filled with pages made from photos of their favorite people, pets, or memories. Or imagine a family reunion where everyone colors pages made from old family photos. It's a fantastic way to connect and share stories.
Teachers can also turn a picture into a coloring page for their lessons, creating sheets of historical figures, plants from a science unit, or diagrams of the solar system.
This power to instantly create line art didn't just appear out of nowhere. It’s built on decades of computer science. Modern AI tools like ours stand on the shoulders of classic computer vision techniques that used methods like Gaussian blurring to smooth images and k-means clustering to group similar colors. Programmers would then run edge detection algorithms on these simplified images to pull out the outlines.
It’s this incredible evolution from early image segmentation to the sophisticated AI we use today that makes it so easy to bring your most creative and personal ideas to life.
Got a few questions rattling around in your head? Perfect. You're in the right place. Let's tackle some of the most common things people wonder about when they start turning their favorite photos into coloring pages.
What Kind of Pictures Make the Best Coloring Pages?
This is probably the number one question I get, and the answer is simpler than you think. You want to give the AI a clear, easy-to-follow map. That means high-contrast images with well-defined subjects are your absolute best friend.
Think about a crisp, close-up shot of your dog sitting on the lawn. The lines are clear, the subject is obvious, and there's not much clutter. That's a home run. Now, picture a blurry, wide-angle photo of that same dog in a messy living room with toys everywhere. The AI will struggle to figure out what's the dog and what's just background noise.
Simple photos of buildings, individual objects, or clear portraits almost always produce fantastic, clean line art. The "busier" the photo, the trickier it gets.
Is This Really Going to Cost Me Anything?
Nope, not a dime for the basic stuff. Tools like ColorPageAI let you turn a picture into a coloring page completely for free. Many of these platforms run on ads or have premium plans with fancy extras, but the core feature—converting your photo—is almost always free to use.
This makes it a zero-risk way to get creative. You can have fun trying out all sorts of pictures—from that silly selfie you took last week to a beautiful landscape shot from your vacation—without ever reaching for your wallet.
Honestly, the best part about the free model is the freedom to just play. There's no pressure. You can upload that weird photo of your cat in a box or a stunning sunset shot and see what happens. It makes the whole process more about fun and less about commitment.
Can I Just Grab Any Picture from the Internet?
Hold on, this one is super important. It's so tempting to just do a quick search and use a cool photo you find online, but you need to be careful. It’s best to stick with pictures you took yourself or photos that are specifically labeled for public use (like those with a Creative Commons license).
Using copyrighted images without permission can land you in hot water if you decide to share the coloring pages you create. To keep things simple and stress-free, just use your own personal photos. That way, you know you have the rights and can transform them into coloring masterpieces without a single worry. It's all about being creative while respecting other creators.
What's the Best Way to Print My Masterpiece?
You've made an awesome coloring page, and now you want to bring it to life on paper. To get the sharpest, cleanest lines, download your finished page as a PDF or PNG. These file types are great at preserving detail, unlike JPEGs which can sometimes make your lines look a little fuzzy.
The paper you choose also makes a huge difference in the final result.
- Standard Printer Paper: Totally fine for a quick, casual coloring session with the kids.
- Cardstock or Heavier Paper: This is my personal recommendation for a more premium experience. Markers won't bleed through, and the whole thing just feels more substantial and special.
One last pro tip: before you hit that print button, dive into your printer settings. Look for an option like “high quality” or “best” mode. It's a tiny click that tells your printer to use more ink and care, resulting in dark, crisp lines that are just begging to be colored.
Ready to stop wondering and start creating? Give ColorPageAI a try and transform your favorite photos into one-of-a-kind coloring pages in just seconds. https://colorpage.ai
Browse free coloring pages
Hundreds of ready-to-print pages, plus a generator that makes any page you can describe.