Classroom Art Project Ideas: Creative & Engaging
April 4, 2025
Unleash Artistic Potential: Engaging Art Projects for Every Classroom
Want exciting art projects to boost creativity and learning? This list delivers 10 hands-on activities perfect for all ages and skill levels. Discover inspiring ideas using diverse mediums, from clay and paint to digital animation. Whether exploring cultural patterns or creating mixed-media self-portraits, these projects encourage collaboration, critical thinking, and artistic expression. Let's spark imaginations!
1. Collaborative Mural Project
Transform your classroom into a vibrant art studio with a collaborative mural project! This exciting activity involves the whole class working together on a large-scale artwork, creating a shared masterpiece that reflects everyone's creativity. Each student contributes to a section of the mural based on a unifying theme, resulting in a cohesive final piece that celebrates the collective effort. Think of it like a giant jigsaw puzzle of creativity, where each piece, designed by a different student, comes together to form a spectacular whole. Learn more about Collaborative Mural Project

This project is incredibly versatile. You can create your mural on a giant sheet of paper, a stretched canvas, or even directly onto a designated wall space. It works for any age group and class size, and can incorporate a variety of media like paint, collage elements, markers, and colored pencils. You could even add textured materials like fabric scraps or natural objects for a truly unique 3D effect!
The collaborative nature of mural making offers fantastic benefits. It fosters teamwork and collaboration skills as students learn to share ideas, compromise, and work within a shared space and theme. It builds a sense of community ownership and pride as they see their individual contributions come together to form something bigger and more impactful. Plus, the finished mural becomes an impressive display piece for the school, showcasing the students' talent and hard work.
Want some inspiration? Check out the amazing work done by the Philadelphia Mural Arts Program's art education initiatives, or how Whitehorse Middle School's students created a 40-foot collaborative mural about local history known as "The Big Picture." Closer to home, P.S. 48 in New York City boasts a stunning "Our Community" mural created by students, which proudly hangs in their main hallway. These projects, inspired by collaborative art pioneers like Judy Chicago and Keith Haring, demonstrate the powerful impact of shared artistic endeavors.
Pros:
- Builds teamwork and collaboration skills
- Creates a sense of community ownership
- Teaches compromise and working within constraints
- Results in an impressive display piece for the school
- Can connect to curriculum themes across subjects
Cons:
- Requires significant space for creation and display
- Needs careful planning and coordination
- May take several class periods to complete
- Some students may feel their contribution is less visible
Tips for a Successful Mural Project:
- Pre-sketch the overall design: This gives structure, but be sure to leave room for student creativity within assigned sections.
- Assign specific areas: Divide the mural into sections and assign them to small teams or individual students, establishing clear boundaries to prevent overlap and confusion.
- Use a grid system: A grid helps maintain proportions, especially when scaling up smaller designs to the larger mural space.
- Connect to curriculum: Tie the mural theme to current classroom studies to reinforce learning and create cross-curricular connections. For example, a history class might create a mural depicting a historical timeline, or a science class could depict the life cycle of a butterfly.
- Document the process: Take photos throughout the project to capture the evolution of the mural and the students' collaborative efforts. This creates a wonderful record of the creative journey.
This project deserves a top spot on the list because it offers a unique blend of artistic expression, collaborative learning, and community building. It's an experience that goes beyond simply creating art; it's about working together, sharing ideas, and creating something beautiful and meaningful as a team.
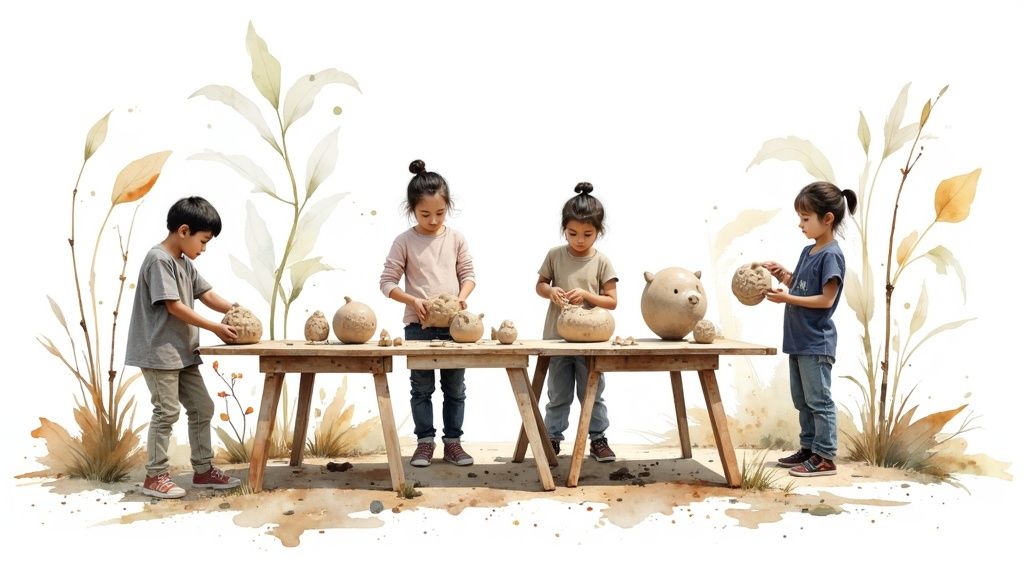
2. Nature-Inspired Clay Sculptures
Bring the outdoors in with this hands-on art project! Nature-inspired clay sculptures allow kids to mold and shape their creativity while exploring the natural world. They'll get to observe plants, animals, or even geological features, then translate those observations into three-dimensional art using clay. Think anything from simple pinch pots resembling tiny nests to more intricate depictions of flowers, insects, or even miniature mountain ranges. This project really blends tactile exploration with scientific observation, strengthening that cool connection between art and nature.
This activity earns its spot on the list because it's adaptable for a wide range of ages and skill levels. Younger kids can enjoy the basic tactile experience of creating pinch pots resembling berries or smooth stones, while older, more experienced kids can challenge themselves with complex animal forms or intricate leaf textures. This project also taps into different learning styles, particularly appealing to those hands-on, tactile learners.
The beauty of this project lies in its flexibility. You can use air-dry clay for convenience, or if you have access to a kiln, fire up those creations for a more professional and lasting result. The Clayground Collective in the UK offers some inspiring school programs based around clay work, demonstrating the educational potential of this medium. Lakeside Elementary, for example, has incorporated Andy Goldsworthy-inspired natural form sculptures into their art curriculum, and Edgewood Primary School even created an "Ecosystem in Clay" display, directly linking their art with their science lessons.
Here are a few tips to get you started:
- Nature Walk Inspiration: Take a nature walk to gather inspiration! Encourage kids to sketch interesting natural objects they find – a twisted branch, a textured leaf, a uniquely shaped rock. You could even bring back a small collection of natural specimens to use as models.
- Clay Techniques 101: Demonstrate basic clay techniques like pinching, coiling, and slab construction to give kids a starting point. There are tons of great online tutorials for these if you need a refresher!
- Slow and Steady Drying: Remember to let the clay dry slowly and evenly to prevent cracking. Cover the pieces lightly with plastic wrap during the drying process.
- Glazing Fun (Optional): If you're firing the clay, consider glazing options that highlight the natural textures of the sculptures. A clear glaze can bring out the earthy tones, while colored glazes can add an extra pop of artistic flair.
Pros:
- Develops fine motor skills and spatial thinking.
- Connects art with science curriculum.
- Creates lasting, durable art pieces (especially if kiln-fired).
- Introduces basic sculpture techniques.
- Appeals to tactile learners.
Cons:
- Clay can be messy and requires specific cleanup.
- Firing requires kiln access (though air-dry clay is a great alternative).
- Storing in-progress pieces can be a bit challenging.
- Can be more expensive than some other art media.
Inspired by the works of artists like Maria Martinez (renowned Native American potter), Andy Goldsworthy (environmental sculptor), and Edmund de Waal (contemporary ceramicist), this project has the potential to unleash your child's inner artist while fostering an appreciation for the natural world around them.
3. Upcycled Material Sculpture Garden
Want a classroom art project that’s both creative and eco-conscious? An Upcycled Material Sculpture Garden is a fantastic way to transform trash into treasure! This project lets students unleash their inner artists while learning about sustainability and resourcefulness. Essentially, it's all about collecting discarded materials and turning them into a collaborative, three-dimensional art installation that resembles a garden. Think bottle-cap flowers, cardboard tube trees, and milk-jug creatures – the possibilities are as limitless as your students' imaginations!
So, how does it work? It’s a surprisingly simple concept. First, you gather a collection of recyclable and found objects. Anything from plastic bottles and egg cartons to old newspapers and fabric scraps can be used. Then, students use these materials to construct individual sculptures, employing various techniques like assembling, weaving, and gluing. Finally, these individual creations are combined to form a collective "garden" display in the classroom.
This project has been a hit in many schools. Check out examples like The Plastic Bottle Flower Garden at Washington Elementary, or Riverdale School's annual 'Junk to Jewels' exhibition. Artist Michelle Reader even runs collaborative recycled sculpture workshops in schools, showcasing just how powerful this project can be. Learn more about Upcycled Material Sculpture Garden and get inspired by other fantastic projects.
Tips for Cultivating Your Own Upcycled Garden:
- Start a Collection Drive: Begin collecting materials weeks in advance. Encourage students and their families to contribute, creating a sense of community involvement.
- Create a "Materials Library": Sort collected items by type (plastics, paper, metal, etc.) to make it easier for students to find what they need.
- Demonstrate Safe Joining Techniques: Show students appropriate methods for joining materials, such as using glue guns (with proper supervision) or tying things together. Adapt the techniques to your students’ age and skill level.
- Connect to Curriculum: Integrate the project with environmental lessons or Earth Day celebrations to reinforce the importance of recycling and sustainability.
- Consider Weatherproofing: If displaying the garden outdoors, use weather-resistant materials or apply a sealant to protect the sculptures.
Pros and Cons at a Glance:
Pros:
- Promotes sustainability: Teaches valuable lessons about recycling and reducing waste.
- Low-cost (or free!): Uses readily available materials, making it budget-friendly.
- Encourages creative problem-solving: Students must think outside the box to repurpose materials.
- Teaches assemblage techniques and structural thinking: Develops valuable artistic and engineering skills.
- Creates a visually impressive classroom display: Transforms your classroom into a vibrant and inspiring space.
Cons:
- Requires material collection: Needs significant planning and organization to gather enough materials.
- Some materials may need prep: You may need to clean or pre-cut certain items.
- Storage can be challenging: Bulky sculptures can be difficult to store.
- May require supervised tool use: Glue guns or other tools may need adult supervision.
This project deserves a spot on this list because it's more than just an art project; it's a learning experience. It fosters environmental awareness, encourages resourcefulness, and empowers students to see the creative potential in everyday objects. Inspired by artists like Louise Nevelson, Robert Rauschenberg, and El Anatsui, who all transformed discarded materials into stunning works of art, this project shows kids that art can be made from anything, and that even trash can be beautiful.
4. Cultural Pattern Exploration
This project is all about diving into the beautiful world of patterns from different cultures and letting them inspire some amazing artwork! Kids get to be detectives, researching designs and symbols from around the globe, and then turn their discoveries into their own creations. It's a fantastic way to mix art with social studies and even a dash of math.
Here's the basic idea: students pick a culture that interests them (or you can assign cultures based on a current unit of study). They then research traditional patterns and symbols, learning about their history and meaning. Finally, they use those patterns as inspiration to create their own art. This could be anything from painting a vibrant design on a canvas to building a 3D sculpture incorporating the patterns.
Why this project rocks:
- Cultural Awareness Booster: Kids learn about different cultures and traditions in a hands-on, engaging way, fostering appreciation and understanding.
- Math and Art Mashup: They'll see how math concepts like symmetry and repetition are used in art and design, making those concepts come alive.
- Research Skills Power-Up: They get to practice valuable research skills, learning how to find and properly credit their sources.
- Super Adaptable: This project can fit perfectly with various cultural studies units or stand alone as a fun art exploration.
- Visually Stunning Results: The end products are usually incredibly beautiful and unique, perfect for displaying and sparking conversation.
Real-World Examples:
- Manchester Elementary did an Islamic Geometric Pattern tile project where students created beautiful tile mosaics.
- Lincoln Middle School's "Patterns of Heritage" hallway installation showcased student-designed patterns reflecting their family backgrounds.
- PS 139 combined patterns from different student family backgrounds into a collaborative Cultural Pattern Quilt.
Tips for Success:
- Context is Key: Provide background information on the cultural significance of the patterns to prevent the project from veering into cultural appropriation.
- Start Simple: Begin with basic pattern exercises before moving on to more complex cultural designs, especially with younger students.
- Helpful Tools: Templates or grid paper can be a lifesaver, especially for intricate patterns.
- Family Involvement: Encourage kids to talk to family members about their own cultural pattern traditions for a personal touch.
- Educational Display: When showcasing the finished artwork, include cards explaining the cultural context and meaning behind the designs.
Pros and Cons:
Pros: Builds cultural awareness and appreciation, connects mathematics and art concepts, teaches research skills and attribution of sources, highly adaptable to various cultural studies units, results in visually striking artwork.
Cons: Requires sensitivity to avoid cultural appropriation, needs research materials or internet access, more complex patterns may frustrate younger students, requires teacher familiarity with cultural contexts.
Inspired By: Artists like Faith Ringgold (story quilts), M.C. Escher (mathematical patterns), and Yayoi Kusama (pattern-based installations) have showcased the power and beauty of pattern in art.
This project earns its place on the list because it's not just about creating pretty pictures. It's about opening minds, fostering understanding, and connecting kids to the rich tapestry of global cultures through the universal language of art. It's a powerful way to combine creativity with learning, resulting in both beautiful art and a deeper understanding of the world around us.
5. Light and Shadow Exploration
Want to add a touch of magic to your art projects? Light and Shadow Exploration is a fantastic way to blend art and science, creating stunning visual effects with simple materials. This project involves crafting objects – think intricate cutouts, interesting sculptures, or even simple shapes – and then using a light source to project their shadows onto a surface. It's all about exploring how light interacts with different materials and forms, creating dramatic plays of light and dark, and introducing concepts like transparency, opacity, and silhouette.

This activity is more than just cool visuals; it encourages spatial thinking and planning as kids figure out how their creations will cast shadows. Plus, it sneaks in some STEM learning about light physics without kids even realizing they're learning! Imagine building a cardboard castle and then using a flashlight to create a dramatic siege scene on the wall – talk about engaging!
This project has earned its place on this list because it's incredibly versatile and impactful. It combines artistic creation with scientific exploration, resulting in both a physical art piece (the cutout or structure) and an ephemeral shadow projection. The exploration of negative space and silhouette adds another layer of artistic learning. It’s also adaptable for a range of ages and abilities – from simple shape explorations with younger children to complex, moving shadow puppets with older ones.
Successful Implementations:
- Shadowplay Exhibition at Meadow Lane Elementary: Students created a whole exhibition of shadow art, from animal silhouettes to fantastical creatures.
- Kathy Barbro's Light Box Experiments with 4th graders: Using light boxes, students experimented with layering translucent materials to create colorful, dynamic shadow compositions.
- The Shadow Theater project at P.S. 122 in New York: This project took shadow play to a theatrical level, with students creating narratives and performances using shadow puppets.
Tips for Shadow Masters:
- Light Sources: Desk lamps, flashlights, and overhead projectors all work great. Experiment to see what effects you can create!
- Start Simple: Begin with simple silhouettes and shapes before tackling complex structures.
- Capture the Magic: Shadow art is temporary, so take photos to preserve those awesome creations.
- Color Play: Introduce colored cellophane or translucent paints to create tinted shadows.
- Surface Matters: Think about the projection surface – a blank wall, a large sheet of paper, or even a makeshift screen can all work.
Pros:
- Integrates art with STEM learning.
- Creates memorable and visually stunning results.
- Adaptable for various ages and skill levels.
- Low-cost materials with high impact.
- Encourages spatial reasoning and planning.
Cons:
- Needs a darkened room or controlled lighting.
- Shadows are ephemeral unless photographed.
- Might require a bit more teacher prep than some projects.
Inspired By:
- Kara Walker: Contemporary silhouette artist known for her powerful and thought-provoking work.
- László Moholy-Nagy: Bauhaus artist and designer who experimented with light and space.
- Rashad Alakbarov: Creates incredible large-scale shadow installations using everyday objects.
So, turn down the lights, grab some simple materials, and get ready to explore the magical world of light and shadow!
6. Mixed Media Self-Portraits
This project is all about letting your inner artist shine through…with your own face as the canvas (not literally, of course!). Mixed media self-portraits involve creating a representation of yourself using a bunch of different art supplies and techniques. Think paint, collage, fabric scraps, photos, markers – anything goes! Instead of just drawing or painting, you get to experiment with texture, layering, and composition to build a truly unique and personalized artwork.
So, how does it work? Basically, you start with a base, maybe a piece of cardboard or canvas. Then, using a photo or mirror as a reference, you start building your self-portrait. You might sketch your features lightly with pencil, then layer on colors with acrylic paint. Maybe you cut out images from magazines that represent your hobbies and glue them around your portrait. You could even incorporate fabric scraps for hair or clothing. The possibilities are endless!
Real-World Inspiration: Check out what other schools have done! Westlake Elementary's Sandra Silberzweig-inspired portraits are bursting with color and personality. Prospect Heights Middle School's "Who Am I?" gallery showcases the power of self-expression through mixed media, and PS 321’s annual Mixed Media Self-Portrait exhibition is always a fantastic display of student creativity.
Tips for Awesome Self-Portraits:
- Start with a reference: Use a photograph or mirror so you don't have to keep looking away from your artwork.
- One step at a time: Don’t try to do everything at once. Master one technique (like painting or collage) before moving on to the next.
- Art history lesson: Show some examples of mixed media portraits by artists like Frida Kahlo, Hannah Höch, Romare Bearden, and Sandra Silberzweig. Their work can inspire unique approaches and ideas.
- Think symbolically: Don't just focus on what you look like. Add elements that represent your interests, personality, and dreams. Maybe a music note if you love to sing, or a soccer ball if you’re a sports fanatic.
- Cohesive colors: If you're worried about your portrait looking too chaotic, start with a limited color palette. This can help unify all the different materials.
Why Mixed Media Self-Portraits Rock:
- Boost Self-Awareness: This project is a fantastic way for kids (and adults!) to explore their identity and express themselves creatively.
- Skill-Building Bonanza: You learn multiple art techniques in a single project, from painting and drawing to collage and sculpture.
- Meaningful Masterpieces: The finished product is a deeply personal and meaningful piece of art that students will cherish.
- Decision-Making Power: Students get to make their own artistic choices, developing their decision-making skills and boosting confidence.
- Adaptable for All: This project can be easily adapted to suit different skill levels and abilities.
The Good and the Not-So-Good:
Pros: Builds self-awareness, teaches multiple techniques, creates individualized artwork, develops decision-making skills, allows for differentiation.
Cons: Requires a variety of art supplies, can be time-consuming, some might feel self-conscious, can be challenging to achieve a cohesive look.
This project deserves a spot on this list because it offers a powerful combination of creative exploration, skill development, and personal expression. It's a fun and engaging way to learn about art and yourself at the same time!
7. Printmaking Exploration Station
Want to introduce your kids to an art form that's both fun and packed with learning? Then set up a Printmaking Exploration Station! This hands-on activity lets kids create multiple copies of their own designs using various printmaking techniques. Think of it as a mini art studio right in your classroom or home!
So how does it work? Printmaking involves transferring ink (or paint) from a prepared surface – called a matrix – onto another material like paper or fabric. Kids can carve designs into surfaces (relief printing), create unique one-off prints (monoprinting), or use found objects like sponges and leaves (stamping) to make their prints.
What makes printmaking so cool?
- Reproducible Art: Kids love seeing their designs multiplied! This is a great way to create personalized cards, artwork for gifts, or even start a mini print exchange with friends.
- Positive/Negative Space: Printmaking naturally teaches the concept of positive and negative space – the area occupied by the design and the area around it. This strengthens visual thinking skills.
- Reverse Thinking: Because the printed image is a mirror image of the carved or painted matrix, kids have to think in reverse, boosting their planning and problem-solving skills.
- Historical Context: From ancient woodblock prints to Andy Warhol's pop art, printmaking has a rich history. Introduce your students to masters like Albrecht Dürer, Hokusai, and Elizabeth Catlett, showing how this art form has shaped communication and expression across cultures.
Successful Implementations:
Imagine your classroom bustling with mini-printmakers! Think along the lines of Roosevelt Elementary's Annual Print Exchange, where students create and trade their prints. Or perhaps a collaborative project like Central Middle School's Printed Textile Wall, showcasing a vibrant tapestry of student designs. Even younger kids can get involved with simple found-object printing, as seen in The Berkeley School's 'One Block, Many Ways' exhibition.
Tips for Printmaking Success:
- Start Simple: For younger artists, begin with easy techniques like stamping with found objects or styrofoam printing.
- Printing Stations: Set up different stations with various materials and techniques, letting kids rotate and experiment.
- Easy Cleanup: Use water-based, washable inks to avoid staining clothes and surfaces.
- Demonstrations are Key: Especially for reversed imagery, clear demonstrations of the planning process are essential.
- Print Exchange: Save successful prints for a class exchange program to encourage collaboration and appreciation for each other's work.
Pros and Cons:
Pros:
- Creates multiple prints from one design
- Teaches planning and reverse thinking
- Opportunities for trading or collaborative displays
- Introduces an art form with historical significance
- Can use simple, accessible materials
Cons:
- Can be messy and requires proper setup/cleanup
- Some techniques require specialized materials (like linoleum cutters for older students)
- Concepts of reversed imagery can be challenging for some
- May require more teacher demonstration than some projects
Why Printmaking Deserves a Spot on the List:
Printmaking offers a unique blend of creative expression, skill development, and historical appreciation. It’s a fantastic way to engage kids (and adults!) in a hands-on artistic process that produces tangible, shareable results. From simple potato prints to more complex techniques, printmaking fosters problem-solving, planning, and an understanding of positive/negative space, all while making something beautiful and unique.
8. Wire and Bead Sculpture Mobiles
Want to bring some kinetic art into your classroom or home? Wire and bead sculpture mobiles are a fantastic way to combine creativity, engineering, and a touch of whimsy. This project involves using wire – think of it as drawing in three dimensions! – to create hanging sculptures adorned with beads and other decorative elements. The real magic happens when these elements work together to create balance and movement, resulting in a dynamic art piece that dances in the air.

This project earns its spot on this list because it offers a unique blend of artistic expression and hands-on learning. It's not just about making something pretty; it's about understanding how balance and counterweight work in practice. Think of it as sneaking in a mini physics lesson while creating art! Kids develop spatial reasoning and fine motor skills as they bend, twist, and connect the wire, and the addition of beads and other decorative bits adds an extra layer of creativity and personalization.
Examples in Action:
Schools have embraced the magic of mobiles, with inspiring examples like the Calder-inspired balanced mobiles at Cedar Ridge Elementary, the 'Science of Balance' mobile installation at Sunnyside School, and the annual 'Art in Motion' exhibition at The Watershed School. These examples show how mobiles can be adapted for different age groups and learning objectives.
Tips for Mobile Mastery:
- Wire Wisdom: Opt for softer wire like aluminum or craft wire, especially for younger artists. It's much easier to bend and shape.
- Balance Basics: Start with simple balance experiments using everyday objects before diving into complex mobile designs. This helps kids grasp the fundamental principles.
- Template Time: Creating templates for wire bending can be a lifesaver, particularly for intricate shapes.
- Bead Organization: Small beads have a knack for escaping! Keep them contained in small bowls or containers to prevent mini treasure hunts.
- Systemic Thinking: Demonstrate how adjusting one element of the mobile affects the overall balance. This reinforces the concept of interconnectedness.
Pros and Cons:
- Pros: Teaches balance and weight distribution, develops spatial thinking, improves fine motor skills, creates dynamic displays, connects to science curriculum.
- Cons: Wire can be tough for little hands, may require tools like wire cutters, needs hanging space, small parts can get lost.
Why Use This Approach?
This project is ideal for anyone looking for a hands-on activity that blends art and science. It's perfect for exploring themes of balance, motion, and three-dimensional design. The finished mobiles add a beautiful, kinetic element to any space, catching the light and gently moving with the air currents. It’s a fantastic project for both individual exploration and collaborative classroom projects.
Inspiration from the Masters:
This art form was popularized by artists like Alexander Calder (the inventor of the mobile as an art form!), Ruth Asawa (known for her incredible wire sculptures), and Bruno Munari (artist and designer of playful "useless machines"). Their work can be a great source of inspiration for your own mobile creations.
9. Identity Quilt Project
This project is all about letting your students stitch together a beautiful tapestry of who they are! Each student creates a square – either from fabric or paper – that represents their identity, hobbies, family, culture, or anything else that makes them unique. These individual squares are then combined to form a larger classroom quilt, a powerful symbol of community and belonging. Think of it as a visual representation of the saying, "The whole is greater than the sum of its parts."
How it Works:
The beauty of this project is its flexibility. You can tailor it to fit your students' ages and skill levels. Younger kids might decorate pre-cut paper squares with markers, crayons, paint, or fabric scraps. Older students could explore more advanced techniques like fabric painting, embroidery, or even basic sewing if resources allow. The key is for each square to tell a story about its creator.
Examples in Action:
- Hope Elementary's "We All Belong" quilt, proudly displayed in their library, is a testament to how this project fosters inclusivity.
- Martin Luther King Jr. Middle School has made the identity quilt an annual tradition, demonstrating the project's lasting impact.
- PS 41's "Stories in Squares" project cleverly connected the quilt to literature studies, showcasing the interdisciplinary potential.
Tips for Quilting Success:
- Uniformity is Key: Provide template squares to ensure everyone's contribution fits seamlessly into the final quilt.
- Simplify for Younger Students: For younger artists, use paper squares with fabric embellishments like ribbons, buttons, or felt. Iron-on transfer paper can also be a great way for them to add designs.
- Community Building: Host a "quilting bee" day and invite parent volunteers to help with the assembly. This turns the project into a shared experience and strengthens the sense of community.
- Add Context: Display the finished quilt with small cards explaining the symbolism in each square. This adds another layer of depth and encourages viewers to engage with each student's story.
Why This Project Deserves a Spot on the List:
The Identity Quilt project is much more than just arts and crafts. It's a powerful tool for:
- Celebrating Diversity: It provides a platform for students to express their individuality and appreciate the diverse perspectives within their classroom.
- Building Community: The collaborative nature of the project fosters a sense of belonging and shared identity.
- Cross-Curricular Connections: It can be easily integrated with social studies, language arts, math (measuring and geometry), and even literature.
- Creating a Lasting Legacy: The finished quilt becomes a treasured artifact of the school year, a visual reminder of the unique individuals who make up the class.
Pros and Cons:
Pros:
- Celebrates student diversity and individuality
- Creates a powerful classroom community symbol
- Teaches textile arts and pattern design
- Can connect to multiple subjects
- Becomes a lasting artifact of the school year
Cons:
- Fabric version requires sewing skills or assistance
- Assembling the final quilt can be technically challenging
- Requires coordination to ensure uniform square sizes
- May need parent volunteers for more complex implementations
Inspiration and History:
This project draws inspiration from the rich traditions of quilting and textile art, particularly the work of artists like Faith Ringgold (story quilt artist and children's book author), The Gee's Bend Quilters (African American quilting tradition), and the powerful collaborative memorial art of The AIDS Memorial Quilt project.
When to Use This Approach:
This project is perfect for back-to-school activities, cultural awareness weeks, or anytime you want to build a stronger sense of community in your classroom. It's also a great way to explore themes of identity, belonging, and self-expression.
10. Stop Motion Animation Studio
Lights, camera, action! Well, more like tiny lights, a steady camera, and incremental action! A Stop Motion Animation Studio is a fantastic way to bring creativity and storytelling to life in a uniquely engaging way. This project lets students create their own animated movies using simple materials and readily available technology. Think of it as bringing claymation or LEGO movies into the classroom (or living room!). Students craft characters and backgrounds, then painstakingly move them bit by bit, taking a photo after each tiny adjustment. When these photos are played in rapid succession, the illusion of movement is created – magic!
So how does it work? Imagine you have a little clay figure. You want it to walk across the table. You take a photo, move its leg slightly forward, take another photo, and repeat the process. Playing these photos quickly makes it appear as if the figure is walking! This is the basic principle of stop motion animation. Learn more about Stop Motion Animation Studio to delve deeper into project-based learning connections.
This project is a powerhouse of learning. It blends traditional art (sculpting, drawing, painting for sets and characters) with digital technology (photography and movie-making software). Kids get to experience collaborative storytelling, flexing their creative muscles in character design and narrative development. They learn about sequencing, timing, and the frame-by-frame magic behind animation, not to mention developing patience and a keen eye for detail. Plus, the end result is a shareable digital movie they can proudly present to family and friends!
Successful implementations of stop motion animation abound! Lakeside Elementary's Annual Animation Festival showcases student-created films, while STEM Academy's 'Science Explained' stop motion series demonstrates how engagingly complex concepts can be conveyed through this medium. Even literary adaptations come alive, as seen in Highland Park's 4th Grade Author Studies animated projects.
Here are some tips for setting up your own Stop Motion Animation Studio:
- Simple Tech is Key: Free apps like Stop Motion Studio or iMotion work wonders. No fancy software needed!
- Plan It Out: Storyboarding before filming helps organize the narrative and shots.
- Steady as She Goes: Secure cameras or tablets in fixed positions using simple stands (even stacks of books work!). This prevents shaky footage.
- Teamwork Makes the Dream Work: Small character movement teams can divide the tasks and make the process more efficient.
- Frame Rate Basics: Aim for 10-12 frames per second of finished animation to achieve smooth movement.
Pros:
- Engaging and Fun: Especially appealing to tech-savvy kids.
- Skill Building: Develops patience, attention to detail, and storytelling abilities.
- Cross-Curricular Connections: Integrates visual art, narrative writing, and technology.
- Shareable Results: Creates digital artifacts that can be shared with families.
Cons:
- Resource Requirements: Access to cameras/tablets and basic software is necessary.
- Time Commitment: This project is multi-step and time-intensive.
- Guidance Needed: Younger students may require significant teacher or parent guidance.
- Storage Solutions: Storing in-progress sets and characters can be a logistical challenge.
This project deserves a spot on this list because it’s a dynamic and engaging way to combine artistic expression with technological skills. Inspired by the likes of Tim Burton (known for his claymation and stop motion work), Aardman Animations (the creators of Wallace and Gromit), and LAIKA Studios (the studio behind Coraline and ParaNorman), stop motion animation offers a rich and rewarding creative experience. While it requires a bit more planning and resources than some other art projects, the results are truly impressive and well worth the effort.
10 Classroom Art Projects: Side-by-Side Comparison
| Project Title | Complexity (🔄) | Resources (⚡) | Expected Outcomes (📊) | Ideal Use Cases (💡) | Key Advantages (⭐) |
|---|---|---|---|---|---|
| Collaborative Mural Project | Moderate planning & coordination required | High – large canvases & diverse media | Cohesive, high-impact community artwork | Large classes, interdisciplinary projects | Fosters teamwork and community bonding |
| Nature-Inspired Clay Sculptures | Moderate – skill demonstrations needed | Moderate-High – clay, tools, and cleanup | Durable 3D art that enhances fine motor skills | STEAM integration and tactile learning | Boosts spatial awareness and manual dexterity |
| Upcycled Material Sculpture Garden | Moderate – material collection & assembly | Low cost but variable – recycled items and adhesives | Unique assemblages with environmental themes | Sustainability and eco-awareness projects | Encourages creative reuse and environmental care |
| Cultural Pattern Exploration | Moderate – research and precise design required | Low-Moderate – basic drawing and craft supplies | Visually striking, culturally informed designs | Cross-curricular art & social studies integration | Enhances cultural appreciation and research skills |
| Light and Shadow Exploration | Moderate-High – controlled lighting & setup needed | Low – simple light sources, paper cutouts | Dramatic visual effects merging art with science | STEAM projects and interactive installations | Engages critical thinking with light physics |
| Mixed Media Self-Portraits | Moderate – combines diverse techniques | High – varied art supplies required | Personalized, multi-layered artworks reflecting identity | Identity exploration and self-expression projects | Encourages creativity and individual expression |
| Printmaking Exploration Station | Moderate – careful planning and cleanup required | Moderate – printing tools, inks, and surfaces | Multiple reproducible pieces that refine design thinking | Traditional art studies and historical techniques | Teaches reverse planning and reproducibility |
| Wire and Bead Sculpture Mobiles | Moderate – requires balance and tool handling | Moderate – wire, beads, and cutting tools | Dynamic, kinetic sculptures that illustrate balance | Engineering-integrated art and tactile projects | Develops fine motor skills and spatial reasoning |
| Identity Quilt Project | Moderate-High – coordination of uniform pieces | Moderate – fabric/paper, sewing or strong adhesives | Collaborative quilt showcasing personal identities | Social studies and cultural expression projects | Celebrates diversity and builds community identity |
| Stop Motion Animation Studio | High – detailed planning with digital tech | High – cameras, software, and staging equipment | Engaging digital animations with narrative storytelling | Multimedia, film, and storytelling education | Merges technology with creative narrative techniques |
Inspiring the Next Generation of Artists
From collaborative murals that build teamwork to introspective self-portraits that encourage self-discovery, the art projects we've explored offer a rich tapestry of creative experiences. The key takeaway here is that art isn't just about the final product; it's about the journey of exploration, experimentation, and expression. Whether you're diving into the tactile world of clay, exploring the interplay of light and shadow, or bringing stories to life through stop motion animation, each project fosters critical thinking, problem-solving skills, and a deeper understanding of the world around us. Looking for more ways to engage your students and foster a dynamic learning environment? For more inspiration and ideas to spark creativity in your classroom, explore these interactive workshop ideas from Tevello. Mastering these approaches isn't just about creating beautiful art; it's about empowering the next generation to think creatively, express themselves confidently, and embrace the power of imagination.
So, go ahead, gather your materials, and unleash the boundless creativity within your classroom. Want to add a personalized touch to your lessons? Design unique and engaging coloring pages tailored to any theme with ColorPageAI. It's the perfect tool to complement these projects and ignite even more artistic sparks!
Ready to start coloring?
Join ColorPage.ai today and get 5 free credits to create your own custom coloring pages!
Start creating