9 Easy Art Projects to Spark Your Creativity in 2025
July 23, 2025
Feeling the creative itch but don't know where to start? You're not alone. Many of us want to make something beautiful but feel intimidated by the idea of complex techniques or expensive supplies. The great news is that art doesn't have to be complicated to be fulfilling. This guide is your gateway to a world of accessible creativity, showcasing nine wonderfully easy art projects designed for every age and skill level.
We'll explore simple, budget-friendly ideas that transform everyday materials into unique works of art. Forget the pressure to be perfect and embrace the simple joy of the creative process. This roundup is crafted to be a comprehensive resource, whether you are a:
- Parent looking for engaging activities for your kids.
- Teacher seeking fresh inspiration for the classroom.
- Therapist incorporating art as a calming, expressive tool.
- Adult wanting to relax and unwind with a hands-on hobby.
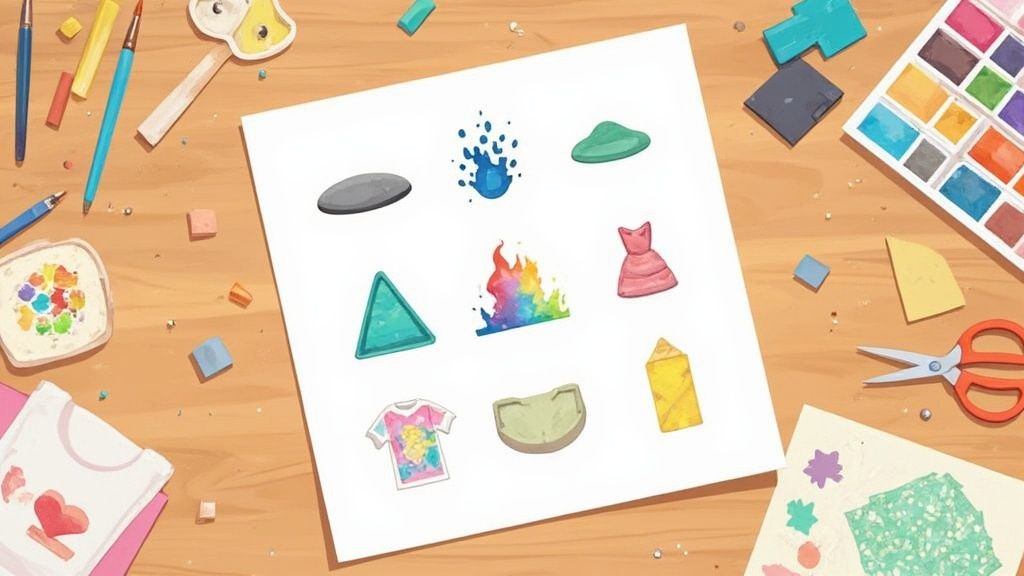
Inside, you will find more than just a list. We provide step-by-step pointers, practical implementation tips, and real-world examples to get you started immediately. From turning a paper plate into an animal to creating vibrant watercolor masterpieces, these projects prove that you don’t need formal training to make something amazing. Let's dive in and prove that everyone has an artist within them, just waiting for the right project to bring that creativity to life.
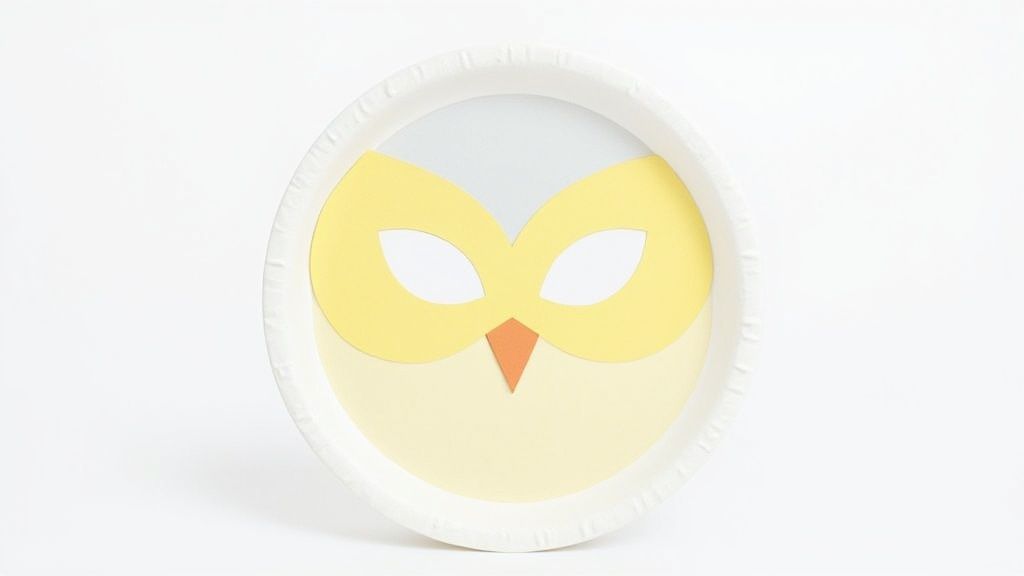
1. Paper Plate Art
Don't underestimate the humble paper plate. It’s not just for picnics; it’s a blank canvas for some of the most accessible and easy art projects you can imagine. This versatile craft involves transforming an everyday disposable plate into a unique piece of art using paint, markers, glue, and other simple supplies. Its round shape and sturdy surface make it an ideal base for countless creative endeavors.
This project is perfect for introducing young children to crafting, but it also offers a surprising level of depth for adults seeking a quick, low-pressure creative outlet. The low cost and readily available materials mean you can experiment without fear of wasting expensive supplies. From seasonal decorations to imaginative masks, the possibilities are nearly endless.
Who It's For & Why It Works
Paper plate art is especially effective for:
- Parents and Teachers: It's a fantastic, low-mess option for keeping kids engaged. A preschool class can make seasonal wreaths by painting plates green and gluing on paper leaves, while elementary students can create detailed animal faces with cut-out ears and whiskers.
- Adults: Believe it or not, paper plates are great for more sophisticated projects too. Try painting intricate mandala designs or creating a stunning sun-and-moon wall hanging by layering two painted plates. It’s a wonderful way to de-stress without the commitment of a large-scale project.
Actionable Tips for Better Results
To elevate your paper plate creations, try these simple hacks:
- Choose Wisely: While standard paper plates work fine, uncoated, sturdy plates hold paint and glue best. For a more durable project, consider using foam plates, which provide a smoother surface for paint.
- Prime Your Surface: For a professional finish, especially with acrylics, apply a thin coat of white gesso to the plate first. This prevents the paint from soaking in and makes your colors pop.
- Build in 3D: Don’t just paint on the plate- build from it. Staple or glue multiple plates together to create larger sculptures, like a caterpillar's body. You can also add texture by gluing on crumpled tissue paper, yarn for hair, or fabric scraps for clothing.
For more inspiration on simple crafts perfect for a quiet afternoon, check out these rainy day craft ideas.
2. Rock Painting
Take your creativity outdoors by transforming simple stones into miniature masterpieces. Rock painting is one of the most grounding and easy art projects, blending nature with personal expression. This ancient practice has seen a huge resurgence, partly thanks to community initiatives like The Kindness Rocks Project, turning found stones into powerful messages of positivity. It’s a wonderful way to create art that can be shared, hidden, and discovered by others.
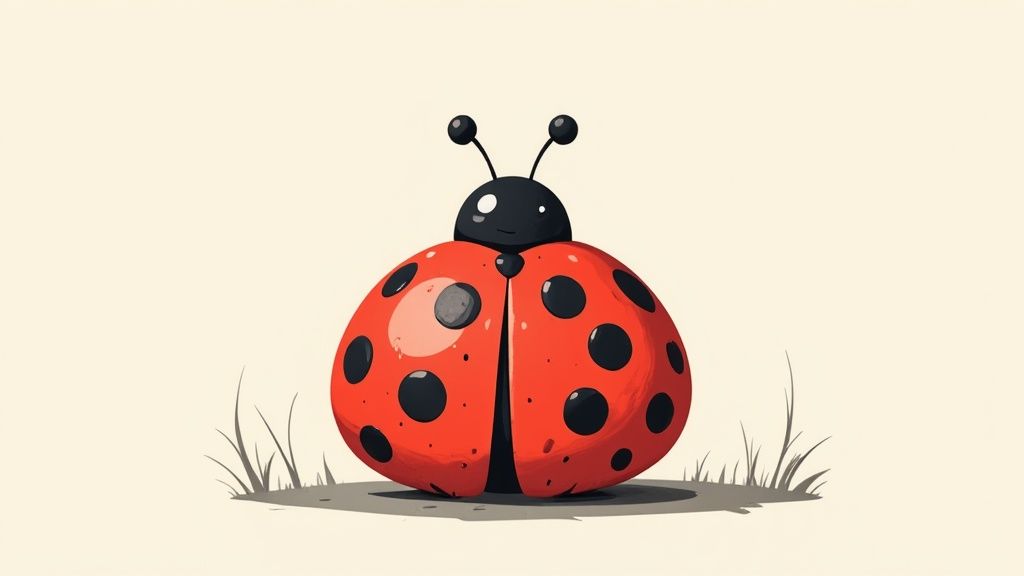
This project connects you to the natural world, starting with the hunt for the perfect smooth, flat stone. The process of painting these little canvases is incredibly therapeutic and satisfying. From tiny ladybugs and detailed mandalas to inspirational words, a simple rock offers a durable and unique surface for your ideas to take shape.
Who It's For & Why It Works
Rock painting is a versatile project that appeals to a wide audience:
- Families & Communities: It's an excellent group activity. Families can spend an afternoon painting together, then go on a "rock hunt" to hide their creations for others in the neighborhood to find. This fosters a sense of community connection and outdoor adventure.
- Adults & Crafters: For those seeking a mindful, relaxing hobby, rock painting is perfect. The small scale makes it a low-commitment project, ideal for detailed work like intricate patterns or miniature landscape scenes. They also make fantastic garden markers, paperweights, or personalized gifts.
- Teachers: In the classroom, rocks can become story prompts, painted with characters or settings. They can also be used for educational purposes, like painting letters of the alphabet, numbers, or elements of the solar system.
Actionable Tips for Better Results
To make your painted rocks stand out and last longer, follow these tips:
- Prep Your Canvas: Start by washing your rocks with soap and water to remove any dirt or grit. For a super smooth and vibrant finish, apply a base coat of white or a light-colored acrylic paint before adding your main design.
- Choose the Right Tools: Fine-tipped acrylic paint pens are fantastic for creating sharp lines and detailed designs. For broader coverage, use multi-surface acrylic paints. Toothpicks and the ends of paintbrush handles are great for making perfect tiny dots.
- Seal Your Artwork: If you plan to leave your rocks outside, protecting them is key. Apply two or three thin coats of a clear, non-yellowing sealant spray (like a UV-resistant acrylic sealer). This will protect your art from rain, sun, and wear.
For those interested in the movement that popularized this craft, learn more about The Kindness Rocks Project.
A creative activity worth losing track of time in
Type any idea and get a printable coloring page back. Five free pages to start.
3. Collage Art
Collage is the art of storytelling with scraps. It involves assembling different materials like magazine cutouts, photographs, fabric, and colored paper onto a surface to create a new, unified piece. Pioneered by artists like Picasso and Braque, this technique makes art accessible to everyone, as it relies on composition and creativity rather than traditional drawing or painting skills, making it one of the most versatile and easy art projects available.

This project is wonderfully liberating because there are no rules. You can create abstract compositions with torn paper, build detailed portraits from photo fragments, or design a powerful vision board with aspirational images and text. The process of searching for, cutting, and arranging materials is both meditative and engaging, offering a satisfying way to express ideas and emotions without the pressure of a blank canvas.
Who It's For & Why It Works
Collage art is a fantastic medium for:
- Teens and Adults: It’s a sophisticated outlet for self-expression. Creating a vision board can be a powerful goal-setting exercise, while a mixed-media family portrait combining photos and painted backgrounds makes for a deeply personal keepsake. It's a therapeutic way to sort through thoughts and ideas visually.
- Teachers: Collage is a brilliant cross-curricular tool. History students can create timelines with images and text from different eras, while literature classes can build visual representations of a novel’s themes or characters. It encourages resourcefulness and critical thinking about how different elements combine to create meaning.
Actionable Tips for Better Results
To make your collage art truly stand out, keep these tips in mind:
- Plan Loosely: Before you glue anything down, arrange your pieces on the surface. Move them around, overlap them, and play with the composition until it feels balanced and visually interesting. This experimentation phase is key.
- Vary Your Materials: The best collages have depth and texture. Mix glossy magazine images with matte construction paper, smooth fabric scraps, and even natural elements like pressed leaves. Varying the scale of your cutouts also adds significant visual interest.
- Use the Right Glue: For projects you want to last, use an acid-free adhesive like a glue stick or PVA glue. Apply a thin, even layer to prevent your paper from wrinkling or buckling as it dries. A brayer can help smooth everything down for a professional finish.
4. Watercolor Resist Art
Discover the magic of watercolor resist art, a fascinating technique where science meets creativity. This method involves using a material that repels water, like a white crayon or masking fluid, to draw a design on paper. When you brush watercolor paint over the top, the paint soaks into the exposed paper but is blocked by your resist material, creating a stunning reveal. It's one of the most satisfying and easy art projects for all ages.

The "Aha!" moment when the hidden design appears is truly captivating, making this project an instant hit with kids and adults alike. It’s an excellent way to explore concepts of cause and effect, positive and negative space, and material properties. The process is forgiving and encourages experimentation, as the final outcome is always a bit of a beautiful surprise.
Who It's For & Why It Works
Watercolor resist is particularly wonderful for:
- Teachers: It’s a perfect STEAM (Science, Technology, Engineering, Art, Math) activity. A science teacher can have students draw the water cycle with a white crayon and reveal it with a blue wash, while an art teacher can use it to teach about geometric patterns or negative space.
- Therapists: The reveal element can be a powerful metaphor in a therapeutic setting. It's also a low-pressure activity that promotes mindfulness, as the focus is on the simple, repetitive motion of painting and the satisfying result. Creating secret messages or hidden images can be a gentle way to encourage self-expression.
- Beginner Artists: If you're intimidated by watercolors, this is your entry point. The resist material acts as a guide, giving your painting instant structure and professional-looking crisp edges without requiring perfect brush control.
Actionable Tips for Better Results
To make your watercolor resist art pop, follow these tips:
- Press Firmly: When using a white crayon or oil pastel, apply firm, even pressure. This ensures a thick layer of wax is deposited, which will create a strong barrier against the watercolor paint for a cleaner, more defined line.
- Use the Right Paper: For the best results, use watercolor paper. Its texture and thickness prevent it from buckling or tearing when wet, allowing you to apply smooth, even washes of color without damaging your work.
- Experiment with Resists: Don't stop at crayons. Try using rubber cement for organic, blob-like shapes (peel it off after the paint dries), masking tape for sharp geometric lines, or even a sprinkle of salt on wet paint to create a starry, textured effect.
5. Coffee Filter Art
Coffee filters are more than just a kitchen staple; they're a magical medium for creating stunning, vibrant art. This craft leverages the unique, absorbent properties of the filter paper to produce beautiful tie-dye effects and color-bleeding patterns. When you apply water to colors drawn on the filter, the ink spreads and blends, creating ethereal designs that are surprisingly easy art projects with a professional look.
This project is a fantastic introduction to the science of color mixing and chromatography, making it a hit in both homes and classrooms. The process is simple, the materials are cheap, and the results are consistently impressive. From delicate flowers to colorful planets or even just abstract designs, coffee filter art offers a delightful and almost foolproof creative experience.
Who It's For & Why It Works
Coffee filter art is especially effective for:
- Teachers and Parents: This is an ideal STEAM (Science, Technology, Engineering, Art, Math) activity. Kids can create tie-dye patterns with washable markers and a spray bottle, learning about color separation and absorption. Projects like layered flowers for spring decorations or butterflies for a classroom display are always a success.
- Adults: The mesmerizing process of watching colors bleed and blend is incredibly therapeutic. You can create sophisticated decorations like a floral wreath for your front door or delicate, translucent window hangings that catch the light beautifully. It’s a low-stress way to engage with color theory and produce something lovely in minutes.
Actionable Tips for Better Results
To get the most out of your coffee filter art, try these tips:
- Use Washable Markers: For the best color-bleeding and tie-dye effects, washable markers are a must. Permanent markers won't run with water, so they won't produce the same beautiful, blended patterns.
- Fold for Symmetry: Before coloring, fold the filter in half, then in half again, and even a third time to create a wedge. Coloring the folded wedge and then spraying it with water will result in a stunning, symmetrical, snowflake-like design when you unfold it.
- Layer for Depth and Texture: Don't stop at one filter. Once dry, you can layer multiple colored filters on top of each other. Pinch them in the middle and secure them with a pipe cleaner to create lush, 3D flowers or fluffy pom-poms. Be gentle when handling the wet filters, as they can tear easily.
6. Painted Canvas Tote Bags
Turn a functional item into a walking piece of art. Painting on canvas tote bags is one of the most rewarding and easy art projects because it combines creativity with everyday utility. This craft involves taking a plain tote and transforming it with fabric paints, markers, stencils, or freehand designs, resulting in a unique accessory that’s both stylish and practical.
This project is fantastic for anyone who loves making things they can actually use. It’s an excellent way to express your personality, create personalized gifts, or even host a fun group activity. Best of all, it encourages sustainability by making reusable bags more appealing, blending artistic expression with an eco-conscious mindset.
Who It's For & Why It Works
Painted canvas tote bags are a great project for:
- Groups and Parties: Looking for a unique activity for a bridal shower or birthday party? Provide guests with bags and paints to create their own custom favors. It’s an engaging, memorable experience that leaves everyone with a useful keepsake.
- Parents and Kids: This is a perfect weekend or summer craft. Kids can design their own library bags featuring favorite book characters, or create a special tote for grocery trips with colorful fruit and vegetable designs. It gives them a sense of ownership and pride.
- Eco-Conscious Crafters: Adults can design sophisticated, minimalist patterns or bold abstract art for their farmers market or shopping bags. It’s a therapeutic process that results in a beautiful, functional item that reduces plastic waste.
Actionable Tips for Better Results
To ensure your custom tote bag looks professional and lasts a long time, follow these tips:
- Prevent Bleed-Through: Always slide a piece of cardboard or a thick stack of paper inside the bag before you start painting. This creates a firm surface and stops the paint from seeping through to the other side.
- Use the Right Paint: While fabric paints are ideal, you can use standard acrylic paint by mixing it with a fabric medium. This makes the paint more flexible and prevents it from cracking or flaking off when the bag is used.
- Heat-Set Your Design: After the paint has dried completely (wait at least 24 hours), you need to heat-set it. Place a thin cloth over the design and iron it on a medium-high setting (no steam) for a few minutes. This makes the design permanent and washable.
- Sketch First: For more complex or detailed designs, lightly sketch your idea onto the canvas with a pencil first. The lines will be covered by the paint and serve as a perfect guide.
7. Paper Chain Sculptures
This craft takes the classic paper chain, a staple of childhood classrooms and holiday decorating, and elevates it into a sophisticated form of sculpture. Paper chain sculptures use linked paper loops to build three-dimensional forms, turning a simple, repetitive action into one of the most dynamic easy art projects. By strategically varying color, link size, and connection points, you can create everything from abstract hanging mobiles to intricate, floor-standing structures.
The beauty of this project lies in its accessibility and scalability. A single person can create a small, elegant piece in an afternoon, or a large community can collaborate on a massive installation, with each person contributing a single link or chain. It’s a meditative process that explores concepts of connection, continuity, and how simple elements can combine to create something complex and beautiful.
Who It's For & Why It Works
Paper chain sculptures are surprisingly versatile and work well for:
- Teachers and Community Leaders: This is a perfect collaborative project. Imagine a school-wide installation where each student contributes a chain in a specific color to build a giant rainbow mural. It’s a powerful visual representation of teamwork and individual contribution.
- Adults Seeking a Mindful Craft: The repetitive nature of cutting strips and looping them together is incredibly calming. You can create geometric sculptures exploring mathematical patterns or organic, free-flowing forms that twist and turn. It’s an art form that grows organically, making it a low-pressure way to engage your creativity. Beyond simple paper chains, if you're interested in exploring a wider range of connected forms, you might find inspiration in various chain art projects.
Actionable Tips for Better Results
To take your paper chains from simple decorations to true sculptures, follow these tips:
- Plan Your Palette: Don’t just use random colors. Plan a color progression, like an ombre fade from dark blue to light blue, or use a specific palette to create a cohesive design. The visual impact of a well-planned color scheme is significant.
- Vary Link Size: Using links of different lengths and widths adds texture and dynamism to your sculpture. Tighter, smaller loops can form a dense core, while longer, wider loops can create a sense of openness and movement.
- Choose Sturdier Paper: For sculptures that need to support their own weight, standard copy paper won't cut it. Use cardstock or construction paper for better structural integrity. Creating a small template from cardboard will also help you cut consistently sized links quickly.
8. Handprint Art
Handprint art is one of the most personal and sentimental easy art projects you can tackle. It transforms a simple handprint into a timeless keepsake by using painted hands as stamps. This technique captures a precious moment in time, turning a child’s hand shape into charming compositions like animals, flowers, or family trees. It's an art form that literally grows with you.
This project is beloved for its ability to create deeply meaningful art with minimal artistic skill. The focus isn't on perfection but on the personal touch. For parents, it’s a beautiful way to document a child’s growth, while for anyone, it’s a fun, tactile experience that connects you directly to your creation. It’s messy, memorable, and full of heart.
Who It's For & Why It Works
Handprint art is a wonderful activity for:
- Parents and Grandparents: It’s the perfect way to create cherished mementos. Make a family "handprint tree" where each family member contributes a print as a leaf, or create a series of canvases over the years to track a child's growth. These pieces become priceless decorations and gifts.
- Teachers: In a classroom setting, handprints are great for collaborative projects. A class can create a garden scene with handprint flowers or a flock of birds for a bulletin board. It’s an excellent way to foster a sense of community and teamwork.
Actionable Tips for Better Results
To get clean, creative handprints every time, follow these tips:
- Use the Right Paint: Always use non-toxic, washable paint designed for skin, like tempera or finger paint. This ensures safety and makes cleanup a breeze.
- Be Prepared for Mess: This is not a neat and tidy project. Have a stack of wet wipes or a damp towel right next to your paper for immediate cleanup after each print. Cover your work surface completely.
- Practice First: Before committing to your final canvas or paper, do a few practice prints on a scratch sheet. This helps you figure out the right amount of paint and the best way to press the hand down (fingers together or splayed) for the desired effect.
- Enhance with Details: Once the handprint base is dry, bring it to life. Use a fine-tip marker or a small paintbrush to add eyes to a handprint turkey, a stem to a handprint flower, or names and dates under each print.
For more hands-on fun, explore these creative activities for preschoolers that turn simple actions into art.
9. String Art
String art turns simple lines into complex and beautiful designs. This satisfying technique involves wrapping colored thread or yarn around strategically placed nails or pins to create geometric patterns, abstract shapes, or even detailed images. It’s a wonderful blend of mathematical precision and artistic freedom, making it one of the more structured yet incredibly creative easy art projects available.
The project starts with a sturdy base, typically a painted or stained piece of wood, and a printed template of your chosen design. By hammering nails along the template’s outline and then removing the paper, you create a framework. The real magic happens as you weave the string from nail to nail, watching the layers of thread build up into a vibrant, three-dimensional-looking piece.
Who It's For & Why It Works
String art is a versatile craft that appeals to a wide range of creators:
- Teens and Adults: This project is perfect for those who enjoy a process-oriented craft. The methodical act of wrapping the string is incredibly therapeutic and relaxing. It’s ideal for creating personalized home decor, like a geometric mandala for the living room or a heart-shaped piece for a Valentine's Day gift.
- Educators: Teachers can use string art to make subjects like geometry and mathematics tangible and fun. Students can explore angles, shapes, and patterns in a hands-on way that reinforces classroom learning.
Actionable Tips for Better Results
To ensure your string art looks sharp and professional, keep these tips in mind:
- Plan Your Placement: Before you start hammering, use graph paper to map out your nail positions. This ensures your final design is symmetrical and well-proportioned. A printed template taped to the wood is a foolproof guide.
- Maintain Tension: The key to clean lines is consistent string tension. Pull the string taut as you wrap it around each nail, but not so tight that it bends the nails or strains the thread.
- Choose Contrasting Colors: To make your design pop, select a string color that contrasts sharply with your background board. For more complex pieces, use multiple colors to define different sections and add depth. The careful wrapping and pulling also make it a great activity for developing dexterity, much like these other fine motor skills development activities.
Easy Art Projects Comparison Matrix
| Art Form | Implementation Complexity 🔄 | Resource Requirements ⚡ | Expected Outcomes 📊 | Ideal Use Cases 💡 | Key Advantages ⭐ |
|---|---|---|---|---|---|
| Paper Plate Art | Low 🔄 | Minimal, inexpensive basic supplies ⚡ | Quick, fun, decorative artworks 📊 | Kids crafts, quick projects, beginners | Budget-friendly, easy cleanup, versatile ⭐ |
| Rock Painting | Low to Medium 🔄 | Natural rocks + acrylic paints ⚡ | Portable, weather-resistant decorated stones 📊 | Outdoor projects, gifts, nature art | Free canvas, lasting keepsakes, meditative ⭐ |
| Collage Art | Medium 🔄 | Recycled materials, adhesives ⚡ | Personal, expressive mixed media art 📊 | Vision boards, scrapbooking, all ages | Eco-friendly, no drawing needed, highly creative ⭐ |
| Watercolor Resist Art | Low 🔄 | Watercolors, resist tools (crayons etc.) ⚡ | Dramatic contrasting paintings 📊 | Educational, beginner-friendly painting | Forgiving, quick professional effect, engaging ⭐ |
| Coffee Filter Art | Low 🔄 | Coffee filters, markers, water ⚡ | Color-bleed, translucent artworks 📊 | Color theory, science-art fusion | Budget-friendly, quick drying, unique effects ⭐ |
| Painted Tote Bags | Medium 🔄 | Fabric paints, canvas bags ⚡ | Functional, personalized wearable art 📊 | Gifts, sustainability, practical art | Durable, eco-conscious, large design space ⭐ |
| Paper Chain Sculptures | Low to Medium 🔄 | Colored paper, glue ⚡ | Modular 3D sculptures, decorations 📊 | Group projects, events, spatial learning | Collaborative, inexpensive, motor skill development ⭐ |
| Handprint Art | Low 🔄 | Non-toxic paint, paper ⚡ | Sentimental keepsakes, family gifts 📊 | Family memory projects, toddler art | Easy, no skill required, meaningful ⭐ |
| String Art | Medium to High 🔄 | Wood/cork board, nails, thread ⚡ | Geometric, precise linear art 📊 | Math-art fusion, advanced kids/adults | Develops spatial thinking, durable, visually striking ⭐ |
Your Next Masterpiece Awaits
We’ve journeyed through a vibrant landscape of creativity, exploring everything from the charming simplicity of paper plate animals to the striking geometry of string art. You've seen how everyday objects like rocks, coffee filters, and even your own handprints can become the foundation for something truly special. These nine easy art projects are more than just a way to pass the time; they are gateways to mindfulness, self-expression, and connection.
The core lesson woven through each project is that art doesn't require a formal studio or years of training. Creativity is an innate human trait waiting to be unlocked. The true magic happens when you give yourself permission to play, to experiment, and to embrace the process without being fixated on a perfect outcome.
Key Takeaways for Your Creative Journey
Let's distill the most important insights from our exploration. Think of these as your creative compass, guiding you as you begin your next project.
- Materials Are All Around You: You don’t need to spend a fortune at a high-end art supply store. Your kitchen pantry (coffee filters), your backyard (rocks), and your recycling bin (paper plates) are treasure troves of potential. The most innovative art often comes from the most unexpected sources.
- Process Over Perfection: Whether you're blending watercolors or carefully painting a tote bag, the real value lies in the act of creating. Focus on the feeling of the brush in your hand, the joy of seeing colors mix, and the satisfaction of bringing an idea to life. This mindset is the key to unlocking a sustainable and joyful creative practice.
- Art is for Everyone: We've covered projects perfect for a rainy afternoon with kids, a relaxing evening for adults, or a therapeutic session. The universal accessibility of these easy art projects proves that age and skill level are not barriers to creativity. Art is a shared language.
- Function Meets Fun: Projects like painted canvas tote bags demonstrate that your art can be both beautiful and useful. Creating something you can wear or use adds another layer of satisfaction and allows you to share your creativity with the world in a practical way.
Your Actionable Next Steps
Feeling inspired? The momentum is yours. Don't let that creative spark fade. Here’s how to turn inspiration into action, starting right now.
- Choose One Project: Don't overwhelm yourself. Look back at the list and pick the one project that genuinely excites you the most. Is it the tactile nature of rock painting? The surprising patterns of watercolor resist? Start there.
- Gather Your Supplies: Make a simple list of what you need. Most of these projects require minimal, low-cost materials you might already have. The act of gathering your tools is the first concrete step toward making art.
- Set the Scene: Carve out a small pocket of time and a dedicated space, even if it's just a corner of your kitchen table. Put on some music, silence your notifications, and give yourself the gift of focused creative time.
Remember, the goal isn’t to replicate what you’ve seen but to use it as a launchpad for your own unique vision. If you're looking for even more ways to get those creative juices flowing for your next masterpiece, you might want to explore more creative content ideas to further inspire your work.
Ultimately, engaging in these projects builds more than just a collection of crafts; it builds confidence. Each painted rock, each paper chain sculpture, is a small victory that says, "I can make things. I am creative." So go ahead, make your mark. Your next masterpiece isn't some far-off, unattainable goal. It's waiting for you in a splash of paint, a folded piece of paper, or a simple line drawn with care.
Ready to jumpstart your creativity instantly? ColorPageAI can generate a unique, high-quality coloring page from any text description you can imagine. It's the perfect way to warm up your artistic muscles or create a custom activity for any occasion. Try ColorPageAI now and bring your ideas to life in seconds
A creative activity worth losing track of time in
Type any idea and get a printable coloring page back. Five free pages to start.