10 Simple Art Projects to Spark Your Creativity
April 20, 2025
Get Ready to Create!
Want fun and easy ways to get creative? This list of 10 simple art projects is perfect for anyone, regardless of skill level. From watercolor postcards to zentangle drawing and shibori fabric dyeing, discover exciting ways to express yourself with minimal supplies. These simple art projects offer engaging activities for kids, relaxing experiences for adults, and unique opportunities to explore different art forms like paper collage art, mandala stone painting, and string art. So grab some materials and get ready to unleash your creativity!
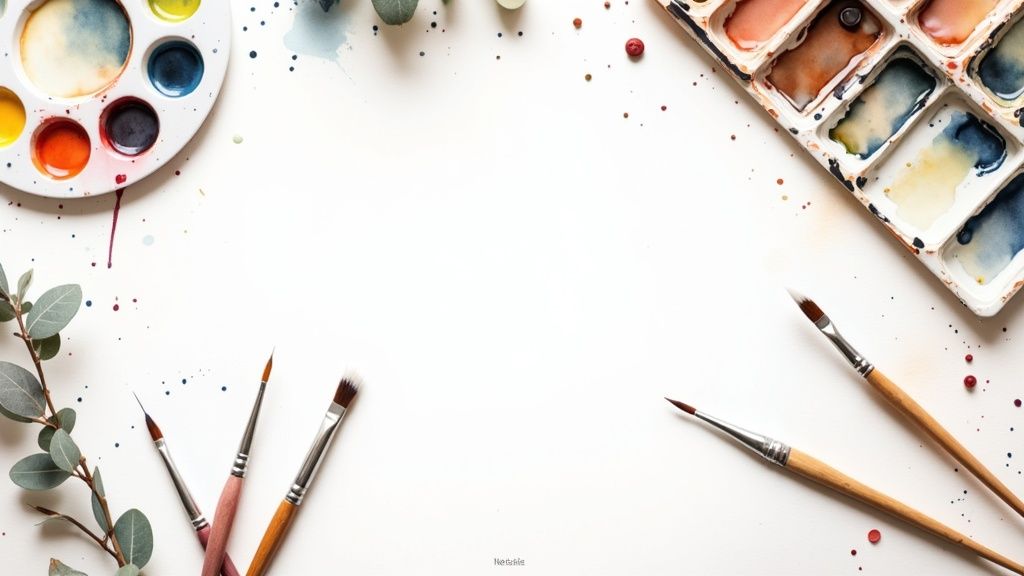
1. Watercolor Postcard Paintings
Looking for a simple art project that’s both fun and functional? Watercolor postcard paintings are a fantastic way to explore your creativity, whether you’re a seasoned artist or a complete beginner. This project combines the beauty of watercolor painting with the practicality of postcards, letting you create miniature masterpieces that can be mailed to loved ones, framed as small art pieces, or kept as a personal reminder of a moment in time. It’s a perfect addition to any list of simple art projects because it's affordable, accessible, and produces charming results quickly.
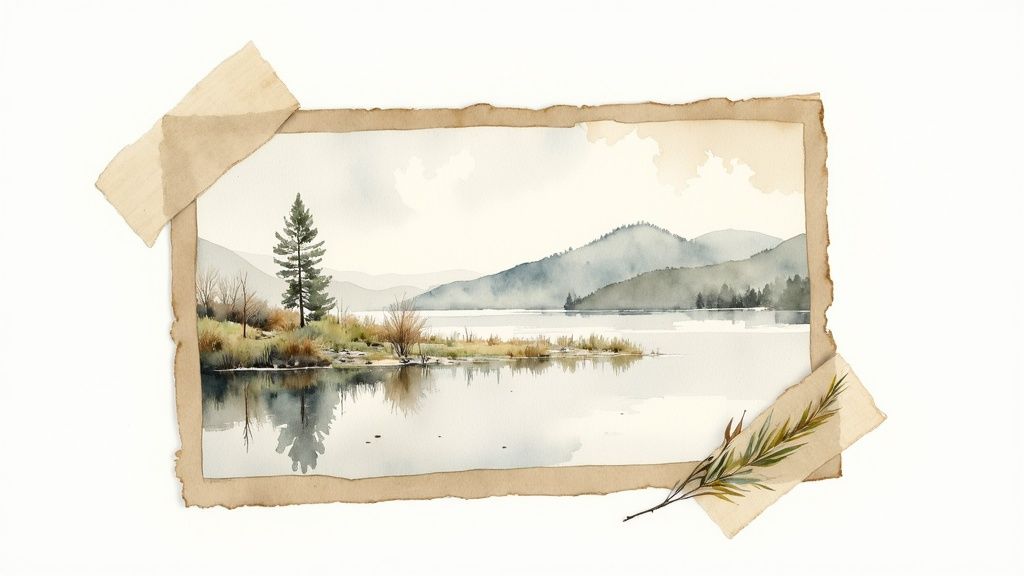
Essentially, you're creating miniature watercolor paintings on postcard-sized paper. The small-scale format and quick drying time of watercolors make this an ideal project for busy schedules or those new to the medium. You can experiment with different watercolor techniques, from light washes and layering to adding pen details for extra flair. Imagine painting a quick landscape on your travels and sending it as a unique souvenir, or creating a batch of personalized thank you notes for a special occasion.
Artists like Molly Hashimoto, known for her stunning nature-themed postcards, and even classic illustrators like Beatrix Potter, who frequently used miniature studies, demonstrate the power of this small format. The practice is also a cornerstone of contemporary mail art exchanges, proving that art can be both intimate and shared.
Why This Project is a Winner:
- Low Material Cost: All you need is watercolor paper, paints, brushes, and maybe some masking tape.
- Relatively Quick to Complete: The small size allows for quicker completion than larger paintings, perfect for short bursts of creativity.
- Easy to Mail to Friends and Family: Share your art with loved ones near and far.
- Can be Produced in Batches: Create a series of themed postcards or gifts.
- Great for Beginners: The smaller scale makes it less intimidating and easier to manage water control.
Things to Keep in Mind:
- Limited Size Can Be Restrictive: Detailed subjects might be challenging to execute on a small scale.
- Paper May Warp if Too Much Water is Used: Use heavier watercolor paper (like 140lb) and allow layers to dry to minimize warping.
- Requires Some Basic Understanding of Watercolor Behavior: A little practice goes a long way!
Tips for Creating Stunning Watercolor Postcards:
- Use 140lb watercolor paper cut to postcard size (approximately 4x6 inches).
- Apply masking tape around the edges for a clean, professional border.
- Start with light washes and gradually build up layers of color.
- Let each layer dry completely before adding details.
- Consider adding pen details, like outlines or fine lines, after the painting is dry.
When and Why to Choose This Project:
This project is ideal for anyone looking for a simple yet rewarding art experience. It's great for:
- Parents and children: A creative and personalized activity.
- Individuals seeking a therapeutic and relaxing experience: The focus required for watercolor can be incredibly calming.
- Teachers: A fun and engaging classroom activity.
- Anyone who wants to create personalized, handmade gifts: Postcards are a unique and thoughtful way to show you care.
Watercolor postcard painting is more than just a simple art project; it’s a gateway to exploring your artistic potential, connecting with others, and adding a touch of handmade beauty to your life. So grab your supplies and start creating!
2. Paper Collage Art
Looking for a fun and easy way to dive into the world of simple art projects? Look no further than paper collage! This fantastically versatile art form involves arranging and gluing various types of paper onto a surface to create anything from a recognizable image to a completely abstract masterpiece. It's a perfect addition to this list because it's accessible to virtually anyone, regardless of age or artistic skill. You don't need to be a drawing whiz – composition and color relationships are the real stars of the show here.
So how does it work? Simply gather your materials – think magazines, newspapers, colored construction paper, tissue paper, wrapping paper, even old ticket stubs or maps! – and start snipping or tearing. You can cut out specific shapes or create interesting textures with rough tears. Then, arrange your paper pieces on your chosen surface (cardboard, canvas, or even a piece of heavy paper work well) and glue them down. Experiment with overlapping pieces, contrasting colors, and different textures to achieve your desired effect. It's a bit like putting together a puzzle, but you make the pieces and the picture!
The beauty of paper collage is its boundless creative freedom. You can create anything you can imagine! Want to depict a bustling city scene? Grab some newspaper clippings and colorful magazine ads. Feeling inspired by nature? Use torn pieces of green and brown paper to create a textured forest. The possibilities are endless. And the best part? Mistakes are easily fixed! Just cover them up with another piece of paper. This forgiving nature makes it one of the most enjoyable simple art projects out there.
Famous artists like Henri Matisse, Pablo Picasso, and Romare Bearden have shown the world the incredible power of collage, creating everything from simple, vibrant compositions to complex, narrative pieces. Their work demonstrates how this seemingly simple technique can produce truly stunning results.
Here are a few tips to get you started:
- Use acid-free glue for longevity: This will prevent your artwork from yellowing or deteriorating over time.
- Work from background to foreground: This helps create depth and dimension in your collage.
- Look for interesting textures and patterns in papers: This adds visual interest and complexity to your piece.
- Try different adhesives for different effects: Regular white glue, glue sticks, and even mod podge can create unique textures.
- Use a bone folder to eliminate air bubbles: This tool is handy for smoothing out glued-down paper and achieving a professional finish.
Pros:
- Inexpensive using found materials: Raid your recycling bin and turn trash into treasure!
- Very accessible for all ages and skill levels: No artistic experience required!
- Mistakes easily fixed: Simply layer more paper over any errors.
- Can incorporate meaningful materials like ticket stubs or maps: Add a personal touch to your artwork.
Cons:
- Can be messy with glue and paper scraps: Have a designated work area and some cleaning supplies handy.
- Archival concerns with some papers: Some papers may fade or deteriorate over time. Using acid-free glue can help mitigate this.
- May require planning for complex designs: Sketching out your design beforehand can be helpful for intricate collages.
Paper collage is a fantastic way to unleash your creativity, upcycle existing materials, and create unique, personalized art. Whether you're looking for a fun activity for kids, a relaxing pastime for yourself, or a way to explore your artistic side, paper collage is a simple art project that offers endless possibilities.
A creative activity worth losing track of time in
Type any idea and get a printable coloring page back. Five free pages to start.
3. Mandala Stone Painting
Mandala stone painting is a super fun and easy way to unleash your inner artist while enjoying the calming benefits of creating intricate patterns. It's all about taking smooth stones or pebbles and transforming them into miniature works of art using acrylic paint and simple tools. The core of this craft lies in creating dot-based patterns, often taking the form of beautiful, symmetrical mandalas. This meditative practice combines natural elements with precise geometric designs to create beautiful decorative objects, making it a perfect addition to our list of simple art projects. It's a fantastic way to connect with nature and create something beautiful at the same time!
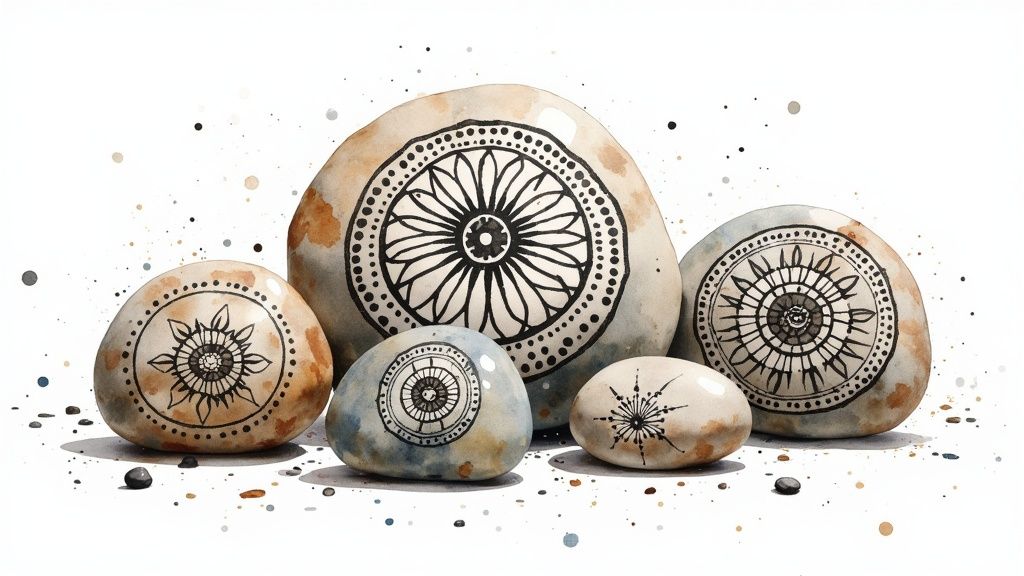
This simple art project works by applying dots of paint in varying sizes and colors to create intricate designs. You can start with simple geometric patterns or dive into more complex mandala designs. The dotting technique is surprisingly easy to pick up, even for beginners, and the results are always impressive. Think of artists like Elspeth McLean and her stunning 'Jewel Drop' painted stones. You can even participate in community rock painting projects like 'The Kindness Rocks Project,' spreading joy and creativity one stone at a time. You can Learn more about Mandala Stone Painting to get a better grasp of the techniques and possibilities.
One of the best things about mandala stone painting is how accessible it is. Stones are readily available – you can find them in your backyard, on a nature walk, or even purchase them inexpensively. This makes it a budget-friendly activity for both kids and adults. Plus, the finished products are durable and can be displayed indoors or outdoors, adding a personal touch to your home or garden. It's also a fantastic way to introduce children to the concept of symmetry and geometric design in a playful and engaging manner.
Here are a few tips to get you started:
- Prep your canvas: Wash and thoroughly dry your stones before painting to ensure the paint adheres properly.
- Base coat boost: Apply a base coat of acrylic paint to provide a smooth surface for your dots and make the colors pop.
- Dotting tools: You don't need fancy tools! Pencil erasers, skewers, the end of a paintbrush, or even toothpicks can be used to create different sized dots.
- Center outwards: When creating mandalas, start from the center and work your way outwards for a balanced design.
- Seal the deal: For stones displayed outdoors, seal them with a clear varnish to protect them from the elements.
Pros:
- Budget-friendly: Stones are free or very inexpensive.
- Therapeutic: The repetitive dotting process can be incredibly meditative and relaxing.
- Durable art: Creates long-lasting art that can be enjoyed indoors or out.
- Scalable complexity: Designs can be as simple or as complex as you like.
Cons:
- Requires patience: Intricate designs can be time-consuming.
- Steady hands: A certain level of dexterity is helpful.
- Stone limitations: The shape and texture of available stones can sometimes limit design options.
Mandala stone painting deserves its place on this list of simple art projects because it’s accessible, therapeutic, and yields beautiful, lasting results. It’s a perfect activity for anyone seeking a creative outlet, whether you’re a seasoned artist or just looking for a fun and relaxing way to spend an afternoon.
4. Pressed Flower Art
Looking for simple art projects that connect you with nature? Pressed flower art is a beautiful and surprisingly easy craft that lets you preserve the ephemeral beauty of flowers and leaves. This is a fantastic addition to our list of simple art projects because it requires minimal supplies, offers a relaxing activity, and results in stunning, unique artwork. It’s perfect for parents looking for a nature-inspired activity with their kids, adults searching for a mindful hobby, or anyone who appreciates the beauty of the natural world.
Essentially, you're creating flattened botanical specimens and then arranging them into delicate compositions. These can be framed, used to decorate cards, incorporated into resin jewelry, or even used as bookmarks. This traditional craft seamlessly blends art with botany, allowing you to appreciate the intricate details of plants while creating something beautiful. Think of it as capturing a fleeting moment of natural beauty and transforming it into a lasting piece of art.
Here’s how it works:
-
Gathering and Pressing: Collect flowers and leaves (ferns, petals, small blossoms work best). Place them between absorbent paper (newspaper, blotting paper, or even coffee filters work well) inside a heavy book or a dedicated flower press. The key is to distribute the weight evenly and ensure the plants are lying flat to prevent wrinkles. This drying process usually takes 2-4 weeks.
-
Arranging and Gluing: Once your botanicals are completely dry and flat, carefully arrange them on acid-free paper or cardstock. Play around with different layouts before committing to a final design. Use acid-free glue (like PVA glue) applied with a toothpick for precise and delicate attachment.
-
Framing and Displaying: Once your glue is dry, you can frame your pressed flower artwork behind glass to protect it from dust and humidity. You can also use your creations to decorate cards, bookmarks, or other paper crafts.
Pressed flower art has a rich history. Victorian-era women filled albums with pressed flowers, often as a way to document the plants they encountered. The Japanese art of oshibana also utilizes pressed flowers in intricate and symbolic arrangements. Today, contemporary botanical artists like Mary Jo Hoffman continue to push the boundaries of this medium, creating stunning works of art. Seeing these examples can inspire your own creations!
Pros:
- Free Materials: Gather flowers and leaves from your garden, a local park (respecting park rules, of course!), or even roadside weeds.
- Connection with Nature: The process of collecting and preserving plants fosters a deeper appreciation for the natural world.
- Lasting Botanical Records: Your pressed flower art becomes a beautiful record of the plants you've collected.
- Simple Process: Requires minimal equipment and is easy to learn.
Cons:
- Advance Planning: The drying process requires patience (2-4 weeks).
- Color Fading: Colors may fade over time, especially if exposed to direct sunlight.
- Fragility: Dried flowers and leaves are delicate and can break easily.
- Seasonality: The availability of fresh flowers and leaves depends on the season.
Tips for Success:
- Press flowers face-down to preserve the details of the petals and leaves.
- Experiment with different types of paper and cardstock for your background.
- Consider the season and plan your projects accordingly. Spring and summer offer the greatest variety of flowers, while autumn provides beautiful foliage.
- Small tweezers can be helpful for precise placement of delicate petals.
Pressed flower art is more than just a simple art project; it’s a journey of connecting with nature, exploring your creativity, and creating lasting botanical treasures. Give it a try and see the beauty you can create from the simplest of natural materials.
5. String Art
Looking for a simple art project that packs a visual punch? String art might be just the thing! This cool technique involves wrapping colored thread or wire around nails hammered into a board. It's a fantastic way to create everything from geometric patterns to representational images, and the tension of the strings creates a really interesting 3D effect. This definitely earns its spot on our list of simple art projects because it's inexpensive, visually appealing, and can be adapted for a wide range of skill levels. Want a unique piece of art for your wall or a personalized gift? String art is a great option.
So how does it work? Basically, you create a design by outlining it with nails on a wooden board (or even a piece of corkboard). Then, you meticulously wrap string or wire around the nails, filling in the design. The contrast between the negative space and the colorful string creates the image. The tension you maintain while stringing is key; it's what gives string art its unique dimensional look.
String art offers a unique blend of geometric precision and artistic expression. Features like the interplay of negative and positive space, and the depth created by string tension, really set this apart from other simple art projects. You can create anything from a simple star to a complex portrait – the only limit is your imagination!
String art's roots can be traced back to the 19th century with Mary Everest Boole's "curve stitching" method, which was designed for teaching mathematical concepts. It later saw a resurgence in popularity as a craft form in the 1970s and is enjoying another wave in contemporary DIY home decor. Check out the geometric string installations by Nike Savvas for some truly inspiring examples! You can even learn more about String Art online for inspiration and techniques.
Pros:
- Inexpensive materials: You just need string, nails, and a board.
- Educational: Teaches spatial relationships and geometric principles.
- Visually stunning: Creates interesting optical effects and a high visual impact.
- Durable: The finished product is quite robust.
Cons:
- Planning required: You'll need to plan your nail placement carefully.
- Time-consuming: Intricate designs can take a while.
- Noise & Safety: Hammering nails can be noisy and requires caution to avoid finger injuries.
Tips for Success:
- Plan it out: Use graph paper to plan your nail placement accurately.
- Pre-drill: Pre-drilling holes in your board will prevent the wood from splitting.
- Secure the string: Wrap your thread around each nail several times to secure it.
- Consistent tension: Maintain an even tension while stringing for the best results.
- Start simple: Begin with basic geometric shapes before tackling complex designs.
Whether you’re a parent seeking a fun activity for your kids, an adult looking for a relaxing hobby, or a teacher wanting to engage students with a hands-on project, string art is a rewarding and creative choice. It’s a great example of how a simple art project can produce amazing results, making it a worthy addition to this list.
6. Hand-Built Clay Pinch Pots
Looking for simple art projects that connect you with an ancient art form? Hand-built clay pinch pots are a fantastic option, and they definitely deserve a spot on this list! This fundamental pottery technique is all about getting your hands dirty and shaping clay into small vessels by, well, pinching! It's incredibly tactile and a perfect example of a simple art project that can result in beautiful, one-of-a-kind creations.
So how does it work? You start with a ball of clay. Press your thumb into the center, and then use your thumb and fingers to pinch and thin the walls, gradually shaping the clay into a pot, bowl, or whatever form you desire. It's that straightforward! No fancy pottery wheel is required, just your hands and a bit of clay. This direct contact with the material is incredibly satisfying and makes the process both therapeutic and meditative. Want to learn more? Learn more about Hand-Built Clay Pinch Pots
Think about prehistoric pottery from cultures around the globe – that's the root of this technique! And it continues to inspire artists today, from the iconic blackware of Maria Martinez of San Ildefonso Pueblo to contemporary artists like Sheila Hicks. These examples showcase the versatility and artistic potential of this seemingly simple method.
Why Pinch Pots are Perfect for Simple Art Projects:
- Accessibility: It's a low-tech process and a great entry point into the world of ceramics. You can even use air-dry clay if you don't have access to a kiln, making it super accessible for beginners.
- Tactile Fun: The immediate tactile feedback you get from working with clay is incredibly engaging and satisfying, making it a fun activity for both kids and adults.
- Organic Results: Each pinch pot is unique and bears the mark of the maker's hand. No two will ever be exactly alike!
- Connection to History: This method connects you to a long and rich history of pottery-making across cultures.
Pros:
- Accessible entry point to ceramics
- Immediate tactile feedback
- Low-tech process
- Can be done with air-dry clay
- Therapeutic and meditative
Cons:
- Limited size potential
- Less precise than wheel-throwing
- Firing requires access to a kiln (unless using air-dry clay)
- May crack if walls are uneven thickness
Tips for Pinch Pot Success:
- Keep it Moist: Have a small bowl of water handy to dip your fingers in and prevent the clay from drying out too quickly.
- Even Walls: Aim for even wall thickness to prevent cracking during drying and firing.
- Smooth Operator: Use a wooden tool or even the back of a spoon to smooth out the surface of your pot.
- Slow and Steady: Allow your pinch pot to dry slowly under plastic to prevent cracking.
- Decorate!: Once dry, consider adding simple decorations. Impressing textures, carving designs, or applying oxide stains are all great options.
Whether you're a parent looking for a creative activity for your kids, an adult seeking a relaxing hobby, or a teacher looking to introduce your students to a new art form, hand-built pinch pots are a perfect choice. They’re a testament to how simple art projects can be both engaging and rewarding, resulting in beautiful and personal creations.
7. Monoprinting with Found Objects
Looking for a simple art project that yields surprisingly stunning results? Monoprinting with found objects is your answer! This unique printmaking technique earns its spot on our list because it's accessible, inexpensive, and produces truly one-of-a-kind art. It's a fantastic way to unleash your creativity, whether you're a seasoned artist or just looking for a fun, simple art project to try.
So, what exactly is monoprinting? It's a process where you arrange objects – think leaves, string, textured fabric scraps, or even household items like bubble wrap or lace – onto an inked surface. Then, you press a piece of paper on top, transferring the ink and creating a print that captures the shape and texture of the objects. Because you're essentially creating a stamp with your arrangement, each print is unique – you can't exactly duplicate the results, adding to the magic!
Think of it like a simplified version of printmaking combined with collage. You get to play with composition and texture, and the results are both immediate and rewarding. This simple art project is perfect for sparking creativity in both kids and adults. Imagine the fun you can have experimenting with different textures and creating your own personalized designs!
Why Monoprinting Rocks:
- No fancy equipment: No press needed! A smooth surface like a piece of plexiglass or even a cookie sheet works perfectly.
- Inexpensive materials: You can use things you already have around the house. A little ink goes a long way, and the possibilities for found objects are endless.
- Spontaneous and experimental: The process encourages you to play and see what happens. There's no right or wrong way to do it.
- Quick results: No long drying times! You can peel back the paper and admire your creation almost instantly.
- Perfect for groups: This is a great activity for classrooms, parties, or family art time.
A Few Things to Keep in Mind:
- Limited editions: You only get one or a few good prints from each setup. Embrace the uniqueness!
- Less precise: Monoprinting is all about embracing the organic and unpredictable nature of the process. It's less about precise lines and more about exploring textures and shapes.
- Can be messy: Ink can get on hands and surfaces, so be prepared with some newspaper or a drop cloth.
Tips for Monoprinting Success:
- Thin is in: Roll a thin, even layer of ink onto your smooth surface.
- Plan your masterpiece: Take a moment to arrange your objects thoughtfully before pressing the paper.
- Apply even pressure: Use a wooden spoon, a baren (a Japanese printmaking tool), or even the bottom of a flat glass to ensure a good transfer.
- Experiment with paper: Try printing on different colors and types of paper to see how it affects the final result.
- Cleanup crew: Clean your materials promptly after use to prevent staining.
Inspiration and History:
Monoprinting has a rich history, with artists like Paul Gauguin using a similar technique called "trace monotypes". It's a popular activity in children's art education and continues to be explored by contemporary artists like Emily Payne, known for her beautiful botanical prints.
This simple art project is a fantastic way to explore your creativity and make something beautiful. So gather your materials, embrace the unexpected, and enjoy the process!
8. Tissue Paper Stained Glass
Want to create stunning "stained glass" art without the, well, glass? Tissue paper stained glass is a fantastically simple art project perfect for brightening up any space. This technique mimics the look of stained glass by adhering colorful tissue paper to a transparent surface. When light shines through, the translucent paper creates vibrant and colorful projections, making it a magical addition to windows, suncatchers, or even lampshades. It's a simple, yet effective way to introduce color and light into your home or classroom, and it's definitely deserving of a spot on our list of simple art projects.
The beauty of this project lies in its simplicity and versatility. By layering different colors of tissue paper, you can create new hues and experiment with color mixing in a fun, hands-on way. This accessible version of the stained-glass concept is perfect for both kids and adults, offering a low-cost and safe way to explore artistic expression. Whether you're a parent looking for a rainy-day activity, a teacher decorating your classroom, or simply someone looking to add a touch of color to your life, tissue paper stained glass is a winner. It's a quick project that yields beautiful results, demonstrating that simple art projects can be incredibly impactful.
Here are some fantastic examples of how you can use tissue paper stained glass:
- Classroom window decorations: Transform a dull classroom into a vibrant learning environment with colorful tissue paper creations themed around current lessons or upcoming holidays.
- Seasonal holiday crafts: From spooky Halloween ghosts to festive Christmas ornaments, tissue paper stained glass is a perfect medium for creating holiday-themed decorations.
- DIY suncatchers: Design your own unique suncatchers and hang them in windows to enjoy the interplay of light and color.
Ready to give it a try? Here are a few tips to make your tissue paper stained glass project a success:
- Cut it up: Cut your tissue paper into small pieces, squares, or abstract shapes for easier handling and layering.
- Blend those colors: Overlap different colored tissue paper pieces to create new hues and add depth to your design.
- Sticky situation: Use liquid starch or diluted white glue applied with a brush to adhere the tissue paper to your chosen transparent surface (wax paper or clear contact paper work well).
- Define the edges: Create an outline with black construction paper or a permanent marker for more defined edges and a polished look.
- Let there be light: Display your finished piece where direct light will shine through to maximize the vibrant color effects.
Pros: Very low cost, safe for young children, creates dramatic light effects, no special tools required, quick to complete.
Cons: Not very durable, colors may fade with prolonged sun exposure, limited detail capability, may require replacement after extended display.
This simple art project has been popularized by school art teachers, craft bloggers, and children's museums, proving its effectiveness and widespread appeal. So, gather your materials and let your creativity shine!
9. Shibori Fabric Dyeing
Looking for a simple art project that packs a punch of color and creativity? Shibori fabric dyeing might be just what you're after. This traditional Japanese resist dyeing technique is a fantastic way to transform ordinary fabric into unique, wearable art, making it a perfect addition to our list of simple art projects. Even better, it's an activity that can be enjoyed by people of all ages and skill levels, from kids looking for a fun afternoon project to adults seeking a relaxing and creative outlet.
Shibori involves folding, twisting, binding, or compressing fabric before dipping it in dye. These manipulations act as a resist, preventing the dye from reaching certain areas of the fabric and creating stunning patterns. It’s a bit like tie-dye's sophisticated older sibling. The magic of shibori lies in its unpredictable nature – you never know exactly what you’ll get, which adds to the excitement and makes every piece truly one-of-a-kind.
How does it work? Imagine crumpling up a piece of cloth and tying it tightly with string. Then, you dunk it into a vibrant indigo dye bath. When you finally unwrap the fabric, the areas protected by the string remain undyed, revealing intricate patterns against the rich blue background. That's shibori in a nutshell!
Examples of Shibori Magic:
Think beyond tie-dye t-shirts (though those are cool too!). Traditional Japanese indigo shibori textiles are stunning examples of this art form. Today, you’ll find shibori techniques popping up everywhere, from high-end fashion runways to trendy home décor like pillows and curtains. It’s a truly versatile technique with endless possibilities.
Tips for Shibori Success:
- Start small and simple: Beginners should start with small cotton items like handkerchiefs or bandanas.
- Rubber bands are your friends: These everyday household items are a great tool for binding and creating interesting patterns.
- Pre-wash your fabric: This removes any sizing or finishes that might interfere with dye absorption.
- Follow dye instructions carefully: This will ensure vibrant, colorfast results.
- Document your folds: Take pictures or make notes of your folding techniques so you can recreate your favorite patterns.
Pros and Cons of Shibori:
Pros:
- You can use natural or synthetic dyes, giving you a wide range of color choices.
- You can create wearable art like scarves and clothing or decorative pieces for your home.
- The resulting patterns can range from precise geometric designs to more free-flowing, organic shapes.
- The process teaches the basic principles of resist dyeing, a valuable skill for any aspiring textile artist.
- Works beautifully on natural fabrics like cotton, silk, and linen.
Cons:
- Dyeing can be a messy process, so make sure you have a dedicated workspace and protect your clothes.
- Results can be unpredictable, especially for beginners. Embrace the surprises!
- Proper dye disposal is important for environmental safety. Follow the manufacturer's instructions carefully.
- Some advanced shibori techniques require special tools or materials.
Why Shibori Deserves a Spot on This List:
Shibori offers a perfect blend of simplicity and sophistication. It’s a simple art project that doesn't require specialized artistic skills, yet it yields impressive and unique results. Whether you're looking to personalize a plain white t-shirt, create a one-of-a-kind scarf, or add a touch of handcrafted elegance to your home décor, shibori offers a fun and rewarding creative experience. This makes it an ideal simple art project for parents, teachers, therapists, and anyone looking to explore their creativity. Plus, the unpredictable nature of the process makes it engaging and exciting for all ages, ensuring that no two shibori creations are ever alike.
10. Zentangle Drawing
Looking for a simple art project that's both relaxing and engaging? Zentangle drawing might be just the thing. This meditative drawing method uses structured patterns, called "tangles," to create beautiful abstract images. It's a fantastic way to unwind, boost your creativity, and produce impressive artwork, even if you think you have no artistic talent whatsoever! Zentangle is definitely worthy of a spot on this list of simple art projects because it's accessible to everyone, requires minimal supplies, and offers a unique blend of structure and freestyle expression.
So, how does it work? You start by drawing a border or using pre-made "tiles." Then, you divide the space into sections using light pencil lines. Within each section, you draw structured patterns, one stroke at a time. The focus is on the process, enjoying the repetitive motion and the gradual emergence of the design, rather than striving for a specific outcome. Traditionally, Zentangle is done in black and white, which adds to its simplicity and elegance. This makes it a perfect simple art project for anyone, regardless of age or skill level.
There are tons of examples of Zentangle art online and in books, ranging from the official Zentangle tiles to more expansive applications in art journals and even therapeutic art settings. Therapists sometimes use this technique to help patients manage stress and anxiety. It's a great way to focus the mind and encourage self-expression. Teachers can also incorporate Zentangle into lesson plans as a calming activity or even to illustrate complex concepts visually.
Want to give it a try? Here are some tips to get you started:
- Start simple: Begin with basic patterns like circles, lines, and curves. There are numerous resources available online and in books that showcase different tangle patterns.
- Slow and steady wins the race: Work slowly and deliberately, focusing on each stroke. This mindful approach is a key part of the Zentangle experience.
- No erasers allowed: There's no such thing as a mistake in Zentangle. If you make a mark you don't like, simply incorporate it into the design. This promotes acceptance and encourages creative problem-solving.
- Turn it around: Rotate your paper as you work. This provides different perspectives and can help you see new possibilities within your design.
- Build your library: As you become more familiar with different tangles, start building a personal library of your favorites. This will allow you to quickly and easily create new and intricate designs.
Pros:
- Minimal materials: All you need is a pen and paper.
- No experience required: Anyone can create beautiful Zentangle art, regardless of their artistic background.
- Portable: You can do it anywhere, anytime.
- Stress-reducing: The meditative nature of Zentangle can help reduce stress and promote relaxation.
- Quick projects: You can create a complete Zentangle in a relatively short amount of time.
Cons:
- Structured approach: Some may find the structured approach limiting.
- Traditionally black and white: While you can certainly experiment with color, the traditional format is black and white, which may not appeal to everyone.
- Repetitive: Some practitioners may find the repetitive nature of Zentangle to become monotonous over time.
While the creators, Rick Roberts and Maria Thomas, have a website (zentangle.com), you don't need official materials to start. Just grab a pen and paper and dive into the meditative world of Zentangle! This simple art project is perfect for parents looking for screen-free activities for kids, adults seeking a relaxing pastime, or anyone who wants to explore their creativity in a low-pressure environment.
Side-by-Side Comparison of 10 Simple Art Projects
| Project Idea | Complexity (🔄) | Resource Needs (⚡) | Expected Outcomes (📊) | Ideal Use Cases (💡) | Key Advantages (⭐) |
|---|---|---|---|---|---|
| Watercolor Postcard Paintings | Low-Medium | Minimal watercolor supplies, postcard paper | Portable, shareable, quick-to-complete art | Mail art, beginner projects, quick batch production | Low cost, experiment-friendly, easy sharing |
| Paper Collage Art | Moderate | Recycled papers, glue, basic craft tools | Unique, textured compositions | Accessible creative projects for all ages, recycled art | Inexpensive, forgiving process, creative freedom |
| Mandala Stone Painting | Moderate-High | Found stones, acrylic paint, dotting tools | Intricate, durable decorative art | Meditative art, nature-inspired decor, outdoor/indoor display | Low material cost, meditative process, long-lasting |
| Pressed Flower Art | Moderate | Fresh flowers, pressing tools, acid-free glue | Delicate, natural botanical compositions | Nature crafts, framing projects, seasonal decor | Natural material use, low-tech, connects art with nature |
| String Art | Moderate-High | Wood board, nails, colored string | Geometric, optical designs with striking patterns | Educational craft projects, home decor, spatial learning exercises | Inexpensive, high visual impact, hands-on spatial creativity |
| Hand-Built Clay Pinch Pots | Low-Medium | Clay, water, minimal sculpting tools | Organic, unique vessels and tactile ceramic pieces | Beginner ceramics, art therapy, DIY pottery without a wheel | Accessible, immediate tactile feedback, low-tech process |
| Monoprinting with Found Objects | Low | Water-based ink, paper, everyday found objects | One-of-a-kind, experimental prints | Group activities, spontaneous art experiments, quick art projects | Inexpensive, experimental, fast results |
| Tissue Paper Stained Glass | Low | Colored tissue paper, adhesive, transparent backing surface | Colorful, light-enhancing panels for window displays | Classroom crafts, seasonal decorations, safe projects for children | Very low cost, dramatic light effects, simple assembly |
| Shibori Fabric Dyeing | Moderate | Natural/synthetic dyes, fabric, rubber bands, folding tools | Unique, wearable or displayable fabrics with intricate patterns | Fashion DIY, home decor, traditional and modern textile crafts | Authentic, versatile, creates one-of-a-kind patterns |
| Zentangle Drawing | Low | Pen and paper | Meditative, abstract patterned drawings | Stress relief, portable art practice, mindful creative expression | Minimal materials, approachable, stress-reducing |
Embrace Your Inner Artist!
From watercolor postcards to Zentangle drawings, these 10 simple art projects offer a fantastic starting point for anyone looking to tap into their creative side. We’ve explored a variety of techniques and materials, proving that you don't need to be a professional artist to create something beautiful and meaningful. The key takeaway here is that art should be enjoyable and accessible to everyone. Remember those simple joys of childhood crafting? Recapture that spirit, experiment with different simple art projects, and don't be afraid to make a glorious mess! These projects aren't just about the end result; they're about the process of exploration, self-expression, and relaxation. Whether you’re a parent, teacher, therapist, or simply seeking a creative outlet, these simple art projects offer a world of possibilities.
Ready to take your creativity to the next level and explore even more simple art projects? Design your own unique coloring pages with ColorPageAI, and bring your wildest artistic visions to life – no artistic expertise required! It's the perfect tool to personalize your art projects and explore a whole new world of creative expression.
A creative activity worth losing track of time in
Type any idea and get a printable coloring page back. Five free pages to start.