Turn Photos Into Coloring Pages with AI
August 22, 2025
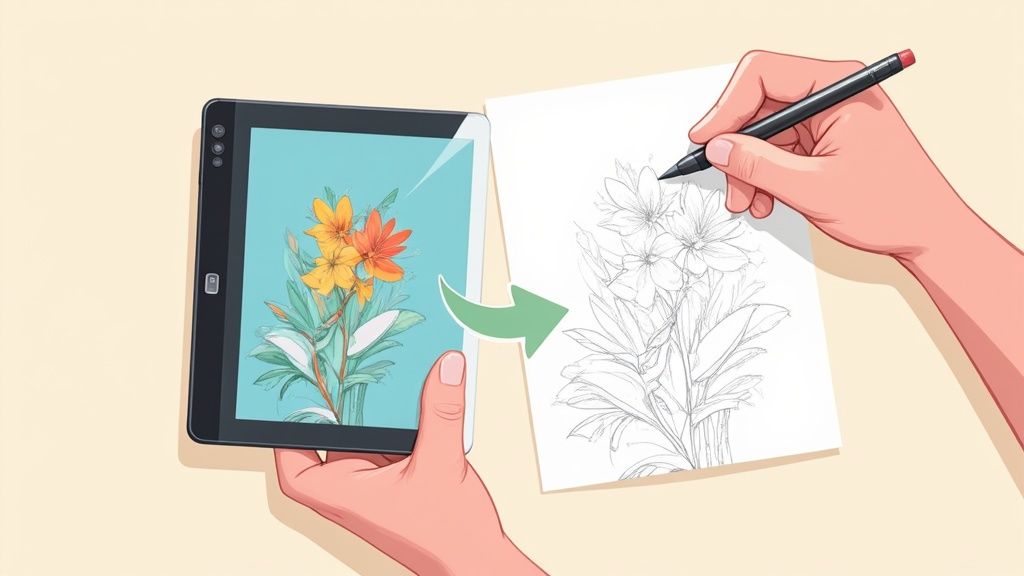
The absolute simplest way to turn a photo into a coloring page is with a free, AI-powered online tool. It's a pretty slick process: you just upload a picture you love, and the software instantly traces all the lines, giving you a printable outline ready for coloring.
Why Is Everyone Suddenly Making Coloring Pages from Photos?
Have you seen it? Friends are suddenly sharing these cool line-art versions of their pets, family photos, or favorite vacation spots. This whole creative explosion is thanks to some surprisingly simple AI tools that can transform a personal memory into a hands-on art project.
Honestly, it's more than just a neat craft. It's a way to reconnect with your best moments and take a much-needed break from the endless scroll. Coloring is a well-known stress reliever, and when the picture you're coloring is one that already makes you happy, the whole experience becomes that much better.
A Personal and Relaxing Escape
There's something special about creating a coloring page from a photo you cherish. No store-bought book can ever match that personal connection, which makes it an incredibly thoughtful gift or just a calming activity for yourself.
It’s no surprise the adult coloring book market is now worth around $1.5 billion and still climbing. People are actively looking for these kinds of creative, unplugged outlets. And if you're looking for something ready-made, you can always find cool themed pages, like these awesome endangered animals coloring pages.
This isn't just about making art; it's about turning a digital memory into something real and tangible. You're not just filling in lines—you're revisiting a happy moment with every stroke of the pencil.
This simple process throws the doors to creativity wide open for everyone. It's a fantastic way to rescue all those great photos from your phone and turn them into something you can hold, create with, and enjoy.
If you're curious to see exactly how it's done, check out our full guide on how to turn your photos into coloring pages for free.
Choosing the Right Photo for Line Art Conversion

The secret to a fantastic coloring page isn’t just about the AI tool—it starts with the photo you feed it. Not all images are created equal, and if you want crisp, clean line art, picking the right source image is half the battle.
Think of it like this: the AI is essentially tracing the most important lines and edges in your picture. If those lines are blurry, hidden in deep shadows, or lost in a super busy background, the final outline will look jumbled and confusing. You want to give the AI a clear roadmap to follow.
What Makes a Photo a Great Candidate?
The best photos for conversion almost always share a few key traits.
First up, you need a clear, well-defined subject. A close-up portrait of your dog sitting in the grass is going to work worlds better than a wide shot of the entire dog park. When the AI can easily spot the main event, it knows exactly what to trace.
Next, look for strong contrast and good lighting. An image where your subject really pops against the background is ideal. Try to steer clear of photos with harsh shadows or blown-out highlights, as these can create messy or incomplete lines. A picture taken on a slightly overcast day often provides that perfect, even lighting that AI tools love.
The goal is simple: pick an image that already has a strong visual foundation. A clean composition and clear subject make it infinitely easier for the AI to interpret the scene and produce a line drawing you'll actually want to color.
This entire trend is a fun, creative offshoot of our love for photo sharing. With the global photo sharing market expected to hit $5.67 billion by 2025, it’s clear we value our digital memories. Turning them into hands-on activities like coloring pages is just the next logical step.
If you really want to level up your photo selection, brushing up on the fundamental principles of visual design can make a huge difference. Choosing an image with good balance, a clear focal point, and solid contrast will always give you a head start.
Photo Selection Quick Guide
To make it even easier, here's a quick cheat sheet for what to look for and what to avoid when picking your photo.
| Characteristic | Works Well (Good Choice) | Avoid (Poor Choice) |
|---|---|---|
| Subject | Clear, single focus (e.g., a person, a pet) | Multiple subjects, busy group shots |
| Contrast | High contrast between subject and background | Low contrast, subject blends into background |
| Lighting | Bright, even lighting | Dark shadows, harsh highlights |
| Focus | Sharp and in-focus | Blurry, out-of-focus images |
| Background | Simple, uncluttered | Complex, busy, or patterned |
Choosing a photo that ticks the "Works Well" boxes will give the AI the best possible material to work with, leading to a much cleaner and more enjoyable coloring page in the end.
Alright, let's get into the nitty-gritty of how these AI converters actually work. This is where the magic happens, and you get to go from a full-color photo to a printable outline in just a few clicks. Forget about complex photo editing software—these tools are built to be incredibly simple.
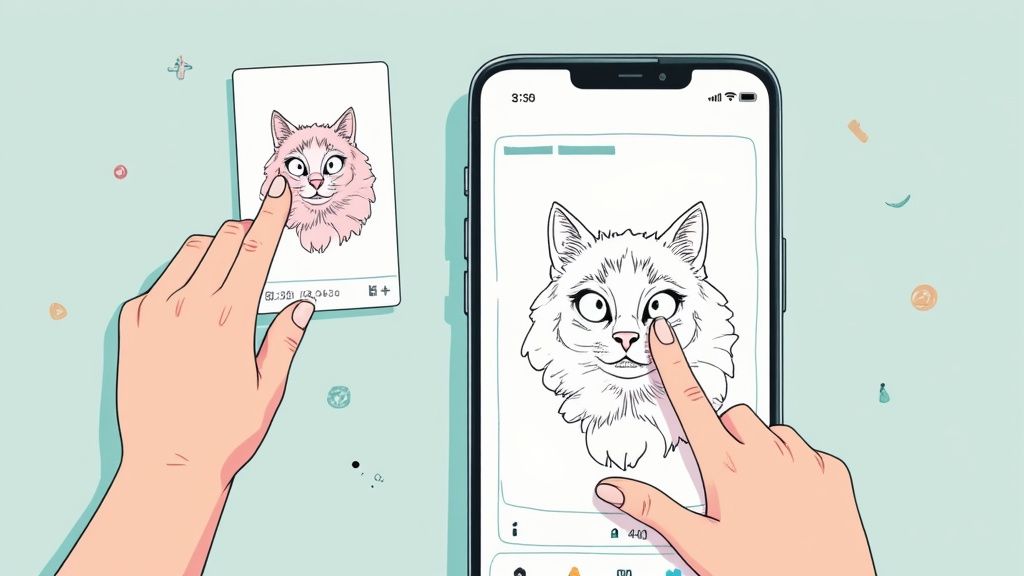
First things first, you need to upload your picture. Remember that photo of your cat we talked about? The one with the clear subject and good contrast? That's the one you'll want to grab. You’ll almost always see a big, friendly "Upload Photo" button right on the main page. Just click it, pick your file, and the AI will get to work. It’s usually super fast.
The whole process is designed to be a simple, three-step journey, as you can see here.
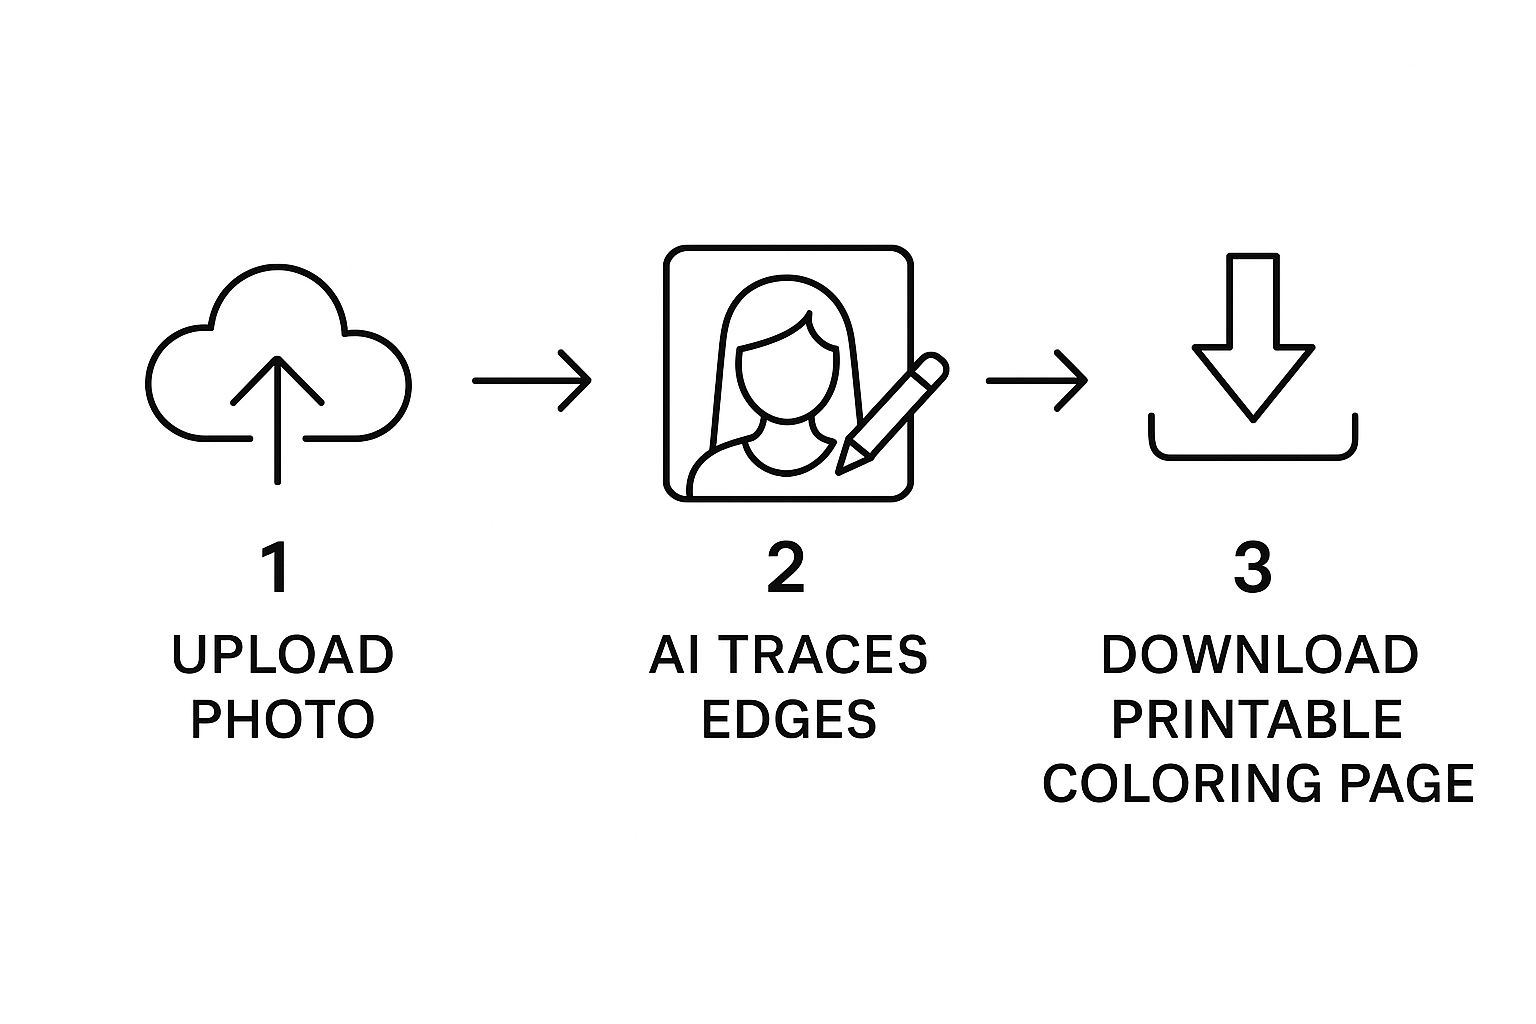
The idea is to let the AI do all the heavy lifting—like figuring out where all the important lines and edges are—so you can focus on the creative part.
Fine-Tuning Your Coloring Page
Once the AI processes your photo, you'll see a preview of the line art. Now, this is where you can really start to play. Don't just settle for the first version it gives you! A few small adjustments can take your coloring page from "good" to "perfect."
Most converters give you a couple of key sliders to mess with:
- Detail Level: This is all about how much information the AI keeps. A low setting gives you simple, bold outlines that are perfect for kids. Crank it up to a high setting, and you'll get all those finer details, like the texture of fur or the subtle lines in a portrait, which is great for more intricate adult coloring pages.
- Line Weight: This just controls how thick the lines are. Thicker lines are a bit more forgiving and easier for little hands to color inside. Thinner lines can give your page a more delicate, almost professional look.
For our cat photo, I’d probably start with a medium detail level. That way, I'd get the whiskers and the outline of the eyes without the fur looking like a chaotic mess. Then, I’d play with the line weight until it looks bold enough to stand out but not so chunky that it overpowers the image.
The real secret is finding the right balance. Too much detail can make a page feel cluttered and stressful, but too little can make it look flat and uninteresting. Just slide things around until the outline is instantly recognizable and, most importantly, looks like it would be fun to color.
The AI is the powerhouse behind all this, analyzing every pixel to find the important edges that define your subject. It’s been trained on millions of images to know the difference between a key feature and just background noise. If you want to dive deeper into how this works from the ground up, check out our guide on how to make coloring pages.
Downloading Your Final Creation
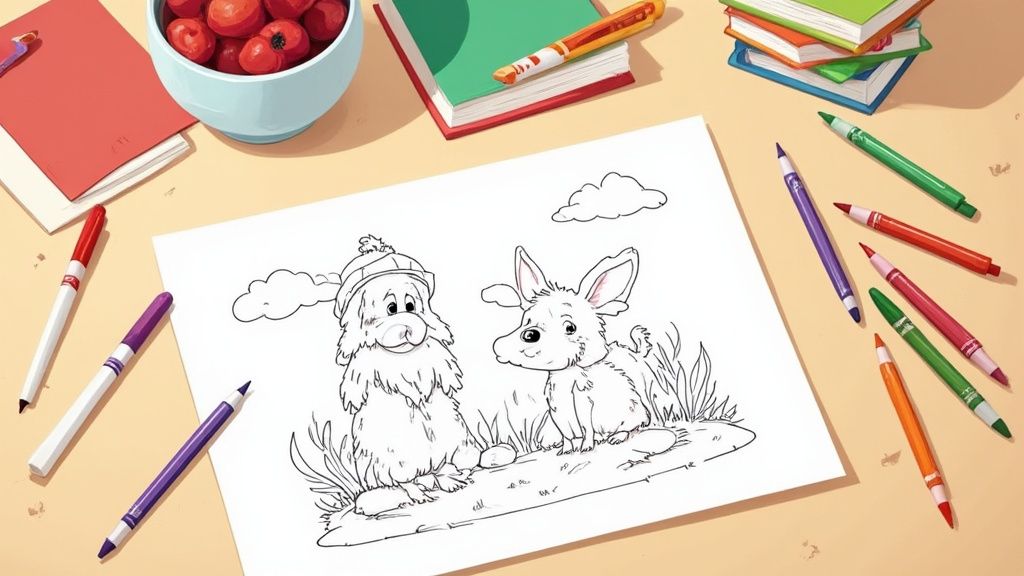
Once you've tweaked the settings and are happy with how your page looks, the last step is a breeze: downloading the file. Most tools will give you a high-resolution PNG or JPG file, which is exactly what you want for printing.
Just look for the "Download" button, and you’re all set. You'll have a custom, one-of-a-kind coloring page on your computer, ready to print and bring to life. And just like that, you’ve turned a simple photo of your cat into a unique piece of art.
Browse free coloring pages
Hundreds of ready-to-print pages, plus a generator that makes any page you can describe.
Quick Edits for a Professional-Looking Finish
Alright, the AI did the heavy lifting, but now it’s our turn to add the finishing touches. A few quick tweaks can take your coloring page from "pretty good" to "absolutely perfect."
Think of the AI's version as a fantastic first draft. Our job is to give it a quick once-over to catch anything that looks a bit off.
This is all about a simple, post-conversion cleanup. Sometimes, the AI leaves behind tiny digital artifacts—little specks, stray lines, or weird squiggles that don’t quite belong. You don't need any fancy software for this. A free tool like Canva works beautifully. Just upload your coloring page, grab the eraser tool, and gently buff away any of those little imperfections.
A Pro Tip for Cleaner AI Results
Here’s a little trick I’ve picked up that makes a huge difference: adjust the contrast of your original photo before you upload it.
By bumping up the contrast just a little, you create sharper, more defined edges for the subject in your photo. This gives the AI a much clearer roadmap to follow, which almost always means a cleaner initial conversion with fewer mistakes to fix later on.
It’s a simple pre-flight check that can save you cleanup time and give your coloring page a much more polished, professional feel right from the start.
The real magic of a custom coloring page is in the details. Taking just five minutes for these small tweaks is what elevates a simple conversion into a high-quality, personalized piece of art that feels genuinely special.
The hunger for personalized creative outlets is absolutely booming. In fact, the adult coloring book market is on track to more than double from $150 million to $350 million between 2023 and 2031. This surge is driven by people looking for unique ways to de-stress, with apps that turn photos into coloring pages right at the forefront of the trend.
Once you have your design perfected, you can even think about how it might look on other custom items. For example, the clean, bold lines of a coloring page are perfect for projects like personalized laser-engraved tumblers, which just goes to show how far one great idea can go.
Printing Your Custom Coloring Page Perfectly
You’ve done the fun part and turned your photos into one-of-a-kind coloring pages. Now for the final, crucial step: getting that digital masterpiece onto paper without spoiling the magic. Don't let a shoddy print job be the reason your creation doesn't shine.
The first thing to think about is the paper. Sure, you can use standard printer paper, but it’s thin and practically begs for marker bleed-through. For a much more satisfying coloring session, I always grab a light to medium-weight cardstock—something in the 65-80 lb range. It gives the page a quality feel and can handle crayons, colored pencils, and even some light marker action without turning into a soggy mess.
Nail Your Printer Settings
Okay, paper chosen. Next up, let's talk to your printer. Before you instinctively hit "Print," take a second to dig into the settings menu. You're looking for the print quality option—switch it from 'Standard' to 'High' or 'Best.' This one tiny tweak makes a world of difference, giving you sharp, bold lines instead of faint, pixelated ones.
Also, keep an eye out for scaling options. To avoid your design getting awkwardly cut off or looking tiny on the page, select 'Fit to Page' or 'Scale to Fit.' This tells the printer to intelligently resize your image to fill the entire sheet. It’s a simple fix that ensures what you saw on the screen is what you get on paper.
Pro Tip: Always print a single test page first. It’s a two-second check that can save you a whole lot of ink and paper. This way, you can make sure everything looks perfect before committing to a full batch for the whole family or classroom.
For a deeper dive into paper types, advanced settings, and troubleshooting, check out our complete guide for printing coloring pages to get flawless results every single time.
A Few Common Questions
Got a couple of questions before you jump in? Perfect. I've put together answers to the most common things people ask when they're getting started.
What kind of photos work best for this?
Honestly, the simpler, the better. Photos with high contrast, a really clear subject, and a clean background are going to give you the best results, hands down.
Think about a close-up of your dog sitting in the grass or a simple portrait of your kid. Those convert beautifully. A super busy, cluttered vacation photo? That’s going to be a lot tougher for the AI to figure out, and you’ll probably end up with some messy, broken lines.
Do I need to be a Photoshop wizard or own fancy software?
Not even a little bit. That’s the best part! There are a ton of free online AI tools designed specifically to turn photos into coloring pages. You literally just upload your picture, and the software does all the heavy lifting for you.
If you do want to do some minor clean-up afterward, you still don't need anything fancy. Web-based tools like Canva or Photopea are more than enough to get the job done right in your browser.
You don't need to be a graphic designer or shell out money for expensive software to create something amazing. The whole point is that this is accessible to everyone.
Can I use a photo that's a little blurry or low-quality?
You can, but I wouldn't recommend it. When a photo is low-resolution or out of focus, the AI has a really hard time finding the distinct edges and details it needs to trace.
What you end up with is usually a jumble of incomplete, confusing lines that don't really look like anything. Starting with a sharp, clear photo is probably the most important thing you can do to get a great result.
What about group photos? Is that possible?
Yep, but it's a bit trickier. With group shots, the key is to find a photo where everyone is clearly defined and not overlapping too much. A simple, non-distracting background becomes even more important here.
If the photo is too busy, the AI can get confused and might merge people together into a single blob. So, be a little more selective with your group pictures to get a coloring page you can actually use.
Ready to see it in action? With ColorPageAI, you can turn any idea or picture into a one-of-a-kind coloring page in just a few seconds. Go ahead and create your first five pages for free and see for yourself.
Browse free coloring pages
Hundreds of ready-to-print pages, plus a generator that makes any page you can describe.