Change Photo to Line Art Instantly with AI
September 19, 2025
So, you want to change a photo to line art? The good news is you don’t need to spend hours meticulously tracing lines in some complicated software. These days, one-click AI tools can analyze your image, identify the important subjects, and spit out a clean outline in just a few seconds.
It's a huge time-saver, whether you're a pro on a deadline or just starting out.
Your Guide to Effortless Line Art Conversion
Ever look at a photo and think, "That would make a great line drawing," but then immediately get discouraged by the thought of all that manual work? I've been there. Thankfully, a new wave of smart AI tools has made this process ridiculously easy. For creators, hobbyists, and small business owners, they're a total game-changer.
We can finally say goodbye to tedious tracing. Modern AI is smart enough to see the people, pets, or objects in a picture and instantly translate them into crisp, clean lines. This opens up so many doors—you can create custom coloring pages for your kids, mock up a minimalist logo idea, or design some eye-catching graphics for your social media feed.
Why Is Everyone Using AI for This?
The shift toward AI-powered tools for creative tasks like this isn't just a gimmick; it's a genuine change in how we work. In fact, the use of AI-based photo-to-line-art converters has shot up by over 150% in just the last few years. People are embracing automation for visual content. If you want to see just how much these tools are simplifying creative work, Harlem World Magazine has a great piece on how platforms like insMind are making an impact.
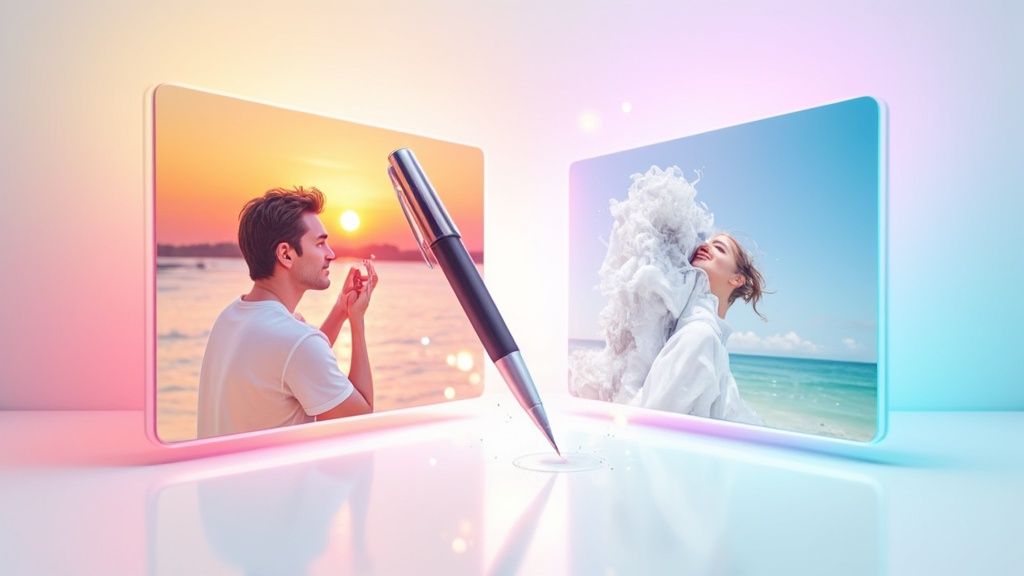
Here’s a perfect example of how simple it is. You just upload your photo, and the AI does all the heavy lifting.

The before-and-after shot says it all—a detailed photo becomes a clean, usable line drawing in an instant.
Knowing Your Options: The Quick Way vs. The Control Freak Way
Before we get into the "how-to," it's important to understand the two main paths you can take. They're wildly different in terms of time, effort, and the final result you can expect. Let's break down the most popular methods for turning a photo into a line drawing.
Comparing Line Art Conversion Methods
| Method | Best For | Ease of Use | Speed |
|---|---|---|---|
| One-Click AI Tools | Quick projects, social media graphics, coloring pages, brainstorming ideas | Very Easy | Seconds |
| Manual Tracing (Photoshop/Illustrator) | Professional logos, client work, highly detailed illustrations | Difficult | Hours |
| Mobile Apps (e.g., Prisma, PicsArt) | Fun, stylized edits for social media; casual use | Easy | Minutes |
| Online Converters (Vectorizers) | Converting simple graphics or logos into scalable vector line art | Moderate | Minutes |
As you can see, the right tool really depends on what you're trying to achieve.
-
One-Click AI Tools: I'm talking about platforms like ColorPageAI that are built for one thing: speed. You upload an image, and the algorithm handles the rest. This is my go-to for whipping up quick results or for projects where I don't need to sweat every single pixel.
-
Manual Software (Photoshop): On the other end of the spectrum is a powerhouse like Adobe Photoshop. Going this route gives you total control. You can perfect every curve, erase any unwanted bits, and adjust line weights with absolute precision. But be warned: it demands a lot more technical skill and a serious time commitment.
My Two Cents: It all comes down to your end goal. If you need a fast, simple conversion for a fun project or a quick mockup, an AI tool is your best friend. But if you’re crafting professional-grade, highly customized line art for a paying client, nothing beats the control you get with Photoshop.
The Easiest Method: Using an AI Converter
Alright, let's get down to the fun part and change a photo to line art without the headache. Forget spending hours tracing lines in complicated software. Imagine turning that awesome photo you took of your dog into a clean drawing, ready for a custom mug or t-shirt. With a good AI tool, this literally takes seconds.
The whole thing is refreshingly simple. You just need to pick the right photo to start with. I've found that images with good contrast and a clear subject against a simple background give the best results. A well-lit portrait of your dog will convert way more cleanly than a blurry shot of them lost in a cluttered room.
Getting the Best Results
Once you've got your photo, you just upload it to an AI converter. Most platforms, including our own ColorPageAI, show you a preview almost instantly. From there, you can usually pick from different line art styles—anything from a super simple outline to a more detailed sketch. This flexibility is key to matching the final look to your project's vibe.
Here’s a quick breakdown of just how simple the workflow is.
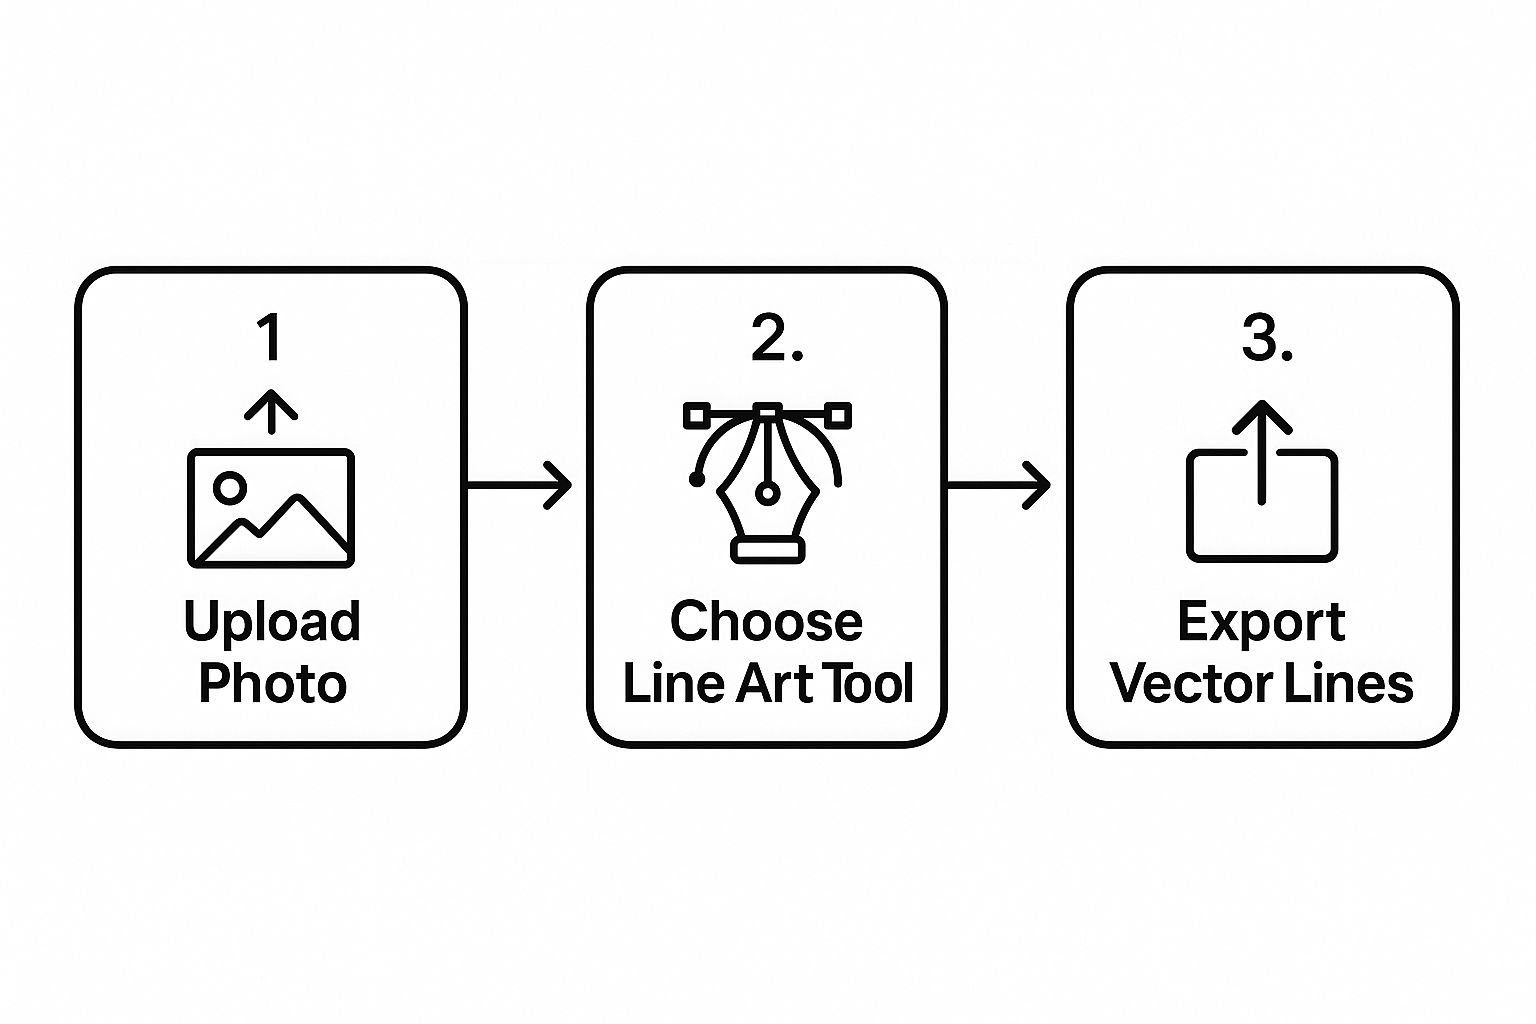
As you can see, it really is just a matter of uploading your image, picking your tool, and hitting export. The whole conversion is over in just a few clicks.
Fine-Tuning Your Artwork
Even though it’s a one-click solution, you still have some creative control. Most AI tools let you play with settings like line weight and the level of detail. I often dial down the "detail" setting when I’m going for a more minimalist, clean look, which works great for logos or icons.
But for something like a coloring page, cranking up the detail can capture more of the original image's personality. If making a coloring book is your main goal, you should definitely check out our guide on how to turn a picture into a coloring page for more specific tips.
Pro Tip: If your photo has a really busy background, pop it into a free online background remover before you upload it to the line art converter. This extra step takes two seconds and ensures the AI focuses only on your main subject. Trust me, it makes for a much cleaner result.
These user-friendly platforms have made this kind of tech explode in popularity. To give you an idea, some specialized converters can handle batch processing of up to 30 images at once, serving over 200,000 monthly users who need to create at scale.
And if you’re creating visuals for social media, you can streamline your process even more. Using an efficient Pinterest AI generator, for example, can automate another big chunk of your content workflow.
When AI’s one-click magic is great for speed, sometimes you need to get your hands dirty and have complete control. For those projects that demand a pro finish, there’s no substitute for rolling up your sleeves in Adobe Photoshop.
This isn't just about slapping on a filter. It's a layered technique that gives you total command over every single line. We're going to use a clever combination of layers and blend modes to literally pull the perfect line art right out of your original photo.
Getting Your Image Ready
First things first, let's prep the photo. The name of the game is contrast. We need to make it as easy as possible for Photoshop to see the edges that will become our final lines.
Your first move is to convert the image to black and white. Just head up to Image > Adjustments > Black & White. Once you've done that, start playing with the contrast. Pushing it higher will deepen the shadows and brighten the highlights, which really helps define the core shapes you want to capture.
The Layer and Blend Method
Alright, this is where the real fun starts. The whole technique hangs on a slick little trick involving layer blending and a couple of filters.
- Duplicate and Invert: First, duplicate your black-and-white layer. Select that new layer and hit Ctrl+I (or Cmd+I on a Mac) to invert the colors. It’ll look like a weird photo negative, but trust the process.
- Time for Color Dodge: Now, change the blend mode of this inverted layer to Color Dodge. Your whole canvas will probably blast out to solid white. Don't panic! That’s exactly what's supposed to happen.
- Bring Out the Lines: Head over to Filter > Other > Minimum. This filter is what starts to pull the lines out of that white void. Tweak the radius setting until you see a rough sketch start to appear. Then, follow it up with Filter > Blur > Gaussian Blur to smooth everything out and refine those lines.
Here’s a peek at the Photoshop interface where you’ll be doing all this.
Expert Insight: There’s no magic number for the Minimum and Gaussian Blur filters. The right values completely depend on your photo’s resolution and level of detail. I always start with a really low radius—maybe 1-2 pixels—and just nudge it up slowly until the lines look crisp and clean.
Back in the day, digital artists had to wrestle with built-in Photoshop filters like 'Photo Copy' or 'Poster Edges', which usually left a huge mess to clean up by hand. We’ve come a long way since then.
The final step is to grab the brush tool on a new layer and do some manual cleanup. Erase any stray marks, thicken up lines that need more definition, and give it that polished, hand-drawn feel. It’s the perfect way to create something truly custom, like your own coloring book. If that sounds like a fun project, you should definitely check out our full guide on how to make coloring pages.
Browse free coloring pages
Hundreds of ready-to-print pages, plus a generator that makes any page you can describe.
How to Choose the Perfect Photo for Conversion
The secret to a fantastic line art conversion has less to do with the software and everything to do with the photo you start with. When you change photo to line art, the AI is basically playing a high-tech game of connect-the-dots, tracing the clearest edges it can find. Your goal is to give it an easy-to-read map.
Think of it this way: the AI needs clean information. A photo with a simple, uncluttered background lets your main subject pop, which makes it a piece of cake for the software to figure out which lines matter. A portrait taken against a plain wall will always convert better than a snapshot from a messy room.
The Makings of a Perfect Source Photo
Before you even think about uploading, give your image a quick mental once-over. Getting these three things right will solve 90% of potential conversion headaches before they even begin.
- Strong Subject Focus: Your main subject—be it a person, pet, or product—should be the undeniable star of the show and fill a good chunk of the frame. Steer clear of busy group shots where people are overlapping.
- High Contrast: Good lighting is your best friend here. You're looking for photos with clear, distinct shadows and highlights. These are what create the crisp edges that translate so beautifully into line work. A flat, evenly lit photo usually just ends up looking muddy.
- Decent Resolution: No need for a pro-level camera, but a blurry, pixelated image will only give you jagged, messy lines. A sharp photo from your smartphone is almost always more than enough to get a clean result.
A Quick Tip from Experience: If your photo's background is a little too busy, pop it into a free online background remover before you start. This step literally takes seconds and guarantees the AI focuses only on what's important: your subject.
The quality of your source photo has a massive impact on the final line art, especially if you're aiming for detailed results in a tool like Photoshop. Understanding even the basics of a professional product photography lighting setup can teach you how to capture those perfect shots from the get-go. Trust me, these little prep steps make all the difference.
So, What Can You Actually Do With Your New Line Art?
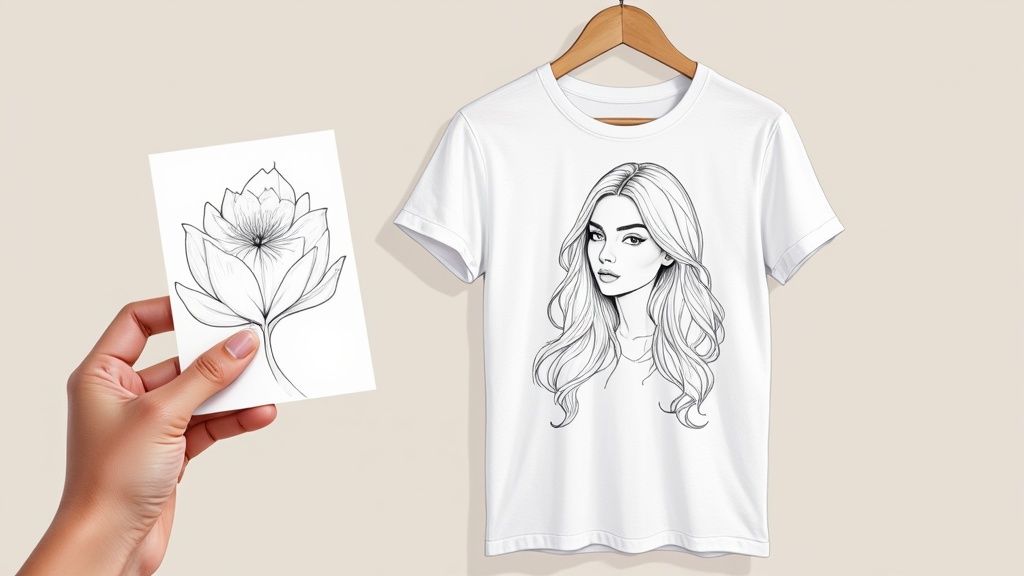
Alright, you've successfully turned your favorite photo into a piece of crisp, clean line art. But now what? The real magic happens when you take that digital file and turn it into something real. This skill opens up a whole world of creative projects that go way beyond just letting it sit on your hard drive.
Think about turning a cherished family photo into a one-of-a-kind piece of wall art. Or maybe creating a set of custom stickers from a goofy picture of your dog. The simple, elegant style of line art is incredibly versatile, fitting in just about anywhere you can imagine. It’s all about looking at your photos and seeing the hidden potential.
From Digital Doodles to Real-World Goods
One of the most obvious—and fun—uses is making genuinely personal gifts. A simple line drawing of a meaningful place printed on a coffee mug, or a pet's portrait on a tote bag? These are the kinds of thoughtful, unique items that people actually cherish.
Here are a few ideas to get you started:
- Custom Coloring Pages: This is a huge one. Transform photos of your kids, pets, or favorite vacation spots into coloring sheets. It’s a fantastic and deeply personal activity for the whole family. If you want to go all-in on this, we actually have a complete guide on creating coloring pages that covers everything.
- Unique Tattoo Designs: Got a photo that means the world to you? Converting it into line art is the perfect first step for designing a minimalist, meaningful tattoo that is 100% yours. No one else will have it.
- Personalized Stationery: Imagine creating custom notecards, letterheads, or even wedding invitations with your own line art. It adds a touch of personality that you just can't buy off the shelf.
I once turned a photo of a friend's first house into a simple line drawing and had it printed and framed. It was a ridiculously simple housewarming gift, but it captured a huge moment for them in a way that a standard photo couldn't. It’s still hanging in their hallway.
And don't forget about the digital world. These drawings make for excellent, clean logos for a small business or side hustle. They're also perfect for eye-catching social media posts or simple illustrations in a presentation. Once you start thinking this way, the possibilities really are endless.
Alright, let's get into the nitty-gritty. Even when you're using simple tools to turn a photo into line art, a few questions tend to crop up again and again. Getting them answered upfront will save you a ton of headaches and false starts down the road.
What’s the Best AI Tool for the Job?
I get this one a lot. While you’ve got plenty of great options out there, I often find myself recommending tools like ColorPageAI or Fotor because they strike a nice balance between simplicity and quality results.
Honestly, the "best" tool really boils down to what you need.
- Are you processing a whole batch of images at once?
- Do you need a bunch of different artistic styles to choose from?
- Or are you just looking for a solid free option to get your feet wet?
Figure that out first, and the right tool will become obvious pretty quickly.
Can I Use a Low-Resolution Photo?
Technically, yes. But should you? Probably not. The final line art will likely look a bit muddy and lack the crispness you’re hoping for.
Think of it this way: high-resolution photos give the AI more data to work with, which naturally leads to sharper, more defined lines. If you're stuck with a lower-quality picture, I’d strongly suggest running it through an AI image upscaler before you start the conversion. It’s an extra step, but it can make a world of difference in the final product.
My two cents: The quality of your source image is everything. Better input always, always leads to better output, especially when you need those clean lines for a coloring page or a detailed illustration.
How Do I Get a More Hand-Drawn Look?
Most decent AI converters have style settings that go way beyond a simple, sterile outline. To get that more organic, hand-drawn vibe, poke around for options with names like "sketch," "doodle," or "detailed drawing." These settings are designed to produce a less uniform look that feels more like something a human artist would create.
Ready to stop reading and start creating? You can turn your own photos into amazing line art in just a few clicks. Give ColorPageAI a try today and see just how easy it is to bring your ideas to life.
Browse free coloring pages
Hundreds of ready-to-print pages, plus a generator that makes any page you can describe.